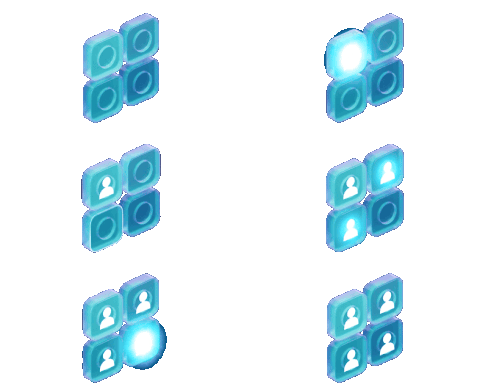
This guide shows you how to add on-demand online lobbies to a Unity multiplayer game that already runs on Edgegap's dedicated game servers, with Edgegap's Server Browser: each player reserves a seat and connects to a ready server automatically, with nobody typing an address.
Once your game server is containerized, Edgegap deploys it worldwide to 615+ Edge Cloud locations (on-demand) from a simple API call and billed exclusively on usage: no entire server to rent, provision or keep running between matches. For persistent servers of reserved capacity, Edgegap offers Private Fleets. Edgegap’s Server Browser builds on top of that.
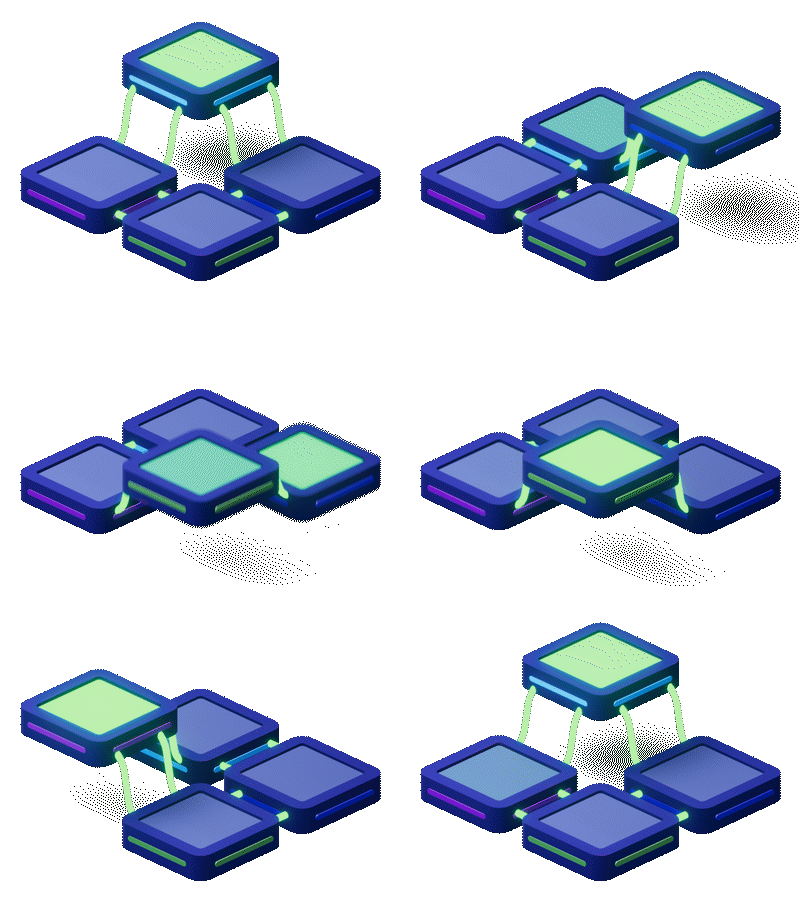
The Server Browser is a hosted service between your players and your servers. Game clients reserve seats through it (1). Each server registers itself, reports its free seats and stays visible with a heartbeat (2). Players then connect straight to the server with your netcode (3). A scaling policy starts servers so there's always capacity (4).

This guide covers:
Preparing a working Edgegap app version for your game
Connecting your coding agent to Edgegap (optional)
Installing Edgegap's Unity SDK
Adding the integration code
Adding the scripts to your scene
Creating your Server Browser
Deploying your server with a scaling policy
Testing with two players
You can do it two ways, and mix them:
With a coding agent. Any AI coding assistant can write the integration code from the two prompts in step 4. Connected to the Edgegap MCP server, it can also build, push and deploy your server. You handle the clicks in Unity and the Edgegap dashboard, and playtest.
By hand. Every step below also works without an agent.
Here, we use Mirror's Billiards example. Any Unity netcode works the same way.
1. Before you start
A free Edgegap account. Verify your email. No credit card is needed to test.
A working Edgegap app version of your game server: a server you deployed and joined at least once. The Server Browser deploys and fills that server, so it needs a functional, containerized game server to work end to end. If you don't have one yet, use our guides:
Edgegap's game server build tool plugin for Unity, from those guides, to rebuild your server in step 7.
For the agent path: an Edgegap API token, from Dashboard → User Settings → Tokens. It is organization-wide, so treat it like a password: never put it in your project, your game client or a chat.
Git: Unity needs a Git client (2.14.0 or newer) on your PATH to install packages from a Git URL, such as the Edgegap SDK. macOS usually has one already (Xcode Command Line Tools); on Windows, install Git.
2. Connect your coding agent to Edgegap
Skip this step if you're doing everything by hand.
The Edgegap MCP server lets your agent create apps and versions, deploy servers and read logs on your account. Edgegap's agent skills don't cover the Server Browser yet, so the integration code comes from the two prompts in step 4; the skills still help with building and deploying.
Claude Code: install the Edgegap plugin. It adds both the MCP server and the skills, and asks for your API token during install (stored in your system's credential store):
/plugin marketplace add edgegap/edgegap-agent-skills, then /plugin install edgegap@edgegap. Restart the session.
Only want the MCP server, without the plugin? Run this in your own terminal instead: claude mcp add --transport http edgegap https://mcp.edgegap.dev/mcp -H "Authorization: token YOUR_EDGEGAP_API_TOKEN" --scope user. Don't do both, or you'll have two edgegap servers.
Cursor, VS Code and other clients that send headers: add https://mcp.edgegap.dev/mcp with the header Authorization: token YOUR_EDGEGAP_API_TOKEN, and install the skills with npx skills add edgegap/edgegap-agent-skills --skill "*".
Claude Desktop: custom connectors can't send the header, so use the local server instead (Node 18+): { "mcpServers": { "edgegap": { "command": "npx", "args": ["-y", "@edgegap/mcp"] } } }. It asks for the token on first use.
Check it works:
"List my Edgegap apps."
Your app and its version should be in the list.
3. Install Edgegap's Unity SDK
The Server Browser is part of Edgegap's Unity SDK, a separate package from the plugin that builds and deploys your server.
In Unity, select Window → Package Management → Package Manager, select +, then Add package from git URL, paste
https://github.com/edgegap/edgegap-unity-sdk.gitand select Add.In the SDK's Samples tab, import Server Browser - Auto-Assign. It adds two scripts: a client handler that reserves a seat and hands your game the server's address, and a server handler that registers your server with the Server Browser and reports its free seats.
The SDK does almost everything. Three netcode-specific parts are left to you: the lines that connect the player to the assigned server, a small handshake that tells the server which player joined, and releasing the player's seat when they leave. Step 4 adds them.
4. Add the integration code
Two prompts for any AI coding assistant write that code for your netcode. The video below shows them on Mirror's Billiards example.
Prompt 1, audit your project (read-only):
"Read-only, no code changes. I'm integrating the Edgegap Server Browser (Auto-Assign) in my Unity project: at runtime it gives my client a reserved server's address (an FQDN) and an external port, and my server must confirm each player by a player ID. Find and tell me, with file paths and line numbers: 1) the method that starts a client connection, and the exact fields where the server address and the port are set, plus the transport in use; 2) how my netcode sends a small custom message from client to server and registers a handler for it on the server; 3) the event that fires on the client when it finishes connecting, and whether it's reset when the client starts (so I know whether to subscribe after starting the client); 4) the event that fires on the server when a player disconnects, and how it identifies the connection. Look at the NetworkManager-style class and its transport first. Confirm each against the project."
Prompt 2, write the integration:
"Using the audit, make three changes for the Edgegap Server Browser Auto-Assign integration, without subclassing or replacing my netcode's manager. 1) Create a standalone MonoBehaviour EdgegapPlayerConnector in Assets/Scripts/ (static Instance, DontDestroyOnLoad) with a small network message carrying a string playerId. On the server, register its handler in Start(): store the connection-to-playerId mapping and call ServerBrowserServerHandler.Instance.OnPlayerJoined(playerId). Expose SubscribeClientConnected(), which sends ServerBrowserClientHandler.Instance.LocalPlayerId once the client is connected, safe to call after the client starts. 2) In the sample's ServerBrowserClientHandler.cs, generate LocalPlayerId at runtime (a new GUID) and use it in the seat reservation; when seats are reserved, set the assigned FQDN as the network address, convert the external port to the type my transport expects and set it, start the client, then call SubscribeClientConnected(). 3) On the server, subscribe to the disconnect event from the audit; look up the disconnecting connection's playerId, call ServerBrowserServerHandler.Instance.OnPlayerAbandoned with the signature you read in the SDK source, and remove the entry. Guard against missing entries and a missing handler. Return the complete files."


The audit catches netcode quirks for you. With Mirror, for example, the client-connected event is reset when the client starts, so the connector subscribes after starting the client. Without the seat release, seats leak and the server eventually reports no free seats.
Here's our video tutorial of Edgegap's Server Browser for Unity, using Mirror's Billiards example:
5. Add the scripts to your scene
In Unity, a script does nothing until it's on a game object. In your game scene, select GameObject → Create Empty three times:
Edgegap Player Connector: add the connector script your assistant created.
Server Browser Server Handler: add the Server Browser Server Handler component.
Server Browser Client Handler: add the Server Browser Client Handler component.
Leave the handlers' fields empty for now: they come from step 6.
6. Create your Server Browser
In the Edgegap dashboard, open Server Browser and create one, named for example
quickstart, with the Simple Example configuration.Start it and wait until it's online. On the free tier it runs 3 hours on a shared test cluster after each start, which is fine for testing.
Open its details and copy the API URL, the server token and the client token.
In Unity, paste the API URL and the server token into the server handler, and the same API URL and the client token into the client handler. Swapping the tokens causes connection errors. Save the scene.
The server token can do everything on your Server Browser, so it only belongs in the server running on Edgegap, never on a player's machine. Pasting it into the component keeps this test simple; in production, set it as a variable on your app version instead, which overrides the inspector value and keeps it out of your project. The client token only reserves seats and reads status.

In production, many studios have players sign in to their own player services first, which reserve the seat for them.
7. Deploy your server with a scaling policy
Your server now reads the Server Browser's URL and token, so it needs a new app version: earlier builds don't have them.
Build, containerize and upload your server with Edgegap's plugin, exactly as in your server guide (or Build from source to run all three at once). With your agent: "Build the Linux server, push it with a new tag and create a new app version with the same port."
On your Server Browser, create a scaling policy named
on-demand: Minimum Active Instances set to1, your application and the new version, and Private Hosts empty so it deploys to Edgegap's cloud. Save it as active.Within a minute, the policy deploys your server. Its logs show it registering with the Server Browser, reporting healthy, and discoverable with free seats. Your on-demand lobby is live.
A minimum of one active instance keeps one server running at all times, ready for players. Remember it's running when you're done testing: deactivate the policy to stop it.
8. Test with two players
Run two players with Unity's Multiplayer Play Mode, or the Editor plus a build.
Press Play. Each player reserves a seat, gets the server's address and connects, and the server confirms each player and takes a seat.
Both players land on the same cloud server, each one's actions replicated in the other's window.

A freshly assigned server may still be starting for a moment, so for production add a connection retry: a couple of attempts, a few seconds apart.
Let players choose. Beyond auto-assignment, players can search and browse servers by region, free seats, game mode or any metadata your server reports, and pick one. Scaling policies can also keep spare servers warm for launches, or pin servers to a Private Fleet by adding its host IDs.
Prefer strict rules over player choice? See Unity Matchmaking SDK. On Unreal Engine, the Server Browser works through Betide Studios' Edgegap Integration Kit.
Stuck? Ask our team and other studios on the Edgegap Discord.
Frequently Asked Questions
Common questions about adding Edgegap's Server Browser to a Unity multiplayer game.
What is a server browser in a multiplayer game?
A list of live game servers players can join, with their free seats and settings such as region or game mode. Edgegap's Server Browser is a hosted service: servers register and report their seats, players reserve a seat and connect, and scaling policies start servers as needed.
Should I use a server browser or matchmaking?
Use a server browser when players should pick a server or drop into a running lobby, and matchmaking when your rules should decide who plays together, such as skill or team balance. Edgegap offers both, and they can work together: matchmaking starts servers and the server browser fills them.
Does Edgegap's Server Browser work with Mirror, Netcode for GameObjects and Fish-Networking?
Yes. The Server Browser doesn't depend on your netcode. Only three parts change: connecting to the assigned address and port, sending the player ID to the server, and releasing the seat when the player leaves.
What's the difference between the server token and the client token?
The server token can use every Server Browser method and belongs only in your game server, ideally as an app version variable. The client token only reserves seats and reads status, for game clients or your player services. Neither is your Edgegap API token.
How much does Edgegap's Server Browser cost?
Testing is free, on a shared cluster that runs 3 hours after each start. Servers your scaling policy deploys bill per vCPU per minute while they run, so a minimum of one active instance means one server running at all times.

Clients
Learn more from clients who integrated Edgegap
31 case studies are available from studios that moved to Edgegap from another platform.

" width="512.001px"><path d="M 503.172 335.449 L 8.828 335.449 C 3.953 335.449 0 331.496 0 326.621 L 0 8.828 C 0 3.953 3.953 0 8.828 0 L 503.173 0 C 508.048 0 512.001 3.953 512.001 8.828 L 512.001 326.621 C 512 331.497 508.047 335.449 503.172 335.449 Z" fill="rgb(245, 245, 245)" height="335.44900000000007px" id="Ef8xUEsN1" transform="translate(0 0)" width="512.001px"/><g d="M 512 25.805 L 0 25.805 L 0 8.828 C 0 3.953 3.953 0 8.828 0 L 503.173 0 C 508.048 0 512.001 3.953 512.001 8.828 L 512 25.805 Z M 0 129.019 L 0 103.215 L 512 103.215 L 512 129.019 Z M 0 77.409 L 0 51.605 L 512 51.605 L 512 77.409 Z M 512 180.627 L 8.828 180.627 C 3.953 180.627 0 176.674 0 171.799 L 0 154.822 L 512 154.822 Z M 0 283.849 L 0 258.045 L 512 258.045 L 512 283.849 Z M 503.172 335.449 L 8.828 335.449 C 3.953 335.449 0 331.496 0 326.621 L 0 309.645 L 512 309.645 L 512 326.622 C 512 331.497 508.047 335.449 503.172 335.449 Z M 0 232.239 L 0 206.435 L 512 206.435 L 512 232.239 Z" fill="transparent" height="335.44898901367185px" id="DuXUCmwlK" transform="translate(0 0)" width="512.001px"><path d="M 512 25.805 L 0 25.805 L 0 8.828 C 0 3.953 3.953 0 8.828 0 L 503.173 0 C 508.048 0 512.001 3.953 512.001 8.828 L 512 25.805 Z" fill="rgb(255, 75, 85)" height="25.805000000000007px" id="nkfHKvOft" width="512.001px"/><path d="M 0 25.804 L 0 0 L 512 0 L 512 25.804 Z" fill="rgb(255, 75, 85)" height="25.803999999999988px" id="feRiBFumj" transform="translate(0 103.215)" width="512px"/><path d="M 0 25.804 L 0 0 L 512 0 L 512 25.804 Z" fill="rgb(255, 75, 85)" height="25.803999999999974px" id="fRN_72QiR" transform="translate(0 51.605)" width="512px"/><path d="M 512 25.805 L 8.828 25.805 C 3.953 25.805 0 21.852 0 16.977 L 0 0 L 512 0 Z" fill="rgb(255, 75, 85)" height="25.80499999999995px" id="quqGY_mqy" transform="translate(0 154.822)" width="512px"/><path d="M 0 25.804 L 0 0 L 512 0 L 512 25.804 Z" fill="rgb(255, 75, 85)" height="25.803999999999974px" id="wILMFtF89" transform="translate(0 258.045)" width="512px"/><path d="M 503.172 25.804 L 8.828 25.804 C 3.953 25.804 0 21.851 0 16.976 L 0 0 L 512 0 L 512 16.977 C 512 21.852 508.047 25.804 503.172 25.804 Z" fill="rgb(255, 75, 85)" height="25.803999999999974px" id="snPoHI_aw" transform="translate(0 309.645)" width="512px"/><path d="M 0 25.804 L 0 0 L 512 0 L 512 25.804 Z" fill="rgb(255, 75, 85)" height="25.803999999999974px" id="oiaqIY9TT" transform="translate(0 206.435)" width="512px"/></g><path d="M 229.517 0 L 8.828 0 C 3.953 0 0 3.952 0 8.827 L 0 171.797 C 0 176.672 3.953 180.625 8.828 180.625 L 229.518 180.625 C 234.393 180.625 238.346 176.672 238.346 171.797 L 238.346 8.827 C 238.345 3.952 234.392 0 229.517 0 Z" fill="rgb(65, 71, 155)" height="180.625px" id="Hg2itSn3m" transform="translate(0 0.001)" width="238.346px"/><g d="M 10.536 0.569 L 12.49 6.429 L 18.667 6.476 C 19.467 6.483 19.798 7.503 19.155 7.978 L 14.186 11.648 L 16.05 17.537 C 16.292 18.299 15.423 18.931 14.772 18.465 L 9.747 14.874 L 4.722 18.466 C 4.071 18.931 3.204 18.3 3.444 17.538 L 5.308 11.649 L 0.339 7.979 C -0.304 7.503 0.027 6.484 0.827 6.477 L 7.004 6.43 L 8.958 0.57 C 9.21 -0.19 10.282 -0.19 10.536 0.569 Z M 10.536 31.223 L 12.49 37.083 L 18.667 37.13 C 19.467 37.137 19.798 38.157 19.155 38.632 L 14.186 42.302 L 16.05 48.191 C 16.292 48.953 15.423 49.585 14.772 49.119 L 9.747 45.528 L 4.722 49.12 C 4.071 49.585 3.204 48.954 3.444 48.192 L 5.308 42.303 L 0.339 38.633 C -0.304 38.157 0.027 37.138 0.827 37.131 L 7.004 37.084 L 8.958 31.224 C 9.21 30.465 10.282 30.465 10.536 31.223 Z M 10.536 61.877 L 12.49 67.737 L 18.667 67.784 C 19.467 67.791 19.798 68.811 19.155 69.286 L 14.186 72.956 L 16.05 78.845 C 16.292 79.607 15.423 80.239 14.772 79.773 L 9.747 76.182 L 4.722 79.774 C 4.071 80.239 3.204 79.608 3.444 78.846 L 5.308 72.957 L 0.339 69.287 C -0.304 68.811 0.027 67.792 0.827 67.785 L 7.004 67.738 L 8.958 61.878 C 9.21 61.119 10.282 61.119 10.536 61.877 Z M 10.536 92.532 L 12.49 98.392 L 18.667 98.439 C 19.467 98.446 19.798 99.466 19.155 99.941 L 14.186 103.611 L 16.05 109.5 C 16.292 110.262 15.423 110.894 14.772 110.428 L 9.747 106.837 L 4.722 110.429 C 4.071 110.894 3.204 110.263 3.444 109.501 L 5.308 103.612 L 0.339 99.942 C -0.304 99.466 0.027 98.447 0.827 98.44 L 7.004 98.393 L 8.958 92.533 C 9.21 91.773 10.282 91.773 10.536 92.532 Z M 10.536 123.186 L 12.49 129.046 L 18.667 129.093 C 19.467 129.1 19.798 130.12 19.155 130.595 L 14.186 134.265 L 16.05 140.154 C 16.292 140.916 15.423 141.548 14.772 141.082 L 9.747 137.491 L 4.722 141.083 C 4.071 141.548 3.204 140.917 3.444 140.155 L 5.308 134.266 L 0.339 130.596 C -0.304 130.12 0.027 129.101 0.827 129.094 L 7.004 129.047 L 8.958 123.187 C 9.21 122.426 10.282 122.426 10.536 123.186 Z M 34.329 15.598 L 36.283 21.458 L 42.46 21.505 C 43.26 21.512 43.591 22.532 42.948 23.007 L 37.979 26.677 L 39.843 32.566 C 40.085 33.328 39.216 33.96 38.565 33.494 L 33.54 29.902 L 28.515 33.494 C 27.864 33.959 26.997 33.328 27.237 32.566 L 29.101 26.677 L 24.132 23.007 C 23.489 22.531 23.82 21.512 24.62 21.505 L 30.797 21.458 L 32.751 15.598 C 33.002 14.84 34.076 14.84 34.329 15.598 Z M 34.329 46.253 L 36.283 52.113 L 42.46 52.16 C 43.26 52.167 43.591 53.187 42.948 53.662 L 37.979 57.332 L 39.843 63.221 C 40.085 63.983 39.216 64.615 38.565 64.149 L 33.54 60.557 L 28.515 64.149 C 27.864 64.614 26.997 63.984 27.237 63.221 L 29.101 57.332 L 24.132 53.662 C 23.489 53.186 23.82 52.167 24.62 52.16 L 30.797 52.113 L 32.751 46.253 C 33.002 45.494 34.076 45.494 34.329 46.253 Z M 34.329 76.907 L 36.283 82.767 L 42.46 82.814 C 43.26 82.821 43.591 83.841 42.948 84.316 L 37.979 87.986 L 39.843 93.875 C 40.085 94.637 39.216 95.269 38.565 94.803 L 33.54 91.211 L 28.515 94.803 C 27.864 95.268 26.997 94.637 27.237 93.875 L 29.101 87.986 L 24.132 84.316 C 23.489 83.84 23.82 82.821 24.62 82.814 L 30.797 82.767 L 32.751 76.907 C 33.002 76.148 34.076 76.148 34.329 76.907 Z M 34.329 107.561 L 36.283 113.421 L 42.46 113.468 C 43.26 113.475 43.591 114.495 42.948 114.97 L 37.979 118.64 L 39.843 124.529 C 40.085 125.291 39.216 125.923 38.565 125.457 L 33.54 121.865 L 28.515 125.457 C 27.864 125.922 26.997 125.291 27.237 124.529 L 29.101 118.64 L 24.132 114.97 C 23.489 114.494 23.82 113.475 24.62 113.468 L 30.797 113.421 L 32.751 107.561 C 33.002 106.803 34.076 106.803 34.329 107.561 Z M 58.122 0.569 L 60.076 6.429 L 66.253 6.476 C 67.053 6.483 67.384 7.503 66.741 7.978 L 61.772 11.648 L 63.636 17.537 C 63.878 18.299 63.009 18.931 62.358 18.465 L 57.333 14.873 L 52.308 18.465 C 51.657 18.93 50.79 18.299 51.03 17.537 L 52.894 11.648 L 47.925 7.978 C 47.282 7.502 47.613 6.483 48.413 6.476 L 54.59 6.429 L 56.544 0.569 C 56.796 -0.19 57.869 -0.19 58.122 0.569 Z M 58.122 31.223 L 60.076 37.083 L 66.253 37.13 C 67.053 37.137 67.384 38.157 66.741 38.632 L 61.772 42.302 L 63.636 48.191 C 63.878 48.953 63.009 49.585 62.358 49.119 L 57.333 45.527 L 52.308 49.119 C 51.657 49.584 50.79 48.953 51.03 48.191 L 52.894 42.302 L 47.925 38.632 C 47.282 38.156 47.613 37.137 48.413 37.13 L 54.59 37.083 L 56.544 31.223 C 56.796 30.465 57.869 30.465 58.122 31.223 Z M 58.122 61.877 L 60.076 67.737 L 66.253 67.784 C 67.053 67.791 67.384 68.811 66.741 69.286 L 61.772 72.956 L 63.636 78.845 C 63.878 79.607 63.009 80.239 62.358 79.773 L 57.333 76.181 L 52.308 79.773 C 51.657 80.238 50.79 79.607 51.03 78.845 L 52.894 72.956 L 47.925 69.286 C 47.282 68.81 47.613 67.791 48.413 67.784 L 54.59 67.737 L 56.544 61.877 C 56.796 61.119 57.869 61.119 58.122 61.877 Z M 58.122 92.532 L 60.076 98.392 L 66.253 98.439 C 67.053 98.446 67.384 99.466 66.741 99.941 L 61.772 103.611 L 63.636 109.5 C 63.878 110.262 63.009 110.894 62.358 110.428 L 57.333 106.836 L 52.308 110.428 C 51.657 110.893 50.79 110.262 51.03 109.5 L 52.894 103.611 L 47.925 99.941 C 47.282 99.465 47.613 98.446 48.413 98.439 L 54.59 98.392 L 56.544 92.532 C 56.796 91.773 57.869 91.773 58.122 92.532 Z M 58.122 123.186 L 60.076 129.046 L 66.253 129.093 C 67.053 129.1 67.384 130.12 66.741 130.595 L 61.772 134.265 L 63.636 140.154 C 63.878 140.916 63.009 141.548 62.358 141.082 L 57.333 137.49 L 52.308 141.082 C 51.657 141.547 50.79 140.916 51.03 140.154 L 52.894 134.265 L 47.925 130.595 C 47.282 130.119 47.613 129.1 48.413 129.093 L 54.59 129.046 L 56.544 123.186 C 56.796 122.426 57.869 122.426 58.122 123.186 Z M 81.916 15.598 L 83.87 21.458 L 90.047 21.505 C 90.847 21.512 91.178 22.532 90.535 23.007 L 85.566 26.677 L 87.43 32.566 C 87.672 33.328 86.803 33.96 86.152 33.494 L 81.127 29.902 L 76.102 33.494 C 75.451 33.959 74.584 33.328 74.824 32.566 L 76.688 26.677 L 71.719 23.007 C 71.076 22.531 71.407 21.512 72.207 21.505 L 78.384 21.458 L 80.338 15.598 C 80.589 14.84 81.663 14.84 81.916 15.598 Z M 81.916 46.253 L 83.87 52.113 L 90.047 52.16 C 90.847 52.167 91.178 53.187 90.535 53.662 L 85.566 57.332 L 87.43 63.221 C 87.672 63.983 86.803 64.615 86.152 64.149 L 81.127 60.557 L 76.102 64.149 C 75.451 64.614 74.584 63.984 74.824 63.221 L 76.688 57.332 L 71.719 53.662 C 71.076 53.186 71.407 52.167 72.207 52.16 L 78.384 52.113 L 80.338 46.253 C 80.589 45.494 81.663 45.494 81.916 46.253 Z M 81.916 76.907 L 83.87 82.767 L 90.047 82.814 C 90.847 82.821 91.178 83.841 90.535 84.316 L 85.566 87.986 L 87.43 93.875 C 87.672 94.637 86.803 95.269 86.152 94.803 L 81.127 91.211 L 76.102 94.803 C 75.451 95.268 74.584 94.637 74.824 93.875 L 76.688 87.986 L 71.719 84.316 C 71.076 83.84 71.407 82.821 72.207 82.814 L 78.384 82.767 L 80.338 76.907 C 80.589 76.148 81.663 76.148 81.916 76.907 Z M 81.916 107.561 L 83.87 113.421 L 90.047 113.468 C 90.847 113.475 91.178 114.495 90.535 114.97 L 85.566 118.64 L 87.43 124.529 C 87.672 125.291 86.803 125.923 86.152 125.457 L 81.127 121.865 L 76.102 125.457 C 75.451 125.922 74.584 125.291 74.824 124.529 L 76.688 118.64 L 71.719 114.97 C 71.076 114.494 71.407 113.475 72.207 113.468 L 78.384 113.421 L 80.338 107.561 C 80.589 106.803 81.663 106.803 81.916 107.561 Z M 105.709 0.569 L 107.663 6.429 L 113.84 6.476 C 114.64 6.483 114.971 7.503 114.328 7.978 L 109.359 11.648 L 111.223 17.537 C 111.465 18.299 110.596 18.931 109.945 18.465 L 104.919 14.873 L 99.894 18.465 C 99.243 18.93 98.376 18.299 98.616 17.537 L 100.48 11.648 L 95.511 7.978 C 94.868 7.502 95.199 6.483 95.999 6.476 L 102.176 6.429 L 104.13 0.569 C 104.383 -0.19 105.456 -0.19 105.709 0.569 Z M 105.709 31.223 L 107.663 37.083 L 113.84 37.13 C 114.64 37.137 114.971 38.157 114.328 38.632 L 109.359 42.302 L 111.223 48.191 C 111.465 48.953 110.596 49.585 109.945 49.119 L 104.919 45.527 L 99.894 49.119 C 99.243 49.584 98.376 48.953 98.616 48.191 L 100.48 42.302 L 95.511 38.632 C 94.868 38.156 95.199 37.137 95.999 37.13 L 102.176 37.083 L 104.13 31.223 C 104.383 30.465 105.456 30.465 105.709 31.223 Z M 105.709 61.877 L 107.663 67.737 L 113.84 67.784 C 114.64 67.791 114.971 68.811 114.328 69.286 L 109.359 72.956 L 111.223 78.845 C 111.465 79.607 110.596 80.239 109.945 79.773 L 104.919 76.181 L 99.894 79.773 C 99.243 80.238 98.376 79.607 98.616 78.845 L 100.48 72.956 L 95.511 69.286 C 94.868 68.81 95.199 67.791 95.999 67.784 L 102.176 67.737 L 104.13 61.877 C 104.383 61.119 105.456 61.119 105.709 61.877 Z M 105.709 92.532 L 107.663 98.392 L 113.84 98.439 C 114.64 98.446 114.971 99.466 114.328 99.941 L 109.359 103.611 L 111.223 109.5 C 111.465 110.262 110.596 110.894 109.945 110.428 L 104.919 106.836 L 99.894 110.428 C 99.243 110.893 98.376 110.262 98.616 109.5 L 100.48 103.611 L 95.511 99.941 C 94.868 99.465 95.199 98.446 95.999 98.439 L 102.176 98.392 L 104.13 92.532 C 104.383 91.773 105.456 91.773 105.709 92.532 Z M 105.709 123.186 L 107.663 129.046 L 113.84 129.093 C 114.64 129.1 114.971 130.12 114.328 130.595 L 109.359 134.265 L 111.223 140.154 C 111.465 140.916 110.596 141.548 109.945 141.082 L 104.919 137.49 L 99.894 141.082 C 99.243 141.547 98.376 140.916 98.616 140.154 L 100.48 134.265 L 95.511 130.595 C 94.868 130.119 95.199 129.1 95.999 129.093 L 102.176 129.046 L 104.13 123.186 C 104.383 122.426 105.456 122.426 105.709 123.186 Z M 129.502 15.598 L 131.456 21.458 L 137.633 21.505 C 138.433 21.512 138.764 22.532 138.121 23.007 L 133.152 26.677 L 135.016 32.566 C 135.258 33.328 134.389 33.96 133.738 33.494 L 128.713 29.902 L 123.688 33.494 C 123.037 33.959 122.17 33.328 122.41 32.566 L 124.274 26.677 L 119.305 23.007 C 118.662 22.531 118.993 21.512 119.793 21.505 L 125.97 21.458 L 127.924 15.598 C 128.177 14.84 129.249 14.84 129.502 15.598 Z M 129.502 46.253 L 131.456 52.113 L 137.633 52.16 C 138.433 52.167 138.764 53.187 138.121 53.662 L 133.152 57.332 L 135.016 63.221 C 135.258 63.983 134.389 64.615 133.738 64.149 L 128.713 60.557 L 123.688 64.149 C 123.037 64.614 122.17 63.984 122.41 63.221 L 124.274 57.332 L 119.305 53.662 C 118.662 53.186 118.993 52.167 119.793 52.16 L 125.97 52.113 L 127.924 46.253 C 128.177 45.494 129.249 45.494 129.502 46.253 Z M 129.502 76.907 L 131.456 82.767 L 137.633 82.814 C 138.433 82.821 138.764 83.841 138.121 84.316 L 133.152 87.986 L 135.016 93.875 C 135.258 94.637 134.389 95.269 133.738 94.803 L 128.713 91.211 L 123.688 94.803 C 123.037 95.268 122.17 94.637 122.41 93.875 L 124.274 87.986 L 119.305 84.316 C 118.662 83.84 118.993 82.821 119.793 82.814 L 125.97 82.767 L 127.924 76.907 C 128.177 76.148 129.249 76.148 129.502 76.907 Z M 129.502 107.561 L 131.456 113.421 L 137.633 113.468 C 138.433 113.475 138.764 114.495 138.121 114.97 L 133.152 118.64 L 135.016 124.529 C 135.258 125.291 134.389 125.923 133.738 125.457 L 128.713 121.865 L 123.688 125.457 C 123.037 125.922 122.17 125.291 122.41 124.529 L 124.274 118.64 L 119.305 114.97 C 118.662 114.494 118.993 113.475 119.793 113.468 L 125.97 113.421 L 127.924 107.561 C 128.177 106.803 129.249 106.803 129.502 107.561 Z M 153.296 0.569 L 155.25 6.429 L 161.427 6.476 C 162.227 6.483 162.558 7.503 161.915 7.978 L 156.946 11.648 L 158.81 17.537 C 159.052 18.299 158.183 18.931 157.532 18.465 L 152.507 14.873 L 147.482 18.465 C 146.831 18.93 145.964 18.299 146.204 17.537 L 148.068 11.648 L 143.099 7.978 C 142.456 7.502 142.787 6.483 143.587 6.476 L 149.764 6.429 L 151.718 0.569 C 151.969 -0.19 153.043 -0.19 153.296 0.569 Z M 153.296 31.223 L 155.25 37.083 L 161.427 37.13 C 162.227 37.137 162.558 38.157 161.915 38.632 L 156.946 42.302 L 158.81 48.191 C 159.052 48.953 158.183 49.585 157.532 49.119 L 152.507 45.527 L 147.482 49.119 C 146.831 49.584 145.964 48.953 146.204 48.191 L 148.068 42.302 L 143.099 38.632 C 142.456 38.156 142.787 37.137 143.587 37.13 L 149.764 37.083 L 151.718 31.223 C 151.969 30.465 153.043 30.465 153.296 31.223 Z M 153.296 61.877 L 155.25 67.737 L 161.427 67.784 C 162.227 67.791 162.558 68.811 161.915 69.286 L 156.946 72.956 L 158.81 78.845 C 159.052 79.607 158.183 80.239 157.532 79.773 L 152.507 76.181 L 147.482 79.773 C 146.831 80.238 145.964 79.607 146.204 78.845 L 148.068 72.956 L 143.099 69.286 C 142.456 68.81 142.787 67.791 143.587 67.784 L 149.764 67.737 L 151.718 61.877 C 151.969 61.119 153.043 61.119 153.296 61.877 Z M 153.296 92.532 L 155.25 98.392 L 161.427 98.439 C 162.227 98.446 162.558 99.466 161.915 99.941 L 156.946 103.611 L 158.81 109.5 C 159.052 110.262 158.183 110.894 157.532 110.428 L 152.507 106.836 L 147.482 110.428 C 146.831 110.893 145.964 110.262 146.204 109.5 L 148.068 103.611 L 143.099 99.941 C 142.456 99.465 142.787 98.446 143.587 98.439 L 149.764 98.392 L 151.718 92.532 C 151.969 91.773 153.043 91.773 153.296 92.532 Z M 153.296 123.186 L 155.25 129.046 L 161.427 129.093 C 162.227 129.1 162.558 130.12 161.915 130.595 L 156.946 134.265 L 158.81 140.154 C 159.052 140.916 158.183 141.548 157.532 141.082 L 152.507 137.49 L 147.482 141.082 C 146.831 141.547 145.964 140.916 146.204 140.154 L 148.068 134.265 L 143.099 130.595 C 142.456 130.119 142.787 129.1 143.587 129.093 L 149.764 129.046 L 151.718 123.186 C 151.969 122.426 153.043 122.426 153.296 123.186 Z M 177.089 15.598 L 179.043 21.458 L 185.22 21.505 C 186.02 21.512 186.351 22.532 185.708 23.007 L 180.739 26.677 L 182.603 32.566 C 182.845 33.328 181.976 33.96 181.325 33.494 L 176.3 29.902 L 171.275 33.494 C 170.624 33.959 169.757 33.328 169.997 32.566 L 171.861 26.677 L 166.892 23.007 C 166.249 22.531 166.58 21.512 167.38 21.505 L 173.557 21.458 L 175.511 15.598 C 175.763 14.84 176.837 14.84 177.089 15.598 Z M 177.089 46.253 L 179.043 52.113 L 185.22 52.16 C 186.02 52.167 186.351 53.187 185.708 53.662 L 180.739 57.332 L 182.603 63.221 C 182.845 63.983 181.976 64.615 181.325 64.149 L 176.3 60.557 L 171.275 64.149 C 170.624 64.614 169.757 63.984 169.997 63.221 L 171.861 57.332 L 166.892 53.662 C 166.249 53.186 166.58 52.167 167.38 52.16 L 173.557 52.113 L 175.511 46.253 C 175.763 45.494 176.837 45.494 177.089 46.253 Z M 177.089 76.907 L 179.043 82.767 L 185.22 82.814 C 186.02 82.821 186.351 83.841 185.708 84.316 L 180.739 87.986 L 182.603 93.875 C 182.845 94.637 181.976 95.269 181.325 94.803 L 176.3 91.211 L 171.275 94.803 C 170.624 95.268 169.757 94.637 169.997 93.875 L 171.861 87.986 L 166.892 84.316 C 166.249 83.84 166.58 82.821 167.38 82.814 L 173.557 82.767 L 175.511 76.907 C 175.763 76.148 176.837 76.148 177.089 76.907 Z M 177.089 107.561 L 179.043 113.421 L 185.22 113.468 C 186.02 113.475 186.351 114.495 185.708 114.97 L 180.739 118.64 L 182.603 124.529 C 182.845 125.291 181.976 125.923 181.325 125.457 L 176.3 121.865 L 171.275 125.457 C 170.624 125.922 169.757 125.291 169.997 124.529 L 171.861 118.64 L 166.892 114.97 C 166.249 114.494 166.58 113.475 167.38 113.468 L 173.557 113.421 L 175.511 107.561 C 175.763 106.803 176.837 106.803 177.089 107.561 Z M 200.883 0.569 L 202.837 6.429 L 209.014 6.476 C 209.814 6.483 210.145 7.503 209.502 7.978 L 204.533 11.648 L 206.397 17.537 C 206.639 18.299 205.77 18.931 205.119 18.465 L 200.094 14.873 L 195.069 18.465 C 194.418 18.93 193.551 18.299 193.791 17.537 L 195.655 11.648 L 190.686 7.978 C 190.043 7.502 190.374 6.483 191.174 6.476 L 197.351 6.429 L 199.305 0.569 C 199.557 -0.19 200.629 -0.19 200.883 0.569 Z M 200.883 31.223 L 202.837 37.083 L 209.014 37.13 C 209.814 37.137 210.145 38.157 209.502 38.632 L 204.533 42.302 L 206.397 48.191 C 206.639 48.953 205.77 49.585 205.119 49.119 L 200.094 45.527 L 195.069 49.119 C 194.418 49.584 193.551 48.953 193.791 48.191 L 195.655 42.302 L 190.686 38.632 C 190.043 38.156 190.374 37.137 191.174 37.13 L 197.351 37.083 L 199.305 31.223 C 199.557 30.465 200.629 30.465 200.883 31.223 Z M 200.883 61.877 L 202.837 67.737 L 209.014 67.784 C 209.814 67.791 210.145 68.811 209.502 69.286 L 204.533 72.956 L 206.397 78.845 C 206.639 79.607 205.77 80.239 205.119 79.773 L 200.094 76.181 L 195.069 79.773 C 194.418 80.238 193.551 79.607 193.791 78.845 L 195.655 72.956 L 190.686 69.286 C 190.043 68.81 190.374 67.791 191.174 67.784 L 197.351 67.737 L 199.305 61.877 C 199.557 61.119 200.629 61.119 200.883 61.877 Z M 200.883 92.532 L 202.837 98.392 L 209.014 98.439 C 209.814 98.446 210.145 99.466 209.502 99.941 L 204.533 103.611 L 206.397 109.5 C 206.639 110.262 205.77 110.894 205.119 110.428 L 200.094 106.836 L 195.069 110.428 C 194.418 110.893 193.551 110.262 193.791 109.5 L 195.655 103.611 L 190.686 99.941 C 190.043 99.465 190.374 98.446 191.174 98.439 L 197.351 98.392 L 199.305 92.532 C 199.557 91.773 200.629 91.773 200.883 92.532 Z M 200.883 123.186 L 202.837 129.046 L 209.014 129.093 C 209.814 129.1 210.145 130.12 209.502 130.595 L 204.533 134.265 L 206.397 140.154 C 206.639 140.916 205.77 141.548 205.119 141.082 L 200.094 137.49 L 195.069 141.082 C 194.418 141.547 193.551 140.916 193.791 140.154 L 195.655 134.265 L 190.686 130.595 C 190.043 130.119 190.374 129.1 191.174 129.093 L 197.351 129.046 L 199.305 123.186 C 199.557 122.426 200.629 122.426 200.883 123.186 Z" fill="transparent" height="141.24202375386588px" id="enVcIjLC_" transform="translate(14.253 19.693)" width="209.8417176622597px"><path d="M 10.536 0.569 L 12.49 6.429 L 18.667 6.476 C 19.467 6.483 19.798 7.503 19.155 7.978 L 14.186 11.648 L 16.05 17.537 C 16.292 18.299 15.423 18.931 14.772 18.465 L 9.747 14.874 L 4.722 18.466 C 4.071 18.931 3.204 18.3 3.444 17.538 L 5.308 11.649 L 0.339 7.979 C -0.304 7.503 0.027 6.484 0.827 6.477 L 7.004 6.43 L 8.958 0.57 C 9.21 -0.19 10.282 -0.19 10.536 0.569 Z" fill="rgb(245, 245, 245)" height="18.624902599161874px" id="QebijiJ_X" transform="translate(0 0)" width="19.494717540189406px"/><path d="M 10.536 0.568 L 12.49 6.428 L 18.667 6.475 C 19.467 6.482 19.798 7.502 19.155 7.977 L 14.186 11.647 L 16.05 17.536 C 16.292 18.298 15.423 18.93 14.772 18.464 L 9.747 14.873 L 4.722 18.465 C 4.071 18.93 3.204 18.299 3.444 17.537 L 5.308 11.648 L 0.339 7.978 C -0.304 7.502 0.027 6.483 0.827 6.476 L 7.004 6.429 L 8.958 0.569 C 9.21 -0.19 10.282 -0.19 10.536 0.568 Z" fill="rgb(245, 245, 245)" height="18.62415259924327px" id="NHoevwh2y" transform="translate(0 30.655)" width="19.494717540189406px"/><path d="M 10.536 0.568 L 12.49 6.428 L 18.667 6.475 C 19.467 6.482 19.798 7.502 19.155 7.977 L 14.186 11.647 L 16.05 17.536 C 16.292 18.298 15.423 18.93 14.772 18.464 L 9.747 14.873 L 4.722 18.465 C 4.071 18.93 3.204 18.299 3.444 17.537 L 5.308 11.648 L 0.339 7.978 C -0.304 7.502 0.027 6.483 0.827 6.476 L 7.004 6.429 L 8.958 0.569 C 9.21 -0.19 10.282 -0.19 10.536 0.568 Z" fill="rgb(245, 245, 245)" height="18.624152599243274px" id="urftzs2DP" transform="translate(0 61.309)" width="19.494717540189406px"/><path d="M 10.536 0.569 L 12.49 6.429 L 18.667 6.476 C 19.467 6.483 19.798 7.503 19.155 7.978 L 14.186 11.648 L 16.05 17.537 C 16.292 18.299 15.423 18.931 14.772 18.465 L 9.747 14.874 L 4.722 18.466 C 4.071 18.931 3.204 18.3 3.444 17.538 L 5.308 11.649 L 0.339 7.979 C -0.304 7.503 0.027 6.484 0.827 6.477 L 7.004 6.43 L 8.958 0.57 C 9.21 -0.19 10.282 -0.19 10.536 0.569 Z" fill="rgb(245, 245, 245)" height="18.6249025991619px" id="fmEX9skq2" transform="translate(0 91.963)" width="19.494717540189406px"/><path d="M 10.536 0.57 L 12.49 6.43 L 18.667 6.477 C 19.467 6.484 19.798 7.504 19.155 7.979 L 14.186 11.649 L 16.05 17.538 C 16.292 18.3 15.423 18.932 14.772 18.466 L 9.747 14.875 L 4.722 18.467 C 4.071 18.932 3.204 18.301 3.444 17.539 L 5.308 11.65 L 0.339 7.98 C -0.304 7.504 0.027 6.485 0.827 6.478 L 7.004 6.431 L 8.958 0.571 C 9.21 -0.19 10.282 -0.19 10.536 0.57 Z" fill="rgb(245, 245, 245)" height="18.625652599080723px" id="oaWAW51QX" transform="translate(0 122.616)" width="19.494717540189406px"/><path d="M 10.536 0.568 L 12.49 6.428 L 18.667 6.475 C 19.467 6.482 19.798 7.502 19.155 7.978 L 14.186 11.647 L 16.05 17.537 C 16.292 18.299 15.423 18.931 14.772 18.464 L 9.747 14.872 L 4.722 18.464 C 4.071 18.93 3.204 18.299 3.444 17.537 L 5.308 11.647 L 0.339 7.978 C -0.304 7.502 0.027 6.482 0.827 6.475 L 7.004 6.428 L 8.958 0.568 C 9.209 -0.189 10.283 -0.189 10.536 0.568 Z" fill="rgb(245, 245, 245)" height="18.62369138688665px" id="jZHlg8t2R" transform="translate(23.793 15.03)" width="19.49471754018942px"/><path d="M 10.536 0.569 L 12.49 6.429 L 18.667 6.476 C 19.467 6.483 19.798 7.503 19.155 7.978 L 14.186 11.648 L 16.05 17.537 C 16.292 18.299 15.423 18.931 14.772 18.465 L 9.747 14.873 L 4.722 18.465 C 4.071 18.93 3.204 18.3 3.444 17.537 L 5.308 11.648 L 0.339 7.978 C -0.304 7.502 0.027 6.483 0.827 6.476 L 7.004 6.429 L 8.958 0.569 C 9.209 -0.19 10.283 -0.19 10.536 0.569 Z" fill="rgb(245, 245, 245)" height="18.624441386886673px" id="ppLhuvUp6" transform="translate(23.793 45.684)" width="19.49471754018942px"/><path d="M 10.536 0.569 L 12.49 6.429 L 18.667 6.476 C 19.467 6.483 19.798 7.503 19.155 7.978 L 14.186 11.648 L 16.05 17.537 C 16.292 18.299 15.423 18.931 14.772 18.465 L 9.747 14.873 L 4.722 18.465 C 4.071 18.93 3.204 18.299 3.444 17.537 L 5.308 11.648 L 0.339 7.978 C -0.304 7.502 0.027 6.483 0.827 6.476 L 7.004 6.429 L 8.958 0.569 C 9.209 -0.19 10.283 -0.19 10.536 0.569 Z" fill="rgb(245, 245, 245)" height="18.624441386886673px" id="YFq3Z1UPk" transform="translate(23.793 76.338)" width="19.49471754018942px"/><path d="M 10.536 0.569 L 12.49 6.429 L 18.667 6.476 C 19.467 6.483 19.798 7.503 19.155 7.978 L 14.186 11.648 L 16.05 17.537 C 16.292 18.299 15.423 18.931 14.772 18.465 L 9.747 14.873 L 4.722 18.465 C 4.071 18.93 3.204 18.299 3.444 17.537 L 5.308 11.648 L 0.339 7.978 C -0.304 7.502 0.027 6.483 0.827 6.476 L 7.004 6.429 L 8.958 0.569 C 9.209 -0.189 10.283 -0.189 10.536 0.569 Z" fill="rgb(245, 245, 245)" height="18.62369138688669px" id="bJ2lbqUPC" transform="translate(23.793 106.993)" width="19.49471754018942px"/><path d="M 10.536 0.569 L 12.49 6.429 L 18.667 6.476 C 19.467 6.483 19.798 7.503 19.155 7.978 L 14.186 11.648 L 16.05 17.537 C 16.292 18.299 15.423 18.931 14.772 18.465 L 9.747 14.873 L 4.722 18.465 C 4.071 18.93 3.204 18.299 3.444 17.537 L 5.308 11.648 L 0.339 7.978 C -0.304 7.502 0.027 6.483 0.827 6.476 L 7.004 6.429 L 8.958 0.569 C 9.21 -0.19 10.283 -0.19 10.536 0.569 Z" fill="rgb(245, 245, 245)" height="18.624441386886666px" id="zVHyqrGJn" transform="translate(47.586 0)" width="19.49471754018944px"/><path d="M 10.536 0.569 L 12.49 6.429 L 18.667 6.476 C 19.467 6.483 19.798 7.503 19.155 7.978 L 14.186 11.648 L 16.05 17.537 C 16.292 18.299 15.423 18.931 14.772 18.465 L 9.747 14.873 L 4.722 18.465 C 4.071 18.93 3.204 18.299 3.444 17.537 L 5.308 11.648 L 0.339 7.978 C -0.304 7.502 0.027 6.483 0.827 6.476 L 7.004 6.429 L 8.958 0.569 C 9.21 -0.19 10.283 -0.19 10.536 0.569 Z" fill="rgb(245, 245, 245)" height="18.623691386886676px" id="kdpUelwqj" transform="translate(47.586 30.655)" width="19.49471754018944px"/><path d="M 10.536 0.569 L 12.49 6.429 L 18.667 6.476 C 19.467 6.483 19.798 7.503 19.155 7.978 L 14.186 11.648 L 16.05 17.537 C 16.292 18.299 15.423 18.931 14.772 18.465 L 9.747 14.873 L 4.722 18.465 C 4.071 18.93 3.204 18.299 3.444 17.537 L 5.308 11.648 L 0.339 7.978 C -0.304 7.502 0.027 6.483 0.827 6.476 L 7.004 6.429 L 8.958 0.569 C 9.21 -0.189 10.283 -0.189 10.536 0.569 Z" fill="rgb(245, 245, 245)" height="18.623691386886676px" id="VjWODxuXE" transform="translate(47.586 61.309)" width="19.49471754018944px"/><path d="M 10.536 0.569 L 12.49 6.429 L 18.667 6.476 C 19.467 6.483 19.798 7.503 19.155 7.978 L 14.186 11.648 L 16.05 17.537 C 16.292 18.299 15.423 18.931 14.772 18.465 L 9.747 14.873 L 4.722 18.465 C 4.071 18.93 3.204 18.299 3.444 17.537 L 5.308 11.648 L 0.339 7.978 C -0.304 7.502 0.027 6.483 0.827 6.476 L 7.004 6.429 L 8.958 0.569 C 9.21 -0.19 10.283 -0.19 10.536 0.569 Z" fill="rgb(245, 245, 245)" height="18.624441386886673px" id="kFHWXXExE" transform="translate(47.586 91.963)" width="19.49471754018944px"/><path d="M 10.536 0.57 L 12.49 6.43 L 18.667 6.477 C 19.467 6.484 19.798 7.504 19.155 7.979 L 14.186 11.649 L 16.05 17.538 C 16.292 18.3 15.423 18.932 14.772 18.466 L 9.747 14.874 L 4.722 18.466 C 4.071 18.931 3.204 18.3 3.444 17.538 L 5.308 11.649 L 0.339 7.979 C -0.304 7.503 0.027 6.484 0.827 6.477 L 7.004 6.43 L 8.958 0.57 C 9.21 -0.19 10.283 -0.19 10.536 0.57 Z" fill="rgb(245, 245, 245)" height="18.625191386886655px" id="ynLTrqDC9" transform="translate(47.586 122.616)" width="19.49471754018944px"/><path d="M 10.536 0.568 L 12.49 6.428 L 18.667 6.475 C 19.467 6.482 19.798 7.502 19.155 7.978 L 14.186 11.647 L 16.05 17.537 C 16.292 18.299 15.423 18.931 14.772 18.464 L 9.747 14.872 L 4.722 18.464 C 4.071 18.93 3.204 18.299 3.444 17.537 L 5.308 11.647 L 0.339 7.978 C -0.304 7.502 0.027 6.482 0.827 6.475 L 7.004 6.428 L 8.958 0.568 C 9.209 -0.189 10.283 -0.189 10.536 0.568 Z" fill="rgb(245, 245, 245)" height="18.62369138688665px" id="INY9C_6W2" transform="translate(71.38 15.03)" width="19.494717540189413px"/><path d="M 10.536 0.569 L 12.49 6.429 L 18.667 6.476 C 19.467 6.483 19.798 7.503 19.155 7.978 L 14.186 11.648 L 16.05 17.537 C 16.292 18.299 15.423 18.931 14.772 18.465 L 9.747 14.873 L 4.722 18.465 C 4.071 18.93 3.204 18.3 3.444 17.537 L 5.308 11.648 L 0.339 7.978 C -0.304 7.502 0.027 6.483 0.827 6.476 L 7.004 6.429 L 8.958 0.569 C 9.209 -0.19 10.283 -0.19 10.536 0.569 Z" fill="rgb(245, 245, 245)" height="18.624441386886673px" id="Kr_Bhh4B9" transform="translate(71.38 45.684)" width="19.494717540189413px"/><path d="M 10.536 0.569 L 12.49 6.429 L 18.667 6.476 C 19.467 6.483 19.798 7.503 19.155 7.978 L 14.186 11.648 L 16.05 17.537 C 16.292 18.299 15.423 18.931 14.772 18.465 L 9.747 14.873 L 4.722 18.465 C 4.071 18.93 3.204 18.299 3.444 17.537 L 5.308 11.648 L 0.339 7.978 C -0.304 7.502 0.027 6.483 0.827 6.476 L 7.004 6.429 L 8.958 0.569 C 9.209 -0.19 10.283 -0.19 10.536 0.569 Z" fill="rgb(245, 245, 245)" height="18.624441386886673px" id="NP905AaRQ" transform="translate(71.38 76.338)" width="19.494717540189413px"/><path d="M 10.536 0.569 L 12.49 6.429 L 18.667 6.476 C 19.467 6.483 19.798 7.503 19.155 7.978 L 14.186 11.648 L 16.05 17.537 C 16.292 18.299 15.423 18.931 14.772 18.465 L 9.747 14.873 L 4.722 18.465 C 4.071 18.93 3.204 18.299 3.444 17.537 L 5.308 11.648 L 0.339 7.978 C -0.304 7.502 0.027 6.483 0.827 6.476 L 7.004 6.429 L 8.958 0.569 C 9.209 -0.189 10.283 -0.189 10.536 0.569 Z" fill="rgb(245, 245, 245)" height="18.62369138688669px" id="PxeFgAfKj" transform="translate(71.38 106.993)" width="19.494717540189413px"/><path d="M 10.537 0.569 L 12.491 6.429 L 18.668 6.476 C 19.468 6.483 19.799 7.503 19.156 7.978 L 14.187 11.648 L 16.051 17.537 C 16.293 18.299 15.424 18.931 14.773 18.465 L 9.747 14.873 L 4.722 18.465 C 4.071 18.93 3.204 18.299 3.444 17.537 L 5.308 11.648 L 0.339 7.978 C -0.304 7.502 0.027 6.483 0.827 6.476 L 7.004 6.429 L 8.958 0.569 C 9.211 -0.19 10.284 -0.19 10.537 0.569 Z" fill="rgb(245, 245, 245)" height="18.624441386886666px" id="f0gRXo7wH" transform="translate(95.172 0)" width="19.495717540189418px"/><path d="M 10.537 0.569 L 12.491 6.429 L 18.668 6.476 C 19.468 6.483 19.799 7.503 19.156 7.978 L 14.187 11.648 L 16.051 17.537 C 16.293 18.299 15.424 18.931 14.773 18.465 L 9.747 14.873 L 4.722 18.465 C 4.071 18.93 3.204 18.299 3.444 17.537 L 5.308 11.648 L 0.339 7.978 C -0.304 7.502 0.027 6.483 0.827 6.476 L 7.004 6.429 L 8.958 0.569 C 9.211 -0.19 10.284 -0.19 10.537 0.569 Z" fill="rgb(245, 245, 245)" height="18.623691386886676px" id="H_cgif1Kb" transform="translate(95.172 30.655)" width="19.495717540189418px"/><path d="M 10.537 0.569 L 12.491 6.429 L 18.668 6.476 C 19.468 6.483 19.799 7.503 19.156 7.978 L 14.187 11.648 L 16.051 17.537 C 16.293 18.299 15.424 18.931 14.773 18.465 L 9.747 14.873 L 4.722 18.465 C 4.071 18.93 3.204 18.299 3.444 17.537 L 5.308 11.648 L 0.339 7.978 C -0.304 7.502 0.027 6.483 0.827 6.476 L 7.004 6.429 L 8.958 0.569 C 9.211 -0.189 10.284 -0.189 10.537 0.569 Z" fill="rgb(245, 245, 245)" height="18.623691386886676px" id="XzZbx7Okw" transform="translate(95.172 61.309)" width="19.495717540189418px"/><path d="M 10.537 0.569 L 12.491 6.429 L 18.668 6.476 C 19.468 6.483 19.799 7.503 19.156 7.978 L 14.187 11.648 L 16.051 17.537 C 16.293 18.299 15.424 18.931 14.773 18.465 L 9.747 14.873 L 4.722 18.465 C 4.071 18.93 3.204 18.299 3.444 17.537 L 5.308 11.648 L 0.339 7.978 C -0.304 7.502 0.027 6.483 0.827 6.476 L 7.004 6.429 L 8.958 0.569 C 9.211 -0.19 10.284 -0.19 10.537 0.569 Z" fill="rgb(245, 245, 245)" height="18.624441386886673px" id="qaty5Waf5" transform="translate(95.172 91.963)" width="19.495717540189418px"/><path d="M 10.537 0.57 L 12.491 6.43 L 18.668 6.477 C 19.468 6.484 19.799 7.504 19.156 7.979 L 14.187 11.649 L 16.051 17.538 C 16.293 18.3 15.424 18.932 14.773 18.466 L 9.747 14.874 L 4.722 18.466 C 4.071 18.931 3.204 18.3 3.444 17.538 L 5.308 11.649 L 0.339 7.979 C -0.304 7.503 0.027 6.484 0.827 6.477 L 7.004 6.43 L 8.958 0.57 C 9.211 -0.19 10.284 -0.19 10.537 0.57 Z" fill="rgb(245, 245, 245)" height="18.625191386886655px" id="dN51AoRdI" transform="translate(95.172 122.616)" width="19.495717540189418px"/><path d="M 10.536 0.568 L 12.49 6.428 L 18.667 6.475 C 19.467 6.482 19.798 7.502 19.155 7.978 L 14.186 11.647 L 16.05 17.537 C 16.292 18.299 15.423 18.931 14.772 18.464 L 9.747 14.872 L 4.722 18.464 C 4.071 18.93 3.204 18.299 3.444 17.537 L 5.308 11.647 L 0.339 7.978 C -0.304 7.502 0.027 6.482 0.827 6.475 L 7.004 6.428 L 8.958 0.568 C 9.211 -0.189 10.283 -0.189 10.536 0.568 Z" fill="rgb(245, 245, 245)" height="18.62369138688665px" id="khhCWngtl" transform="translate(118.966 15.03)" width="19.494717540189413px"/><path d="M 10.536 0.569 L 12.49 6.429 L 18.667 6.476 C 19.467 6.483 19.798 7.503 19.155 7.978 L 14.186 11.648 L 16.05 17.537 C 16.292 18.299 15.423 18.931 14.772 18.465 L 9.747 14.873 L 4.722 18.465 C 4.071 18.93 3.204 18.3 3.444 17.537 L 5.308 11.648 L 0.339 7.978 C -0.304 7.502 0.027 6.483 0.827 6.476 L 7.004 6.429 L 8.958 0.569 C 9.211 -0.19 10.283 -0.19 10.536 0.569 Z" fill="rgb(245, 245, 245)" height="18.624441386886673px" id="OpSxSGX2p" transform="translate(118.966 45.684)" width="19.494717540189413px"/><path d="M 10.536 0.569 L 12.49 6.429 L 18.667 6.476 C 19.467 6.483 19.798 7.503 19.155 7.978 L 14.186 11.648 L 16.05 17.537 C 16.292 18.299 15.423 18.931 14.772 18.465 L 9.747 14.873 L 4.722 18.465 C 4.071 18.93 3.204 18.299 3.444 17.537 L 5.308 11.648 L 0.339 7.978 C -0.304 7.502 0.027 6.483 0.827 6.476 L 7.004 6.429 L 8.958 0.569 C 9.211 -0.19 10.283 -0.19 10.536 0.569 Z" fill="rgb(245, 245, 245)" height="18.624441386886673px" id="Fp_nZxnBc" transform="translate(118.966 76.338)" width="19.494717540189413px"/><path d="M 10.536 0.569 L 12.49 6.429 L 18.667 6.476 C 19.467 6.483 19.798 7.503 19.155 7.978 L 14.186 11.648 L 16.05 17.537 C 16.292 18.299 15.423 18.931 14.772 18.465 L 9.747 14.873 L 4.722 18.465 C 4.071 18.93 3.204 18.299 3.444 17.537 L 5.308 11.648 L 0.339 7.978 C -0.304 7.502 0.027 6.483 0.827 6.476 L 7.004 6.429 L 8.958 0.569 C 9.211 -0.189 10.283 -0.189 10.536 0.569 Z" fill="rgb(245, 245, 245)" height="18.62369138688669px" id="NGJ0Zu_rO" transform="translate(118.966 106.993)" width="19.494717540189413px"/><path d="M 10.536 0.569 L 12.49 6.429 L 18.667 6.476 C 19.467 6.483 19.798 7.503 19.155 7.978 L 14.186 11.648 L 16.05 17.537 C 16.292 18.299 15.423 18.931 14.772 18.465 L 9.747 14.873 L 4.722 18.465 C 4.071 18.93 3.204 18.299 3.444 17.537 L 5.308 11.648 L 0.339 7.978 C -0.304 7.502 0.027 6.483 0.827 6.476 L 7.004 6.429 L 8.958 0.569 C 9.209 -0.19 10.283 -0.19 10.536 0.569 Z" fill="rgb(245, 245, 245)" height="18.624441386886666px" id="BEIl4Je_E" transform="translate(142.76 0)" width="19.494717540189413px"/><path d="M 10.536 0.569 L 12.49 6.429 L 18.667 6.476 C 19.467 6.483 19.798 7.503 19.155 7.978 L 14.186 11.648 L 16.05 17.537 C 16.292 18.299 15.423 18.931 14.772 18.465 L 9.747 14.873 L 4.722 18.465 C 4.071 18.93 3.204 18.299 3.444 17.537 L 5.308 11.648 L 0.339 7.978 C -0.304 7.502 0.027 6.483 0.827 6.476 L 7.004 6.429 L 8.958 0.569 C 9.209 -0.19 10.283 -0.19 10.536 0.569 Z" fill="rgb(245, 245, 245)" height="18.623691386886676px" id="L3LLd2qSS" transform="translate(142.76 30.655)" width="19.494717540189413px"/><path d="M 10.536 0.569 L 12.49 6.429 L 18.667 6.476 C 19.467 6.483 19.798 7.503 19.155 7.978 L 14.186 11.648 L 16.05 17.537 C 16.292 18.299 15.423 18.931 14.772 18.465 L 9.747 14.873 L 4.722 18.465 C 4.071 18.93 3.204 18.299 3.444 17.537 L 5.308 11.648 L 0.339 7.978 C -0.304 7.502 0.027 6.483 0.827 6.476 L 7.004 6.429 L 8.958 0.569 C 9.209 -0.189 10.283 -0.189 10.536 0.569 Z" fill="rgb(245, 245, 245)" height="18.623691386886676px" id="C26ZhMQno" transform="translate(142.76 61.309)" width="19.494717540189413px"/><path d="M 10.536 0.569 L 12.49 6.429 L 18.667 6.476 C 19.467 6.483 19.798 7.503 19.155 7.978 L 14.186 11.648 L 16.05 17.537 C 16.292 18.299 15.423 18.931 14.772 18.465 L 9.747 14.873 L 4.722 18.465 C 4.071 18.93 3.204 18.299 3.444 17.537 L 5.308 11.648 L 0.339 7.978 C -0.304 7.502 0.027 6.483 0.827 6.476 L 7.004 6.429 L 8.958 0.569 C 9.209 -0.19 10.283 -0.19 10.536 0.569 Z" fill="rgb(245, 245, 245)" height="18.624441386886673px" id="lpcZI_knR" transform="translate(142.76 91.963)" width="19.494717540189413px"/><path d="M 10.536 0.57 L 12.49 6.43 L 18.667 6.477 C 19.467 6.484 19.798 7.504 19.155 7.979 L 14.186 11.649 L 16.05 17.538 C 16.292 18.3 15.423 18.932 14.772 18.466 L 9.747 14.874 L 4.722 18.466 C 4.071 18.931 3.204 18.3 3.444 17.538 L 5.308 11.649 L 0.339 7.979 C -0.304 7.503 0.027 6.484 0.827 6.477 L 7.004 6.43 L 8.958 0.57 C 9.209 -0.19 10.283 -0.19 10.536 0.57 Z" fill="rgb(245, 245, 245)" height="18.625191386886655px" id="LKKi1miyN" transform="translate(142.76 122.616)" width="19.494717540189413px"/><path d="M 10.536 0.568 L 12.49 6.428 L 18.667 6.475 C 19.467 6.482 19.798 7.502 19.155 7.978 L 14.186 11.647 L 16.05 17.537 C 16.292 18.299 15.423 18.931 14.772 18.464 L 9.747 14.872 L 4.722 18.464 C 4.071 18.93 3.204 18.299 3.444 17.537 L 5.308 11.647 L 0.339 7.978 C -0.304 7.502 0.027 6.482 0.827 6.475 L 7.004 6.428 L 8.958 0.568 C 9.21 -0.189 10.284 -0.189 10.536 0.568 Z" fill="rgb(245, 245, 245)" height="18.62369138688665px" id="So7JAfykC" transform="translate(166.553 15.03)" width="19.494717540189413px"/><path d="M 10.536 0.569 L 12.49 6.429 L 18.667 6.476 C 19.467 6.483 19.798 7.503 19.155 7.978 L 14.186 11.648 L 16.05 17.537 C 16.292 18.299 15.423 18.931 14.772 18.465 L 9.747 14.873 L 4.722 18.465 C 4.071 18.93 3.204 18.3 3.444 17.537 L 5.308 11.648 L 0.339 7.978 C -0.304 7.502 0.027 6.483 0.827 6.476 L 7.004 6.429 L 8.958 0.569 C 9.21 -0.19 10.284 -0.19 10.536 0.569 Z" fill="rgb(245, 245, 245)" height="18.624441386886673px" id="i_X58HtKq" transform="translate(166.553 45.684)" width="19.494717540189413px"/><path d="M 10.536 0.569 L 12.49 6.429 L 18.667 6.476 C 19.467 6.483 19.798 7.503 19.155 7.978 L 14.186 11.648 L 16.05 17.537 C 16.292 18.299 15.423 18.931 14.772 18.465 L 9.747 14.873 L 4.722 18.465 C 4.071 18.93 3.204 18.299 3.444 17.537 L 5.308 11.648 L 0.339 7.978 C -0.304 7.502 0.027 6.483 0.827 6.476 L 7.004 6.429 L 8.958 0.569 C 9.21 -0.19 10.284 -0.19 10.536 0.569 Z" fill="rgb(245, 245, 245)" height="18.624441386886673px" id="sYLKdPWes" transform="translate(166.553 76.338)" width="19.494717540189413px"/><path d="M 10.536 0.569 L 12.49 6.429 L 18.667 6.476 C 19.467 6.483 19.798 7.503 19.155 7.978 L 14.186 11.648 L 16.05 17.537 C 16.292 18.299 15.423 18.931 14.772 18.465 L 9.747 14.873 L 4.722 18.465 C 4.071 18.93 3.204 18.299 3.444 17.537 L 5.308 11.648 L 0.339 7.978 C -0.304 7.502 0.027 6.483 0.827 6.476 L 7.004 6.429 L 8.958 0.569 C 9.21 -0.189 10.284 -0.189 10.536 0.569 Z" fill="rgb(245, 245, 245)" height="18.62369138688669px" id="lgKPxTzNc" transform="translate(166.553 106.993)" width="19.494717540189413px"/><path d="M 10.536 0.569 L 12.49 6.429 L 18.667 6.476 C 19.467 6.483 19.798 7.503 19.155 7.978 L 14.186 11.648 L 16.05 17.537 C 16.292 18.299 15.423 18.931 14.772 18.465 L 9.747 14.873 L 4.722 18.465 C 4.071 18.93 3.204 18.299 3.444 17.537 L 5.308 11.648 L 0.339 7.978 C -0.304 7.502 0.027 6.483 0.827 6.476 L 7.004 6.429 L 8.958 0.569 C 9.21 -0.19 10.282 -0.19 10.536 0.569 Z" fill="rgb(245, 245, 245)" height="18.624441386886666px" id="YJBDLjcnH" transform="translate(190.347 0)" width="19.494717540189384px"/><path d="M 10.536 0.569 L 12.49 6.429 L 18.667 6.476 C 19.467 6.483 19.798 7.503 19.155 7.978 L 14.186 11.648 L 16.05 17.537 C 16.292 18.299 15.423 18.931 14.772 18.465 L 9.747 14.873 L 4.722 18.465 C 4.071 18.93 3.204 18.299 3.444 17.537 L 5.308 11.648 L 0.339 7.978 C -0.304 7.502 0.027 6.483 0.827 6.476 L 7.004 6.429 L 8.958 0.569 C 9.21 -0.19 10.282 -0.19 10.536 0.569 Z" fill="rgb(245, 245, 245)" height="18.623691386886676px" id="h0B4xCWqU" transform="translate(190.347 30.655)" width="19.494717540189384px"/><path d="M 10.536 0.569 L 12.49 6.429 L 18.667 6.476 C 19.467 6.483 19.798 7.503 19.155 7.978 L 14.186 11.648 L 16.05 17.537 C 16.292 18.299 15.423 18.931 14.772 18.465 L 9.747 14.873 L 4.722 18.465 C 4.071 18.93 3.204 18.299 3.444 17.537 L 5.308 11.648 L 0.339 7.978 C -0.304 7.502 0.027 6.483 0.827 6.476 L 7.004 6.429 L 8.958 0.569 C 9.21 -0.189 10.282 -0.189 10.536 0.569 Z" fill="rgb(245, 245, 245)" height="18.623691386886676px" id="Zd8vecdZV" transform="translate(190.347 61.309)" width="19.494717540189384px"/><path d="M 10.536 0.569 L 12.49 6.429 L 18.667 6.476 C 19.467 6.483 19.798 7.503 19.155 7.978 L 14.186 11.648 L 16.05 17.537 C 16.292 18.299 15.423 18.931 14.772 18.465 L 9.747 14.873 L 4.722 18.465 C 4.071 18.93 3.204 18.299 3.444 17.537 L 5.308 11.648 L 0.339 7.978 C -0.304 7.502 0.027 6.483 0.827 6.476 L 7.004 6.429 L 8.958 0.569 C 9.21 -0.19 10.282 -0.19 10.536 0.569 Z" fill="rgb(245, 245, 245)" height="18.624441386886673px" id="MMpBqeWtB" transform="translate(190.347 91.963)" width="19.494717540189384px"/><path d="M 10.536 0.57 L 12.49 6.43 L 18.667 6.477 C 19.467 6.484 19.798 7.504 19.155 7.979 L 14.186 11.649 L 16.05 17.538 C 16.292 18.3 15.423 18.932 14.772 18.466 L 9.747 14.874 L 4.722 18.466 C 4.071 18.931 3.204 18.3 3.444 17.538 L 5.308 11.649 L 0.339 7.979 C -0.304 7.503 0.027 6.484 0.827 6.477 L 7.004 6.43 L 8.958 0.57 C 9.21 -0.19 10.282 -0.19 10.536 0.57 Z" fill="rgb(245, 245, 245)" height="18.625191386886655px" id="RU3NMhoZd" transform="translate(190.347 122.616)" width="19.494717540189384px"/></g></g></svg>)
A Flawless Global Launch for Rivals of Aether 2
Aether Studios
Learn how Aether Studios quickly added Edgegap and delivered flawless launch & post-launch to their community.
Case Study

" width="512.0010000000001px"><path d="M 503.172 335.449 L 8.828 335.449 C 3.953 335.449 0 331.496 0 326.621 L 0 8.828 C 0 3.953 3.953 0 8.828 0 L 503.173 0 C 508.048 0 512.001 3.953 512.001 8.828 L 512.001 326.621 C 512 331.497 508.047 335.449 503.172 335.449 Z" fill="rgb(65, 71, 155)" height="335.44900000000007px" id="ONvuEWaqr" transform="translate(0 0)" width="512.0010000000001px"/><path d="M 247.172 0 L 231.838 0 L 150.068 53.574 L 150.068 0 L 105.93 0 L 105.93 53.574 L 24.16 0 L 8.828 0 C 3.953 0 0 3.952 0 8.827 L 0 15.829 L 70.155 61.792 L 0 61.792 L 0 105.93 L 70.155 105.93 L 0 151.894 L 0 158.896 C 0 163.771 3.953 167.724 8.828 167.724 L 24.162 167.724 L 105.932 114.15 L 105.932 167.724 L 150.07 167.724 L 150.07 114.15 L 231.839 167.724 L 247.173 167.724 C 252.048 167.724 256.001 163.771 256.001 158.896 L 256.001 151.894 L 185.846 105.931 L 256 105.931 L 256 61.793 L 185.845 61.793 L 256 15.83 L 256 8.828 C 256 3.952 252.047 0 247.172 0 Z" fill="rgb(245, 245, 245)" height="167.72399999999996px" id="GUmgchOlg" transform="translate(0 0.001)" width="256.0010000000001px"/><g d="M 256 70.621 L 141.241 70.621 L 141.241 0 L 114.759 0 L 114.759 70.621 L 0 70.621 L 0 97.103 L 114.759 97.103 L 114.759 167.724 L 141.241 167.724 L 141.241 97.103 L 256 97.103 Z M 97.103 61.793 L 4.207 1.492 C 1.735 3.056 0 5.685 0 8.827 L 0 9.285 L 80.889 61.793 Z M 166.283 61.793 L 254.657 4.427 C 253.121 1.828 250.411 0 247.172 0 L 245.263 0 L 150.069 61.793 Z M 89.474 105.931 L 1.269 163.187 C 2.79 165.849 5.542 167.724 8.828 167.724 L 10.493 167.724 L 105.689 105.931 Z M 255.86 159.589 L 173.194 105.931 L 156.98 105.931 L 250.854 166.866 C 253.666 165.561 255.595 162.826 255.86 159.589 Z" fill="transparent" height="167.724px" id="cSLZBdSvU" transform="translate(0 0.001)" width="256px"><path d="M 256 70.621 L 141.241 70.621 L 141.241 0 L 114.759 0 L 114.759 70.621 L 0 70.621 L 0 97.103 L 114.759 97.103 L 114.759 167.724 L 141.241 167.724 L 141.241 97.103 L 256 97.103 Z" fill="rgb(255, 75, 85)" height="167.724px" id="r2Lr8paf8" width="256px"/><path d="M 97.103 60.301 L 4.207 0 C 1.735 1.564 0 4.193 0 7.335 L 0 7.793 L 80.889 60.301 Z" fill="rgb(255, 75, 85)" height="60.30099999999999px" id="PC8xW9NFh" transform="translate(0 1.492)" width="97.103px"/><path d="M 16.214 61.793 L 104.588 4.427 C 103.052 1.828 100.342 0 97.103 0 L 95.194 0 L 0 61.793 Z" fill="rgb(255, 75, 85)" height="61.793000000000006px" id="HmYUgAs52" transform="translate(150.069 0)" width="104.58800000000002px"/><path d="M 88.205 0 L 0 57.256 C 1.521 59.918 4.273 61.793 7.559 61.793 L 9.224 61.793 L 104.42 0 Z" fill="rgb(255, 75, 85)" height="61.793000000000006px" id="gm8wSFSGZ" transform="translate(1.269 105.931)" width="104.41999999999999px"/><path d="M 98.88 53.658 L 16.214 0 L 0 0 L 93.874 60.935 C 96.686 59.63 98.615 56.895 98.88 53.658 Z" fill="rgb(255, 75, 85)" height="60.935px" id="g7qMKJ3Wr" transform="translate(156.98 105.931)" width="98.88000000000002px"/></g><g d="M 42.098 157.089 L 48.761 179.086 L 70.114 170.581 C 71.936 169.855 73.592 171.933 72.48 173.547 L 59.436 192.471 L 79.398 203.862 C 81.101 204.834 80.51 207.424 78.554 207.561 L 55.625 209.162 L 59.166 231.872 C 59.468 233.81 57.074 234.963 55.748 233.518 L 40.2 216.59 L 24.652 233.518 C 23.326 234.962 20.932 233.809 21.234 231.872 L 24.775 209.162 L 1.846 207.561 C -0.11 207.424 -0.701 204.834 1.002 203.862 L 20.964 192.471 L 7.92 173.547 C 6.808 171.933 8.464 169.855 10.286 170.581 L 31.639 179.086 L 38.302 157.089 C 38.873 155.212 41.53 155.212 42.098 157.089 Z M 304.706 0.688 L 307.961 11.433 L 318.391 7.279 C 319.28 6.925 320.09 7.939 319.546 8.728 L 313.175 17.973 L 322.926 23.538 C 323.758 24.012 323.469 25.278 322.513 25.344 L 311.313 26.126 L 313.042 37.219 C 313.19 38.166 312.02 38.729 311.372 38.023 L 303.777 29.754 L 296.182 38.023 C 295.534 38.728 294.365 38.165 294.512 37.219 L 296.241 26.126 L 285.041 25.344 C 284.085 25.278 283.796 24.012 284.628 23.538 L 294.379 17.973 L 288.008 8.728 C 287.464 7.939 288.274 6.925 289.163 7.279 L 299.593 11.433 L 302.848 0.688 C 303.13 -0.229 304.429 -0.229 304.706 0.688 Z M 232.129 83.164 L 235.384 93.909 L 245.814 89.755 C 246.703 89.401 247.513 90.415 246.969 91.204 L 240.598 100.449 L 250.349 106.014 C 251.181 106.488 250.892 107.754 249.936 107.82 L 238.736 108.602 L 240.465 119.695 C 240.613 120.642 239.443 121.205 238.795 120.499 L 231.2 112.23 L 223.605 120.499 C 222.957 121.204 221.788 120.641 221.935 119.695 L 223.664 108.602 L 212.464 107.82 C 211.508 107.754 211.219 106.488 212.051 106.014 L 221.802 100.449 L 215.431 91.204 C 214.887 90.415 215.697 89.401 216.586 89.755 L 227.016 93.909 L 230.271 83.164 C 230.553 82.247 231.851 82.247 232.129 83.164 Z M 373.37 47.853 L 376.625 58.598 L 387.055 54.444 C 387.944 54.09 388.754 55.104 388.21 55.893 L 381.839 65.138 L 391.59 70.703 C 392.422 71.177 392.133 72.443 391.177 72.509 L 379.977 73.291 L 381.706 84.384 C 381.854 85.331 380.684 85.894 380.037 85.188 L 372.442 76.919 L 364.847 85.188 C 364.199 85.893 363.03 85.33 363.177 84.384 L 364.906 73.291 L 353.706 72.509 C 352.75 72.443 352.461 71.177 353.293 70.703 L 363.044 65.138 L 356.673 55.893 C 356.129 55.104 356.939 54.09 357.828 54.444 L 368.258 58.598 L 371.513 47.853 C 371.794 46.936 373.092 46.936 373.37 47.853 Z M 304.706 189.095 L 307.961 199.84 L 318.391 195.685 C 319.28 195.331 320.09 196.345 319.546 197.134 L 313.175 206.379 L 322.926 211.944 C 323.758 212.418 323.469 213.684 322.513 213.75 L 311.313 214.532 L 313.042 225.625 C 313.19 226.572 312.02 227.135 311.372 226.429 L 303.777 218.16 L 296.182 226.429 C 295.534 227.134 294.365 226.571 294.512 225.625 L 296.241 214.532 L 285.041 213.75 C 284.085 213.684 283.796 212.418 284.628 211.944 L 294.379 206.379 L 288.008 197.134 C 287.464 196.345 288.274 195.331 289.163 195.685 L 299.593 199.84 L 302.848 189.095 C 303.13 188.178 304.429 188.178 304.706 189.095 Z M 329.888 102.472 L 327.275 110.308 L 319.016 110.372 C 317.947 110.381 317.503 111.745 318.364 112.38 L 325.008 117.287 L 322.516 125.162 C 322.194 126.182 323.355 127.025 324.224 126.403 L 330.944 121.6 L 337.664 126.403 C 338.534 127.025 339.694 126.181 339.372 125.162 L 336.88 117.287 L 343.524 112.38 C 344.385 111.744 343.941 110.381 342.872 110.372 L 334.613 110.308 L 332 102.472 C 331.661 101.457 330.226 101.457 329.888 102.472 Z" fill="transparent" height="234.16663387836536px" id="Omk3PigsP" transform="translate(88.573 58.766)" width="392.07946959689326px"><path d="M 42.098 1.408 L 48.761 23.405 L 70.114 14.9 C 71.936 14.174 73.592 16.252 72.48 17.866 L 59.436 36.79 L 79.398 48.181 C 81.101 49.153 80.51 51.743 78.554 51.88 L 55.625 53.481 L 59.166 76.191 C 59.468 78.129 57.074 79.282 55.748 77.837 L 40.2 60.909 L 24.652 77.837 C 23.326 79.281 20.932 78.128 21.234 76.191 L 24.775 53.481 L 1.846 51.88 C -0.11 51.743 -0.701 49.153 1.002 48.181 L 20.964 36.79 L 7.92 17.866 C 6.808 16.252 8.464 14.174 10.286 14.9 L 31.639 23.405 L 38.302 1.408 C 38.873 -0.469 41.53 -0.469 42.098 1.408 Z" fill="rgb(245, 245, 245)" height="78.48563412250599px" id="fYQnRYK1R" transform="translate(0 155.681)" width="80.40008303312064px"/><path d="M 20.567 0.688 L 23.822 11.433 L 34.252 7.279 C 35.141 6.925 35.951 7.939 35.407 8.728 L 29.036 17.973 L 38.787 23.538 C 39.619 24.012 39.33 25.278 38.374 25.344 L 27.174 26.126 L 28.903 37.219 C 29.051 38.166 27.881 38.729 27.233 38.023 L 19.638 29.754 L 12.043 38.023 C 11.395 38.728 10.226 38.165 10.373 37.219 L 12.102 26.126 L 0.902 25.344 C -0.054 25.278 -0.343 24.012 0.489 23.538 L 10.24 17.973 L 3.869 8.728 C 3.325 7.939 4.135 6.925 5.024 7.279 L 15.454 11.433 L 18.709 0.688 C 18.991 -0.229 20.29 -0.229 20.567 0.688 Z" fill="rgb(245, 245, 245)" height="38.339856082326236px" id="xWQ8ul9f2" transform="translate(284.139 0)" width="39.27685021212767px"/><path d="M 20.567 0.688 L 23.822 11.433 L 34.252 7.279 C 35.141 6.925 35.951 7.939 35.407 8.728 L 29.036 17.973 L 38.787 23.538 C 39.619 24.012 39.33 25.278 38.374 25.344 L 27.174 26.126 L 28.903 37.219 C 29.051 38.166 27.881 38.729 27.233 38.023 L 19.638 29.754 L 12.043 38.023 C 11.395 38.728 10.226 38.165 10.373 37.219 L 12.102 26.126 L 0.902 25.344 C -0.054 25.278 -0.343 24.012 0.489 23.538 L 10.24 17.973 L 3.869 8.728 C 3.325 7.939 4.135 6.925 5.024 7.279 L 15.454 11.433 L 18.709 0.688 C 18.991 -0.229 20.289 -0.229 20.567 0.688 Z" fill="rgb(245, 245, 245)" height="38.339856082326236px" id="FPh7KrM7r" transform="translate(211.562 82.476)" width="39.2768502121277px"/><path d="M 20.566 0.688 L 23.821 11.433 L 34.251 7.279 C 35.14 6.925 35.95 7.939 35.406 8.728 L 29.035 17.973 L 38.786 23.538 C 39.618 24.012 39.329 25.278 38.373 25.344 L 27.173 26.126 L 28.902 37.219 C 29.05 38.166 27.88 38.729 27.233 38.023 L 19.638 29.754 L 12.043 38.023 C 11.395 38.728 10.226 38.165 10.373 37.219 L 12.102 26.126 L 0.902 25.344 C -0.054 25.278 -0.343 24.012 0.489 23.538 L 10.24 17.973 L 3.869 8.728 C 3.325 7.939 4.135 6.925 5.024 7.279 L 15.454 11.433 L 18.709 0.688 C 18.99 -0.229 20.288 -0.229 20.566 0.688 Z" fill="rgb(245, 245, 245)" height="38.339856082326264px" id="uCwvZ9Smz" transform="translate(352.804 47.165)" width="39.27585021212769px"/><path d="M 20.567 0.688 L 23.822 11.433 L 34.252 7.278 C 35.141 6.924 35.951 7.938 35.407 8.727 L 29.036 17.972 L 38.787 23.537 C 39.619 24.011 39.33 25.277 38.374 25.343 L 27.174 26.125 L 28.903 37.218 C 29.051 38.165 27.881 38.728 27.233 38.022 L 19.638 29.753 L 12.043 38.022 C 11.395 38.727 10.226 38.164 10.373 37.218 L 12.102 26.125 L 0.902 25.343 C -0.054 25.277 -0.343 24.011 0.489 23.537 L 10.24 17.972 L 3.869 8.727 C 3.325 7.938 4.135 6.924 5.024 7.278 L 15.454 11.433 L 18.709 0.688 C 18.991 -0.229 20.29 -0.229 20.567 0.688 Z" fill="rgb(245, 245, 245)" height="38.33885608232623px" id="rWM9Mwb0Y" transform="translate(284.139 188.407)" width="39.27685021212767px"/><path d="M 11.978 0.761 L 9.365 8.597 L 1.106 8.661 C 0.037 8.67 -0.407 10.034 0.454 10.669 L 7.098 15.576 L 4.606 23.451 C 4.284 24.471 5.445 25.314 6.314 24.692 L 13.034 19.889 L 19.754 24.692 C 20.624 25.314 21.784 24.47 21.462 23.451 L 18.97 15.576 L 25.614 10.669 C 26.475 10.033 26.031 8.67 24.962 8.661 L 16.703 8.597 L 14.09 0.761 C 13.751 -0.254 12.316 -0.254 11.978 0.761 Z" fill="rgb(245, 245, 245)" height="24.90477517194006px" id="oNJ4MMpCs" transform="translate(317.91 101.71)" width="26.068572725630133px"/></g></g></svg>)
Overcome Latency Introduced by VR’s use of WiFi in Competitive Multiplayer
Halfbrick Studios
Discover how Halfbrick successfully launched & maintains a multiplayer-focused Early Access on META Quest's VR platform.
Case Study
" width="512.0020000000002px"><path d="M 503.172 335.449 L 8.828 335.449 C 3.953 335.449 0 331.496 0 326.621 L 0 8.828 C 0 3.953 3.953 0 8.828 0 L 503.173 0 C 508.048 0 512.001 3.953 512.001 8.828 L 512.001 326.621 C 512 331.496 508.047 335.449 503.172 335.449 Z" fill="rgb(65, 71, 155)" height="335.44900000000007px" id="yyH2D1DI9" transform="translate(0 0)" width="512.0010000000001px"/><path d="M 512 8.828 C 512 3.953 508.047 0 503.172 0 L 463.677 0 L 300.137 107.147 L 300.137 0 L 211.861 0 L 211.861 107.147 L 48.322 0 L 8.828 0 C 3.953 0 0 3.953 0 8.828 L 0 31.659 L 140.309 123.586 L 0 123.586 L 0 211.862 L 140.309 211.862 L 0 303.79 L 0 326.621 C 0 331.496 3.953 335.449 8.828 335.449 L 48.323 335.449 L 211.863 228.302 L 211.863 335.449 L 300.139 335.449 L 300.139 228.302 L 463.679 335.449 L 503.174 335.449 C 508.049 335.449 512.002 331.496 512.002 326.621 L 512.002 303.79 L 371.693 211.863 L 512 211.863 L 512 123.587 L 371.691 123.587 L 512 31.659 Z" fill="rgb(245, 245, 245)" height="335.44899999999996px" id="b6Y_9_Nmp" transform="translate(0 0)" width="512.0020000000002px"/><g d="M 512 141.242 L 282.483 141.242 L 282.483 0 L 229.517 0 L 229.517 141.242 L 0 141.242 L 0 194.207 L 229.517 194.207 L 229.517 335.449 L 282.483 335.449 L 282.483 194.207 L 512 194.207 Z M 178.948 211.862 L 0.25 327.859 C 0.875 332.122 4.39 335.449 8.827 335.449 L 20.986 335.449 L 211.376 211.863 L 178.948 211.863 Z M 346.388 211.862 L 313.96 211.862 L 504.073 335.266 C 508.504 334.794 512.001 331.176 512.001 326.62 L 512.001 319.362 Z M 0 18.573 L 161.779 123.587 L 194.207 123.587 L 5.143 0.861 C 2.123 2.264 0 5.279 0 8.828 Z M 332.566 123.587 L 511.693 7.31 C 510.949 3.188 507.509 0.001 503.172 0.001 L 490.525 0.001 L 300.138 123.587 Z" fill="transparent" height="335.449px" id="qOqNZNTkq" transform="translate(0 0)" width="512.0009914550781px"><path d="M 512 141.242 L 282.483 141.242 L 282.483 0 L 229.517 0 L 229.517 141.242 L 0 141.242 L 0 194.207 L 229.517 194.207 L 229.517 335.449 L 282.483 335.449 L 282.483 194.207 L 512 194.207 Z" fill="rgb(255, 75, 85)" height="335.449px" id="wdNznAHgp" width="512px"/><path d="M 178.698 0 L 0 115.997 C 0.625 120.26 4.14 123.587 8.577 123.587 L 20.736 123.587 L 211.126 0.001 L 178.698 0.001 Z" fill="rgb(255, 75, 85)" height="123.58699999999999px" id="ipi6c7oPr" transform="translate(0.25 211.862)" width="211.12599999999998px"/><path d="M 32.428 0 L 0 0 L 190.113 123.404 C 194.544 122.932 198.041 119.314 198.041 114.758 L 198.041 107.5 Z" fill="rgb(255, 75, 85)" height="123.404px" id="pwgtGo_iw" transform="translate(313.96 211.862)" width="198.041px"/><path d="M 0 17.712 L 161.779 122.726 L 194.207 122.726 L 5.143 0 C 2.123 1.403 0 4.418 0 7.967 Z" fill="rgb(255, 75, 85)" height="122.726px" id="YGw5MRgIz" transform="translate(0 0.861)" width="194.207px"/><path d="M 32.428 123.586 L 211.555 7.309 C 210.811 3.187 207.371 0 203.034 0 L 190.387 0 L 0 123.586 Z" fill="rgb(255, 75, 85)" height="123.586px" id="LKFs809KW" transform="translate(300.138 0.001)" width="211.555px"/></g></g></svg>)
MENA’s Social App Adds Online Games
WOLF
Learn how the highly popular MENA-region social app added matchmaking & multiplayer games orchestration easily to WOLF Qanawat.
Case Study
" width="512.0010000000001px"><path d="M 503.172 335.449 L 8.828 335.449 C 3.953 335.449 0 331.496 0 326.621 L 0 8.828 C 0 3.953 3.953 0 8.828 0 L 503.173 0 C 508.048 0 512.001 3.953 512.001 8.828 L 512.001 326.621 C 512 331.497 508.047 335.449 503.172 335.449 Z" fill="rgb(255, 75, 85)" height="335.44900000000007px" id="SNQmZukZi" transform="translate(0 0)" width="512.0010000000001px"/><g d="M 186.827 58.028 L 200.664 76.129 L 222.27 68.897 C 223.478 68.493 224.506 69.859 223.782 70.907 L 210.843 89.66 L 224.398 107.974 C 225.156 108.998 224.174 110.397 222.954 110.033 L 201.12 103.522 L 187.892 122.072 C 187.153 123.109 185.517 122.608 185.486 121.335 L 184.931 98.558 L 163.201 91.709 C 161.986 91.326 161.957 89.617 163.159 89.194 L 184.65 81.628 L 184.448 58.845 C 184.436 57.571 186.054 57.016 186.827 58.028 Z M 110.309 158.937 C 71.314 158.937 39.682 127.304 39.682 88.274 C 39.682 49.316 71.315 17.612 110.309 17.612 C 124.817 17.612 138.196 22.074 149.346 29.626 C 151.053 30.782 153.002 28.539 151.573 27.053 C 134.909 9.728 111.325 -0.841 85.175 0.052 C 40.249 1.585 3.057 37.605 0.186 82.465 C -3.101 133.848 37.585 176.551 88.241 176.551 C 113.194 176.551 135.62 166.119 151.634 149.439 C 153.049 147.966 151.096 145.756 149.405 146.902 C 138.243 154.471 124.842 158.937 110.309 158.937 Z" fill="transparent" height="176.5514615414524px" id="ukfOWsxib" transform="translate(66.647 79.449)" width="224.6639984455675px"><path d="M 24.554 0.523 L 38.391 18.624 L 59.997 11.392 C 61.205 10.988 62.233 12.354 61.509 13.402 L 48.57 32.155 L 62.125 50.469 C 62.883 51.493 61.901 52.892 60.681 52.528 L 38.847 46.017 L 25.619 64.567 C 24.88 65.604 23.244 65.103 23.213 63.83 L 22.658 41.053 L 0.928 34.204 C -0.287 33.821 -0.316 32.112 0.886 31.689 L 22.377 24.123 L 22.175 1.34 C 22.163 0.066 23.781 -0.489 24.554 0.523 Z" fill="rgb(245, 245, 245)" height="65.12552054851531px" id="mbIdfSroO" transform="translate(162.274 57.505)" width="62.390469392833126px"/><path d="M 110.309 158.937 C 71.314 158.937 39.682 127.304 39.682 88.274 C 39.682 49.316 71.315 17.612 110.309 17.612 C 124.817 17.612 138.196 22.074 149.346 29.626 C 151.053 30.782 153.002 28.539 151.573 27.053 C 134.909 9.728 111.325 -0.841 85.175 0.052 C 40.249 1.585 3.057 37.605 0.186 82.465 C -3.101 133.848 37.585 176.551 88.241 176.551 C 113.194 176.551 135.62 166.119 151.634 149.439 C 153.049 147.966 151.096 145.756 149.405 146.902 C 138.243 154.471 124.842 158.937 110.309 158.937 Z" fill="rgb(245, 245, 245)" height="176.5514615414524px" id="PMGcfUOiV" width="152.12110077269674px"/></g></g></svg>)
Hybrid Orchestration Keeps Kickoff Tactics Ready for Any Traffic
Birch Games
How hybrid orchestration helped Birch Games handle traffic, pairing egress-free Fleets with the regionless cloud.
Case Study
" width="512.0010000000001px"><g d="M 503.172 335.449 L 8.828 335.449 C 3.953 335.449 0 331.496 0 326.621 L 0 8.828 C 0 3.953 3.953 0 8.828 0 L 503.173 0 C 508.048 0 512.001 3.953 512.001 8.828 L 512.001 326.621 C 512 331.497 508.047 335.449 503.172 335.449 Z M 114.76 335.455 L 114.76 0.005 L 397.24 0.005 L 397.24 335.455 Z" fill="transparent" height="335.4549999998882px" id="QVOdJ4c3U" transform="translate(0 0)" width="512.001px"><path d="M 503.172 335.449 L 8.828 335.449 C 3.953 335.449 0 331.496 0 326.621 L 0 8.828 C 0 3.953 3.953 0 8.828 0 L 503.173 0 C 508.048 0 512.001 3.953 512.001 8.828 L 512.001 326.621 C 512 331.497 508.047 335.449 503.172 335.449 Z" fill="rgb(245, 245, 245)" height="335.44899999999996px" id="wF_JuDDdb" width="512.001px"/><path d="M 0 335.45 L 0 0 L 282.48 0 L 282.48 335.45 Z" fill="rgb(245, 245, 245)" height="335.44999999999993px" id="BDMWsWel0" transform="translate(114.76 0.005)" width="282.48px"/></g><g d="M 8.828 0 C 3.953 0 0 3.952 0 8.827 L 0 326.62 C 0 331.495 3.953 335.448 8.828 335.448 L 114.759 335.448 L 114.759 0 Z M 503.172 0 L 397.241 0 L 397.241 335.448 L 503.172 335.448 C 508.047 335.448 512 331.495 512 326.62 L 512 8.827 C 512 3.952 508.047 0 503.172 0 Z M 309.569 206.484 L 361.952 176.552 L 349.932 170.542 C 346.561 168.856 344.631 165.216 345.13 161.479 L 349.041 132.157 L 326.864 138.609 C 321.965 140.035 316.881 137.021 315.779 132.04 L 313.655 122.44 L 292.832 146.81 C 289.945 150.188 284.446 147.608 285.199 143.228 L 294.092 91.52 L 280.477 95.244 C 276.5 96.332 272.3 94.522 270.361 90.884 L 256.024 64.013 L 256.024 63.973 L 256.014 63.993 L 256.003 63.973 L 256.003 64.013 L 241.666 90.884 C 239.725 94.521 235.525 96.331 231.548 95.244 L 217.932 91.52 L 226.825 143.228 C 227.578 147.606 222.078 150.187 219.191 146.81 L 198.368 122.44 L 196.244 132.04 C 195.142 137.022 190.058 140.034 185.159 138.609 L 162.982 132.157 L 166.893 161.479 C 167.392 165.215 165.462 168.856 162.091 170.542 L 150.071 176.552 L 202.454 206.485 C 207.88 209.586 210.258 216.162 208.069 222.015 L 203.591 233.992 L 248.476 230.16 C 250.96 229.948 253.074 231.948 253.001 234.439 L 251.587 282.483 L 260.415 282.483 L 259 234.437 C 258.927 231.945 261.041 229.946 263.525 230.158 L 308.431 233.992 L 303.953 222.015 C 301.766 216.161 304.143 209.584 309.569 206.484 Z" fill="transparent" height="335.448px" id="Xzi3AP5Xz" transform="translate(0 0.001)" width="511.9999973144531px"><path d="M 8.828 0 C 3.953 0 0 3.952 0 8.827 L 0 326.62 C 0 331.495 3.953 335.448 8.828 335.448 L 114.759 335.448 L 114.759 0 Z" fill="rgb(255, 75, 85)" height="335.448px" id="EYGeKz2xE" width="114.759px"/><path d="M 105.931 0 L 0 0 L 0 335.448 L 105.931 335.448 C 110.806 335.448 114.759 331.495 114.759 326.62 L 114.759 8.827 C 114.759 3.952 110.806 0 105.931 0 Z" fill="rgb(255, 75, 85)" height="335.448px" id="nueA_ymwG" transform="translate(397.241 0)" width="114.75900000000001px"/><path d="M 159.498 142.511 L 211.881 112.579 L 199.861 106.569 C 196.49 104.883 194.56 101.243 195.059 97.506 L 198.97 68.184 L 176.793 74.636 C 171.894 76.062 166.81 73.048 165.708 68.067 L 163.584 58.467 L 142.761 82.837 C 139.874 86.215 134.375 83.635 135.128 79.255 L 144.021 27.547 L 130.406 31.271 C 126.429 32.359 122.229 30.549 120.29 26.911 L 105.953 0.04 L 105.953 0 L 105.943 0.02 L 105.932 0 L 105.932 0.04 L 91.595 26.911 C 89.654 30.548 85.454 32.358 81.477 31.271 L 67.861 27.547 L 76.754 79.255 C 77.507 83.633 72.007 86.214 69.12 82.837 L 48.297 58.467 L 46.173 68.067 C 45.071 73.049 39.987 76.061 35.088 74.636 L 12.911 68.184 L 16.822 97.506 C 17.321 101.242 15.391 104.883 12.02 106.569 L 0 112.579 L 52.383 142.512 C 57.809 145.613 60.187 152.189 57.998 158.042 L 53.52 170.019 L 98.405 166.187 C 100.889 165.975 103.003 167.975 102.93 170.466 L 101.516 218.51 L 110.344 218.51 L 108.929 170.464 C 108.856 167.972 110.97 165.973 113.454 166.185 L 158.36 170.019 L 153.882 158.042 C 151.695 152.188 154.072 145.611 159.498 142.511 Z" fill="rgb(255, 75, 85)" height="218.5099999999999px" id="vf0MUM7tN" transform="translate(150.071 63.973)" width="211.88099999999997px"/></g></g></svg>)
7 Days Blood Moons
The Fun Pimps & iLLOGIKA
Learn how Illogika dramatically reduced server costs & ensured the online experience the 7 Days to Die franchise expects.
Case Study

Authentic Online Warfare Requires the Ultimate Orchestration
Highwire Games
Learn how Highwire's need for performance required orchestration only Edgegap can deliver.
Case Study

22,000 Reviews, 4.8 Stars, and Infrastructure That Scaled Automatically
Sinn Studios
How a simple, Slack-supported integration got Sinn Studio's hit VR title online fast and keeps it there.
Case Study

" width="512.0000078124999px"><path d="M 170.667 335.449 L 8.828 335.449 C 3.953 335.449 0 331.496 0 326.621 L 0 8.828 C 0 3.953 3.953 0 8.828 0 L 170.667 0 Z" fill="rgb(65, 71, 155)" height="335.44900000000007px" id="oFMLHlRjX" transform="translate(0 0)" width="170.66699999999975px"/><path d="M 0 335.45 L 0 0 L 170.67 0 L 170.67 335.45 Z" fill="rgb(245, 245, 245)" height="335.44999999999993px" id="bJAhRrOsu" transform="translate(170.67 0.005)" width="170.66999999999996px"/><path d="M 161.839 335.448 L 0 335.448 L 0 0 L 161.839 0 C 166.714 0 170.667 3.953 170.667 8.828 L 170.667 326.621 C 170.667 331.497 166.714 335.448 161.839 335.448 Z" fill="rgb(255, 75, 85)" height="335.448px" id="g1RxeskUA" transform="translate(341.333 0.001)" width="170.66699999999992px"/></g></svg>)
Dynamic Server Orchestration
Under NDA - AAA Studio
Discover how one the world's biggest AAA studio improved its peer-to-peer multiplayer experience through edge computing.
Case Study

Near Zero Latency for AAA Fighting Game
AAA Studio - Under NDA
How an unannounced project delivered the lowest lag possible and improved fairness in its 1v1 game.
Case Study

Play Gods with Multiplayer Physics
Squido Studio
Learn how Squido uses Edgegap's highligh optimized game servers to deliver mind-bending & chaotic VR gameplay.
Case Study

A Fully Managed Solutions that Saves Time for Indies Multiplayer VR Horror
Dirty Pearl Studios
Discover how Dirty Pearl Studios saved development time thanks to Edgegap’s easy integration and automated orchestration alongside its Nakama integration.
Case Study
Instant Global Server Deployment for Collaborative XR Medical Education
AlensiaXR
How AlensiaXR uses Edgegap to deliver low-latency, always-available shared anatomy sessions to medical students worldwide.
Case Study

" width="512.0010000000001px"><path d="M 0 0 L 512 0 L 512 158.897 C 512 163.772 508.047 167.725 503.172 167.725 L 8.828 167.725 C 3.953 167.725 0 163.772 0 158.897 Z" fill="rgb(255, 75, 85)" height="167.72499999999923px" id="YJE0c7GLE" transform="translate(0 167.725)" width="512px"/><path d="M 512 167.725 L 0 167.725 L 0 8.828 C 0 3.953 3.953 0 8.828 0 L 503.173 0 C 508.048 0 512.001 3.953 512.001 8.828 L 512 167.725 Z" fill="rgb(245, 245, 245)" height="167.72500000000002px" id="XDGHOpzwZ" transform="translate(0 0)" width="512.0010000000001px"/></g></svg>)
The Lightkeepers: A VR Social Co-op Game with Dedicated Servers
Spectral Games
How Spectral Games used Edgegap Matchmaking and Server Browser to launch dedicated servers for its VR social lobby, with no prior server experience.
Case Study

Fast & reliable deployments worldwide for PvPvE challenger Gravebound
Crater Studios
How Edgegap’s orchestration and matchmaking helped Crater Studios dramatically helped a small them focus on gameplay instead of infrastructure.
Case Study

" width="512.0010000000001px"><path d="M 503.172 335.449 L 8.828 335.449 C 3.953 335.449 0 331.496 0 326.621 L 0 8.828 C 0 3.953 3.953 0 8.828 0 L 503.173 0 C 508.048 0 512.001 3.953 512.001 8.828 L 512.001 326.621 C 512 331.497 508.047 335.449 503.172 335.449 Z" fill="rgb(65, 115, 205)" height="335.44900000000007px" id="c30zpw8rU" transform="translate(0 0)" width="512.0010000000001px"/><path d="M 512 141.241 L 211.862 141.241 L 211.862 0 L 158.897 0 L 158.897 141.241 L 0 141.241 L 0 194.207 L 158.897 194.207 L 158.897 335.448 L 211.862 335.448 L 211.862 194.207 L 512 194.207 Z" fill="rgb(255, 225, 90)" height="335.4480000000001px" id="vJVGripqv" transform="translate(0 0.001)" width="512px"/></g></svg>)
Rapid Scaling of Web Metaverse
Hiber
Learn how Hiber eliminated the guesswork out of its server capacity planning with Edgegap.
Case Study
High Hardware Requirements & Custom Game Server Pools
Alderon Games
Learn how Alderon Games instantly leverages a custom pool of game servers across multiple providers worldwide for its popular MMO.
Case Study

Easy Integration for Indie Devs
WhaleFood Games
Read how WhaleFood Games "kicked out" its netcode issues with Edgegap.
Case Study

" width="512.0010000000001px"><path d="M 512 167.725 L 0 167.725 L 0 8.828 C 0 3.953 3.953 0 8.828 0 L 503.173 0 C 508.048 0 512.001 3.953 512.001 8.828 L 512 167.725 Z" fill="rgb(200, 65, 75)" height="167.72500000000002px" id="CxXieiVuO" transform="translate(0 0)" width="512.0010000000001px"/><path d="M 0 0 L 512 0 L 512 158.897 C 512 163.772 508.047 167.725 503.172 167.725 L 8.828 167.725 C 3.953 167.725 0 163.772 0 158.897 Z" fill="rgb(245, 245, 245)" height="167.72499999999923px" id="Ngt78qjyi" transform="translate(0 167.725)" width="512px"/></g></svg>)
Cutting-edge tech that powers South-East Asia’s first-ever eSports title.
Anantarupa Studios
Learn how Edgegap transformed South-East Asia’s gaming landscape streamlining complex infrastructure and cutting-edge tech with one seamless solution.
Case Study

" width="512.001px"><path d="M 512 111.817 L 0 111.817 L 0 8.828 C 0 3.953 3.953 0 8.828 0 L 503.173 0 C 508.048 0 512.001 3.953 512.001 8.828 L 512 111.817 Z" fill="rgb(245, 245, 245)" height="111.81700000000001px" id="EGwGlIKuR" width="512.001px"/><path d="M 503.172 111.816 L 8.828 111.816 C 3.953 111.816 0 107.863 0 102.988 L 0 0 L 512 0 L 512 102.988 C 512 107.864 508.047 111.816 503.172 111.816 Z" fill="rgb(255, 75, 85)" height="111.81600000000003px" id="amGDoEPua" transform="translate(0 223.633)" width="512px"/><path d="M 0 111.81 L 0 0 L 512 0 L 512 111.81 Z" fill="rgb(65, 71, 155)" height="111.80999999999997px" id="SAoZfFEJY" transform="translate(0 111.815)" width="512px"/><path d="M 64.018 167.147 C 61.405 165.646 0 129.931 0 75.034 L 0 0 L 132.414 0 L 132.414 75.034 C 132.414 129.931 71.009 165.646 68.396 167.147 L 66.207 168.396 Z" fill="rgb(255, 75, 85)" height="168.396px" id="u_PaEQybT" transform="translate(66.207 83.863)" width="132.414px"/><path d="M 69.36 48.552 L 48.551 51.293 L 41.616 51.293 L 41.616 38.875 L 45.777 38.875 L 62.423 41.616 L 60.169 31.939 L 62.423 22.262 L 45.777 25.002 L 41.616 25.002 L 41.616 20.808 L 44.356 0 L 34.68 2.819 L 25.004 0 L 27.744 20.808 L 27.744 25.002 L 23.581 25.002 L 6.936 22.262 L 9.19 31.939 L 6.936 41.616 L 23.581 38.875 L 27.744 38.875 L 27.744 51.293 L 20.808 51.293 L 0 48.552 L 2.818 58.228 L 0 67.905 L 20.808 65.164 L 27.744 65.164 L 27.744 97.104 L 41.616 97.104 L 41.616 65.164 L 48.551 65.164 L 69.36 67.905 L 66.542 58.228 Z" fill="rgb(245, 245, 245)" height="97.10400000000001px" id="YjflMXOAP" transform="translate(97.734 97.104)" width="69.36000000000001px"/><path d="M 44.009 0 C 34.891 0 27.071 5.532 23.707 13.419 C 23.113 13.37 22.545 13.241 21.94 13.241 C 10.189 13.241 0.674 22.451 0 34.032 C 17.875 56.036 40.264 69.148 41.82 70.043 L 44.009 71.293 L 46.198 70.043 C 47.754 69.148 70.143 56.037 88.018 34.032 C 87.344 22.451 77.829 13.241 66.078 13.241 C 65.473 13.241 64.905 13.37 64.311 13.419 C 60.947 5.532 53.127 0 44.009 0 Z" fill="rgb(65, 71, 155)" height="71.293px" id="WT5YdQe9l" transform="translate(88.405 180.966)" width="88.01799999999997px"/><path d="M 132.414 8.828 C 132.414 8.828 132.414 61.794 132.414 79.449 C 132.414 132.415 70.621 167.725 70.621 167.725 C 70.621 167.725 8.828 132.415 8.828 79.449 C 8.828 61.794 8.828 8.828 8.828 8.828 L 132.414 8.828 M 141.241 0 L 132.413 0 L 8.828 0 L 0 0 L 0 8.828 L 0 79.449 C 0 136.877 63.537 173.843 66.241 175.389 L 70.621 177.892 L 75.001 175.389 C 77.706 173.843 141.242 136.876 141.242 79.449 L 141.242 8.828 L 141.242 0 Z" fill="rgb(245, 245, 245)" height="177.89199999999997px" id="E_CZMIWSc" transform="translate(61.793 79.449)" width="141.24199999999996px"/></g></svg>)
One Strike. Global Reach.
Triple Hill Interactive
How Triple Hill Interactive leverages Edgegap's orchestration to deliver low latency and improve fairness in a genre where every millisecond counts.
Case Study

" width="512.0010000000001px"><path d="M 503.172 335.449 L 8.828 335.449 C 3.953 335.449 0 331.496 0 326.621 L 0 8.828 C 0 3.953 3.953 0 8.828 0 L 503.173 0 C 508.048 0 512.001 3.953 512.001 8.828 L 512.001 326.621 C 512 331.497 508.047 335.449 503.172 335.449 Z" fill="rgb(245, 245, 245)" height="335.44900000000007px" id="cCCLct8Da" transform="translate(0 0)" width="512.0010000000001px"/><path d="M 129.808 14.808 C 89.245 -12.233 34.458 -1.178 7.434 39.314 C -6.121 59.525 -0.611 86.988 19.669 100.509 C 39.934 114.03 67.309 108.539 80.83 88.257 C 94.351 67.976 121.744 62.553 142.008 76.003 C 162.306 89.524 167.765 116.987 154.225 137.198 C 181.267 96.638 170.336 41.85 129.808 14.808" fill="rgb(255, 75, 85)" height="137.19811402970538px" id="v5sfYHDtN" transform="translate(175.201 79.449)" width="169.07020884275516px"/><path d="M 14.833 0 C 1.278 20.211 6.788 47.674 27.068 61.195 C 47.333 74.716 74.708 69.225 88.229 48.943 C 101.75 28.662 129.143 23.239 149.407 36.689 C 169.705 50.21 175.164 77.673 161.624 97.884 C 134.618 138.516 79.849 149.433 39.286 122.391 C -1.24 95.351 -12.208 40.563 14.833 0" fill="rgb(65, 71, 155)" height="137.2355828090993px" id="gTXnIXsU0" transform="translate(167.801 118.764)" width="169.06172709346876px"/><g d="M 263.669 24.868 L 279.704 48.97 C 281.051 50.995 280.506 53.729 278.485 55.082 L 274.419 57.805 C 272.39 59.163 269.644 58.617 268.29 56.585 L 252.235 32.489 C 250.884 30.462 251.432 27.723 253.458 26.37 L 257.544 23.642 C 259.574 22.287 262.317 22.836 263.669 24.868 Z M 288.409 62.029 L 304.496 86.116 C 305.854 88.15 305.299 90.902 303.259 92.25 L 299.175 94.949 C 297.149 96.289 294.421 95.738 293.072 93.719 L 276.994 69.657 C 275.64 67.631 276.184 64.89 278.211 63.535 L 282.285 60.811 C 284.312 59.456 287.054 60.001 288.409 62.029 Z M 280.838 13.41 L 321.667 74.683 C 323.019 76.711 322.47 79.451 320.442 80.803 L 316.34 83.537 C 314.312 84.89 311.571 84.341 310.219 82.313 L 269.376 21.044 C 268.023 19.015 268.573 16.273 270.603 14.922 L 274.718 12.183 C 276.747 10.834 279.486 11.382 280.838 13.41 Z M 297.96 1.97 L 314.03 26.119 C 315.384 28.153 314.828 30.899 312.789 32.246 L 308.703 34.946 C 306.675 36.286 303.946 35.735 302.598 33.712 L 286.516 9.595 C 285.163 7.567 285.712 4.826 287.74 3.474 L 291.839 0.742 C 293.866 -0.611 296.608 -0.062 297.96 1.97 Z M 322.716 39.209 L 338.761 63.308 C 340.111 65.334 339.564 68.07 337.541 69.423 L 333.466 72.147 C 331.437 73.504 328.691 72.956 327.339 70.924 L 311.294 46.825 C 309.945 44.799 310.491 42.063 312.514 40.71 L 316.589 37.986 C 318.617 36.629 321.363 37.176 322.716 39.209 Z M 46.47 169.66 L 87.294 230.867 C 88.646 232.894 88.1 235.634 86.072 236.987 L 81.984 239.717 C 79.956 241.071 77.215 240.524 75.861 238.495 L 35.037 177.288 C 33.685 175.261 34.231 172.521 36.259 171.168 L 40.347 168.438 C 42.375 167.084 45.117 167.632 46.47 169.66 Z M 29.331 181.109 L 45.359 205.15 C 46.71 207.176 46.165 209.911 44.142 211.266 L 40.076 213.988 C 38.049 215.345 35.305 214.8 33.95 212.771 L 17.903 188.736 C 16.549 186.709 17.095 183.968 19.123 182.614 L 23.209 179.886 C 25.236 178.533 27.978 179.08 29.331 181.109 Z M 54.1 218.283 L 70.146 242.385 C 71.496 244.411 70.949 247.148 68.924 248.5 L 64.846 251.226 C 62.817 252.582 60.074 252.035 58.72 250.005 L 42.664 225.908 C 41.313 223.881 41.861 221.142 43.886 219.789 L 47.974 217.059 C 50.004 215.703 52.747 216.252 54.1 218.283 Z M 12.191 192.554 L 52.989 253.764 C 54.34 255.79 53.793 258.528 51.77 259.882 L 47.693 262.608 C 45.665 263.964 42.922 263.418 41.568 261.388 L 0.746 200.186 C -0.607 198.158 -0.058 195.417 1.97 194.064 L 6.072 191.33 C 8.098 189.978 10.839 190.526 12.191 192.554 Z M 35.043 86.12 L 75.861 24.863 C 77.214 22.833 79.956 22.285 81.985 23.639 L 86.072 26.368 C 88.099 27.721 88.645 30.461 87.294 32.488 L 46.46 93.711 C 45.11 95.734 42.379 96.284 40.352 94.942 L 36.281 92.247 C 34.243 90.899 33.689 88.152 35.043 86.12 Z M 17.896 74.687 L 58.721 13.418 C 60.074 11.388 62.818 10.84 64.847 12.196 L 68.924 14.922 C 70.948 16.275 71.494 19.011 70.144 21.038 L 29.33 82.31 C 27.977 84.34 25.235 84.889 23.206 83.534 L 19.118 80.805 C 17.092 79.453 16.545 76.714 17.896 74.687 Z M 0.739 63.303 L 41.568 1.973 C 42.921 -0.058 45.666 -0.607 47.695 0.749 L 51.772 3.475 C 53.796 4.828 54.342 7.562 52.994 9.589 L 12.19 70.928 C 10.839 72.959 8.096 73.509 6.067 72.156 L 1.965 69.422 C -0.062 68.07 -0.61 65.331 0.739 63.303 Z M 252.242 230.867 L 268.289 206.832 C 269.644 204.803 272.388 204.258 274.415 205.615 L 278.481 208.338 C 280.504 209.692 281.048 212.428 279.698 214.454 L 263.67 238.494 C 262.317 240.523 259.575 241.071 257.547 239.717 L 253.461 236.989 C 251.434 235.635 250.888 232.895 252.242 230.867 Z M 276.992 193.819 L 293.065 169.665 C 294.417 167.635 297.159 167.085 299.188 168.438 L 303.284 171.168 C 305.313 172.521 305.861 175.264 304.507 177.292 L 288.4 201.408 C 287.049 203.431 284.318 203.979 282.291 202.635 L 278.229 199.943 C 276.194 198.594 275.64 195.85 276.992 193.819 Z M 269.375 242.376 L 285.432 218.278 C 286.784 216.249 289.525 215.7 291.554 217.053 L 295.658 219.79 C 297.685 221.142 298.233 223.88 296.883 225.909 L 280.836 250.009 C 279.485 252.038 276.746 252.588 274.716 251.237 L 270.601 248.498 C 268.573 247.147 268.023 244.405 269.375 242.376 Z M 294.152 205.141 L 310.218 181.099 C 311.572 179.074 314.31 178.528 316.337 179.879 L 320.439 182.613 C 322.468 183.966 323.016 186.709 321.66 188.737 L 305.595 212.779 C 304.242 214.804 301.503 215.35 299.477 213.999 L 295.374 211.265 C 293.343 209.914 292.796 207.17 294.152 205.141 Z M 286.52 253.759 L 302.595 229.703 C 303.945 227.684 306.672 227.134 308.698 228.473 L 312.784 231.173 C 314.823 232.521 315.379 235.27 314.023 237.304 L 297.96 261.392 C 296.608 263.42 293.867 263.967 291.839 262.616 L 287.74 259.884 C 285.711 258.53 285.164 255.787 286.52 253.759 Z M 311.303 216.647 L 327.338 192.562 C 328.691 190.531 331.436 189.982 333.465 191.339 L 337.537 194.061 C 339.562 195.415 340.107 198.154 338.755 200.18 L 322.706 224.233 C 321.357 226.257 318.623 226.806 316.596 225.462 L 312.536 222.772 C 310.503 221.424 309.95 218.679 311.303 216.647 Z" fill="transparent" height="263.3571318398189px" id="lCNvJODvG" transform="translate(86.251 36.047)" width="339.5021952064517px"><path d="M 12.175 1.969 L 28.21 26.071 C 29.557 28.096 29.012 30.83 26.991 32.183 L 22.925 34.906 C 20.896 36.264 18.15 35.718 16.796 33.686 L 0.741 9.59 C -0.61 7.563 -0.062 4.824 1.964 3.471 L 6.05 0.743 C 8.08 -0.612 10.823 -0.063 12.175 1.969 Z" fill="rgb(70, 70, 85)" height="35.653004887132894px" id="ycHGraynn" transform="translate(251.494 22.898)" width="28.949224226348377px"/><path d="M 12.159 1.963 L 28.246 26.05 C 29.604 28.084 29.049 30.836 27.009 32.184 L 22.925 34.883 C 20.899 36.223 18.171 35.672 16.822 33.653 L 0.744 9.591 C -0.61 7.565 -0.066 4.824 1.961 3.469 L 6.035 0.745 C 8.062 -0.61 10.804 -0.065 12.159 1.963 Z" fill="rgb(70, 70, 85)" height="35.61505162784737px" id="ODMXhao7B" transform="translate(276.25 60.066)" width="28.98986021520443px"/><path d="M 12.204 1.966 L 53.033 63.239 C 54.385 65.267 53.836 68.007 51.808 69.359 L 47.706 72.093 C 45.678 73.446 42.937 72.897 41.585 70.869 L 0.742 9.6 C -0.611 7.571 -0.061 4.829 1.969 3.478 L 6.084 0.739 C 8.113 -0.61 10.852 -0.062 12.204 1.966 Z" fill="rgb(70, 70, 85)" height="72.83552656291968px" id="gAtjDJ8Ik" transform="translate(268.635 11.443)" width="53.77405604083742px"/><path d="M 12.186 1.97 L 28.256 26.119 C 29.61 28.153 29.054 30.899 27.015 32.246 L 22.929 34.946 C 20.901 36.286 18.172 35.735 16.824 33.712 L 0.742 9.595 C -0.611 7.567 -0.062 4.826 1.966 3.474 L 6.065 0.742 C 8.092 -0.611 10.834 -0.062 12.186 1.97 Z" fill="rgb(70, 70, 85)" height="35.67789736965542px" id="f0upNkuAE" transform="translate(285.774 0)" width="28.99624208292397px"/><path d="M 12.162 1.968 L 28.207 26.067 C 29.557 28.093 29.01 30.829 26.987 32.182 L 22.912 34.906 C 20.883 36.263 18.137 35.715 16.785 33.683 L 0.74 9.584 C -0.609 7.558 -0.063 4.822 1.96 3.469 L 6.035 0.745 C 8.063 -0.612 10.809 -0.065 12.162 1.968 Z" fill="rgb(70, 70, 85)" height="35.65170389226978px" id="g1IvjgcHB" transform="translate(310.554 37.24)" width="28.948026505279813px"/><path d="M 12.175 1.965 L 52.999 63.172 C 54.351 65.199 53.805 67.939 51.777 69.292 L 47.689 72.022 C 45.661 73.376 42.92 72.829 41.566 70.8 L 0.742 9.593 C -0.61 7.566 -0.064 4.826 1.964 3.473 L 6.052 0.743 C 8.08 -0.611 10.822 -0.063 12.175 1.965 Z" fill="rgb(70, 70, 85)" height="72.76560416064711px" id="DfSn3Pc_i" transform="translate(34.295 167.695)" width="53.74158297919352px"/><path d="M 12.172 1.966 L 28.2 26.007 C 29.551 28.033 29.006 30.768 26.983 32.123 L 22.917 34.845 C 20.89 36.202 18.146 35.657 16.791 33.628 L 0.744 9.593 C -0.61 7.566 -0.064 4.825 1.964 3.471 L 6.05 0.743 C 8.077 -0.61 10.819 -0.063 12.172 1.966 Z" fill="rgb(70, 70, 85)" height="35.59099170245332px" id="jByoEFF0s" transform="translate(17.16 179.143)" width="28.94190201423369px"/><path d="M 12.177 1.968 L 28.223 26.07 C 29.573 28.096 29.026 30.833 27.001 32.185 L 22.923 34.911 C 20.894 36.267 18.151 35.72 16.797 33.69 L 0.741 9.593 C -0.61 7.566 -0.062 4.827 1.963 3.474 L 6.051 0.744 C 8.081 -0.612 10.824 -0.063 12.177 1.968 Z" fill="rgb(70, 70, 85)" height="35.65609443432436px" id="cfwvk0dN9" transform="translate(41.923 216.315)" width="28.96370280245386px"/><path d="M 12.187 1.966 L 52.985 63.176 C 54.336 65.202 53.789 67.94 51.766 69.294 L 47.689 72.02 C 45.661 73.376 42.918 72.83 41.564 70.8 L 0.742 9.598 C -0.611 7.57 -0.062 4.829 1.966 3.476 L 6.068 0.742 C 8.094 -0.61 10.835 -0.062 12.187 1.966 Z" fill="rgb(70, 70, 85)" height="72.76486523911214px" id="IqyALdEZR" transform="translate(0.004 190.588)" width="53.726594621300734px"/><path d="M 0.741 63.224 L 41.559 1.967 C 42.912 -0.063 45.654 -0.611 47.683 0.743 L 51.77 3.472 C 53.797 4.825 54.343 7.565 52.992 9.592 L 12.158 70.815 C 10.808 72.838 8.077 73.388 6.05 72.046 L 1.979 69.351 C -0.059 68.003 -0.613 65.256 0.741 63.224 Z" fill="rgb(70, 70, 85)" height="72.77986922325502px" id="eu7akUuuY" transform="translate(34.303 22.896)" width="53.7333925108759px"/><path d="M 0.741 63.236 L 41.566 1.967 C 42.919 -0.063 45.663 -0.611 47.692 0.745 L 51.769 3.471 C 53.793 4.824 54.339 7.56 52.989 9.587 L 12.175 70.859 C 10.822 72.889 8.08 73.438 6.051 72.083 L 1.963 69.354 C -0.063 68.002 -0.61 65.263 0.741 63.236 Z" fill="rgb(70, 70, 85)" height="72.82608281373737px" id="BqIoabpdS" transform="translate(17.155 11.451)" width="53.730324651495074px"/><path d="M 0.739 63.298 L 41.568 1.968 C 42.921 -0.063 45.666 -0.612 47.695 0.744 L 51.772 3.47 C 53.796 4.823 54.342 7.557 52.994 9.584 L 12.19 70.923 C 10.839 72.954 8.096 73.504 6.067 72.151 L 1.965 69.417 C -0.062 68.065 -0.61 65.326 0.739 63.298 Z" fill="rgb(70, 70, 85)" height="72.89285657954811px" id="Ru83FJVt4" transform="translate(0 0.005)" width="53.73395842855223px"/><path d="M 0.744 25.998 L 16.791 1.963 C 18.146 -0.066 20.89 -0.611 22.917 0.746 L 26.983 3.469 C 29.006 4.823 29.55 7.559 28.2 9.585 L 12.172 33.625 C 10.819 35.654 8.077 36.202 6.049 34.848 L 1.963 32.12 C -0.064 30.766 -0.61 28.026 0.744 25.998 Z" fill="rgb(70, 70, 85)" height="35.59143200811687px" id="x3YbJM4yr" transform="translate(251.499 204.869)" width="28.94151305135091px"/><path d="M 0.739 26.123 L 16.812 1.969 C 18.164 -0.061 20.906 -0.611 22.935 0.742 L 27.031 3.472 C 29.06 4.825 29.608 7.568 28.254 9.596 L 12.147 33.712 C 10.796 35.735 8.065 36.283 6.038 34.939 L 1.976 32.247 C -0.059 30.898 -0.613 28.154 0.739 26.123 Z" fill="rgb(70, 70, 85)" height="35.674615562545625px" id="JWamSXmPn" transform="translate(276.253 167.696)" width="28.99757428163076px"/><path d="M 0.741 26.065 L 16.798 1.967 C 18.15 -0.062 20.891 -0.611 22.92 0.742 L 27.024 3.479 C 29.051 4.831 29.599 7.569 28.249 9.598 L 12.202 33.698 C 10.851 35.727 8.112 36.277 6.082 34.926 L 1.967 32.187 C -0.061 30.836 -0.611 28.094 0.741 26.065 Z" fill="rgb(70, 70, 85)" height="35.6663054618719px" id="wRX9_udCm" transform="translate(268.634 216.311)" width="28.98926678158773px"/><path d="M 0.745 26.004 L 16.811 1.962 C 18.165 -0.063 20.903 -0.609 22.93 0.742 L 27.032 3.476 C 29.061 4.829 29.609 7.572 28.253 9.6 L 12.188 33.642 C 10.835 35.667 8.096 36.213 6.07 34.862 L 1.967 32.128 C -0.064 30.777 -0.611 28.033 0.745 26.004 Z" fill="rgb(70, 70, 85)" height="35.6033871135171px" id="Lzz1KNGuY" transform="translate(293.408 179.137)" width="28.997456779853394px"/><path d="M 0.745 26.018 L 16.82 1.962 C 18.17 -0.057 20.897 -0.607 22.923 0.732 L 27.009 3.432 C 29.048 4.78 29.604 7.529 28.248 9.563 L 12.185 33.651 C 10.833 35.679 8.092 36.226 6.064 34.875 L 1.965 32.143 C -0.064 30.789 -0.611 28.046 0.745 26.018 Z" fill="rgb(70, 70, 85)" height="35.6159819374752px" id="A0idkIboh" transform="translate(285.776 227.741)" width="28.98956714730457px"/><path d="M 0.741 26.053 L 16.776 1.968 C 18.129 -0.063 20.874 -0.612 22.903 0.745 L 26.975 3.467 C 29 4.821 29.545 7.56 28.193 9.586 L 12.144 33.639 C 10.795 35.663 8.061 36.212 6.034 34.868 L 1.974 32.178 C -0.059 30.83 -0.612 28.085 0.741 26.053 Z" fill="rgb(70, 70, 85)" height="35.603519692695585px" id="rLYSPut_p" transform="translate(310.563 190.594)" width="28.93537083447484px"/></g></g></svg>)
Fast-paced Team Battle Royale... with Gun-totting Animal Plushes!
SANDYFLOOR
Discover how a Korea-based Indie Studio launched it multiplayer worldwide.
Case Study

" width="512.0010000000001px"><path d="M 503.172 335.449 L 8.828 335.449 C 3.953 335.449 0 331.496 0 326.621 L 0 8.828 C 0 3.953 3.953 0 8.828 0 L 503.173 0 C 508.048 0 512.001 3.953 512.001 8.828 L 512.001 326.621 C 512 331.497 508.047 335.449 503.172 335.449 Z" fill="rgb(255, 75, 85)" height="335.44900000000007px" id="o4EFIIQWk" transform="translate(0 0)" width="512.0010000000001px"/><path d="M 110.786 2.968 L 134.395 73.758 L 209.016 74.336 C 213.188 74.368 214.918 79.693 211.562 82.172 L 151.533 126.501 L 174.042 197.648 C 175.301 201.626 170.771 204.918 167.376 202.492 L 106.667 159.099 L 45.957 202.492 C 42.563 204.918 38.033 201.627 39.291 197.649 L 61.8 126.502 L 1.771 82.173 C -1.586 79.695 0.145 74.369 4.317 74.337 L 78.938 73.758 L 102.547 2.969 C 103.868 -0.99 109.466 -0.99 110.786 2.968 Z" fill="rgb(255, 225, 90)" height="203.32040523295515px" id="P6STu5elW" transform="translate(149.333 64.725)" width="213.33273524655823px"/></g></svg>)
Mobile Horse Racing Goes Global with Instant, Cost-Efficient Servers
Mirai Labs
How Mirai Labs powers Pegaxy Blaze's worldwide multiplayer races with just-in-time server deployment and fractional vCPU to keep cost per player low.
Case Study
Server Management & Distribution
Matrioshka Games
Read how Matrioshka Games were able to ship a Battle Royale in early access with limited ressources.
Case Study
At my Signal, Unleash Hell!
TyGames
Discover how Indie studio TyGames immerses players in third-person gladiatorial combat multiplayer.
Case Study
Instant Worldwide Orchestration
Soliton Interactive
Discover how Soliton Interactive did the impossible… Ship it's first playable as multiplayer!
Case Study

" width="512.0010000000001px"><path d="M 503.172 335.449 L 8.828 335.449 C 3.953 335.449 0 331.496 0 326.621 L 0 8.828 C 0 3.953 3.953 0 8.828 0 L 503.173 0 C 508.048 0 512.001 3.953 512.001 8.828 L 512.001 326.621 C 512 331.497 508.047 335.449 503.172 335.449 Z" fill="rgb(200, 65, 75)" height="335.44900000000007px" id="MlxFuckso" transform="translate(0 0)" width="512.0010000000001px"/><path d="M 0 61.793 L 0 0 L 512 0 L 512 61.793 Z" fill="rgb(245, 245, 245)" height="61.793000000000006px" id="u3fp3xqWC" transform="translate(0 136.825)" width="512px"/></g></svg>)
Competitive play with server-side physics ensures ideal sub-50 ms latency
NS7
Discover why solely Edgegap could enable an indie studio to deliver on its vision for a AAA-quality F2P sports gameplay through server-side physics and authority.
Case Study

" width="512.0010000000001px"><path d="M 503.172 335.449 L 8.828 335.449 C 3.953 335.449 0 331.496 0 326.621 L 0 8.828 C 0 3.953 3.953 0 8.828 0 L 503.173 0 C 508.048 0 512.001 3.953 512.001 8.828 L 512.001 326.621 C 512 331.497 508.047 335.449 503.172 335.449 Z" fill="rgb(115, 175, 0)" height="335.44900000000007px" id="XF0CA1kua" transform="translate(0 0)" width="512.0010000000001px"/><path d="M 190.294 1.287 L 4.238 114.538 C -1.413 117.977 -1.413 126.179 4.238 129.619 L 190.294 242.871 C 193.113 244.587 196.654 244.587 199.474 242.871 L 385.531 129.62 C 391.182 126.181 391.182 117.979 385.531 114.539 L 199.474 1.287 C 196.655 -0.429 193.113 -0.429 190.294 1.287 Z" fill="rgb(255, 225, 90)" height="244.15800000000002px" id="lacElszeU" transform="translate(61.116 45.646)" width="389.7694999999999px"/><path d="M 0 70.62 C 0 31.618 31.618 0 70.62 0 C 109.622 0 141.24 31.618 141.24 70.62 C 141.24 109.622 109.622 141.24 70.62 141.24 C 31.618 141.24 0 109.622 0 70.62 Z" fill="rgb(65, 71, 155)" height="141.24px" id="yn1LT8Oxg" transform="translate(185.38 97.105)" width="141.24px"/><g d="M 7.605 0.071 C 4.273 5.649 1.7 11.711 0 18.148 C 39.149 15.202 97.062 26.154 133.922 61.921 C 136.328 55.78 137.916 49.238 138.512 42.399 C 100.451 10.366 47.832 -1.025 7.605 0.071 Z M 71.129 60.297 L 73.009 65.935 L 78.952 65.981 C 79.721 65.987 80.04 66.969 79.422 67.426 L 74.641 70.957 L 76.434 76.623 C 76.666 77.357 75.83 77.964 75.205 77.516 L 70.37 74.06 L 65.535 77.516 C 64.909 77.964 64.074 77.357 64.306 76.623 L 66.099 70.957 L 61.318 67.426 C 60.699 66.969 61.018 65.987 61.787 65.981 L 67.73 65.935 L 69.61 60.297 C 69.853 59.567 70.885 59.567 71.129 60.297 Z M 94.228 74.882 L 95.037 77.308 L 97.595 77.328 C 97.926 77.33 98.064 77.753 97.797 77.95 L 95.739 79.469 L 96.51 81.908 C 96.61 82.224 96.251 82.485 95.981 82.292 L 93.9 80.805 L 91.819 82.292 C 91.55 82.485 91.19 82.224 91.29 81.908 L 92.061 79.469 L 90.003 77.95 C 89.737 77.754 89.874 77.331 90.205 77.328 L 92.763 77.308 L 93.572 74.882 C 93.678 74.567 94.123 74.567 94.228 74.882 Z M 61.142 49.587 L 61.951 52.013 L 64.509 52.033 C 64.84 52.035 64.978 52.458 64.711 52.655 L 62.653 54.174 L 63.424 56.613 C 63.524 56.929 63.165 57.19 62.895 56.997 L 60.814 55.51 L 58.733 56.997 C 58.464 57.19 58.104 56.929 58.204 56.613 L 58.975 54.174 L 56.917 52.655 C 56.651 52.459 56.788 52.036 57.119 52.033 L 59.677 52.013 L 60.486 49.587 C 60.592 49.273 61.037 49.273 61.142 49.587 Z M 16.334 46.645 L 17.143 49.071 L 19.701 49.091 C 20.032 49.093 20.17 49.516 19.903 49.713 L 17.845 51.232 L 18.616 53.671 C 18.716 53.987 18.357 54.248 18.087 54.055 L 16.006 52.568 L 13.925 54.055 C 13.656 54.248 13.296 53.987 13.396 53.671 L 14.167 51.232 L 12.109 49.713 C 11.843 49.517 11.98 49.094 12.311 49.091 L 14.869 49.071 L 15.678 46.645 C 15.785 46.331 16.229 46.331 16.334 46.645 Z M 53.818 74.044 L 54.627 76.47 L 57.185 76.49 C 57.516 76.492 57.654 76.915 57.387 77.112 L 55.329 78.631 L 56.1 81.07 C 56.2 81.386 55.841 81.647 55.571 81.454 L 53.49 79.967 L 51.409 81.454 C 51.14 81.647 50.78 81.386 50.88 81.07 L 51.651 78.631 L 49.593 77.112 C 49.327 76.916 49.464 76.493 49.795 76.49 L 52.353 76.47 L 53.162 74.044 C 53.269 73.731 53.714 73.731 53.818 74.044 Z M 33.194 44.952 L 33.856 46.936 L 35.948 46.953 C 36.218 46.955 36.331 47.301 36.114 47.462 L 34.431 48.704 L 35.062 50.698 C 35.144 50.956 34.85 51.17 34.629 51.012 L 32.927 49.796 L 31.225 51.012 C 31.004 51.17 30.711 50.956 30.792 50.698 L 31.423 48.704 L 29.74 47.462 C 29.523 47.301 29.634 46.955 29.906 46.953 L 31.998 46.936 L 32.66 44.952 C 32.745 44.695 33.108 44.695 33.194 44.952 Z M 96.023 3.991 L 96.851 6.473 L 99.467 6.493 C 99.806 6.495 99.946 6.928 99.673 7.129 L 97.569 8.683 L 98.358 11.178 C 98.461 11.501 98.092 11.768 97.817 11.571 L 95.688 10.049 L 93.559 11.571 C 93.283 11.769 92.916 11.5 93.018 11.178 L 93.807 8.683 L 91.703 7.129 C 91.43 6.928 91.571 6.496 91.909 6.493 L 94.525 6.473 L 95.353 3.991 C 95.461 3.669 95.916 3.669 96.023 3.991 Z M 19.216 32.814 L 19.878 34.798 L 21.97 34.815 C 22.24 34.817 22.353 35.163 22.136 35.324 L 20.453 36.566 L 21.084 38.56 C 21.166 38.818 20.872 39.032 20.651 38.874 L 18.949 37.658 L 17.247 38.874 C 17.026 39.032 16.733 38.818 16.814 38.56 L 17.445 36.566 L 15.762 35.324 C 15.545 35.163 15.656 34.818 15.928 34.815 L 18.02 34.798 L 18.682 32.814 C 18.767 32.557 19.13 32.557 19.216 32.814 Z M 29.316 60.778 L 30.318 63.784 L 33.486 63.808 C 33.896 63.811 34.066 64.334 33.736 64.578 L 31.187 66.46 L 32.143 69.48 C 32.267 69.871 31.822 70.195 31.488 69.956 L 28.91 68.114 L 26.332 69.956 C 25.999 70.194 25.553 69.871 25.677 69.48 L 26.633 66.46 L 24.084 64.578 C 23.754 64.334 23.924 63.811 24.334 63.808 L 27.502 63.784 L 28.504 60.778 C 28.637 60.39 29.187 60.39 29.316 60.778 Z M 107.107 75.512 L 107.737 77.403 L 109.73 77.418 C 109.988 77.42 110.095 77.749 109.888 77.902 L 108.285 79.086 L 108.886 80.986 C 108.964 81.232 108.684 81.435 108.473 81.285 L 106.852 80.126 L 105.23 81.285 C 105.02 81.435 104.74 81.232 104.817 80.986 L 105.418 79.086 L 103.815 77.902 C 103.608 77.749 103.715 77.42 103.973 77.418 L 105.966 77.403 L 106.596 75.512 C 106.679 75.267 107.026 75.267 107.107 75.512 Z M 114.081 61.082 L 114.89 63.508 L 117.448 63.528 C 117.779 63.53 117.917 63.953 117.65 64.15 L 115.592 65.669 L 116.363 68.108 C 116.463 68.424 116.104 68.685 115.834 68.492 L 113.753 67.005 L 111.672 68.492 C 111.403 68.685 111.043 68.424 111.143 68.108 L 111.914 65.669 L 109.856 64.15 C 109.59 63.954 109.727 63.531 110.058 63.528 L 112.616 63.508 L 113.425 61.082 C 113.531 60.767 113.976 60.767 114.081 61.082 Z" fill="transparent" height="82.35850740358373px" id="B22U7SVGG" transform="translate(187.796 131.527)" width="138.51199999999997px"><path d="M 7.605 0.071 C 4.273 5.649 1.7 11.711 0 18.148 C 39.149 15.202 97.062 26.154 133.922 61.921 C 136.328 55.78 137.916 49.238 138.512 42.399 C 100.451 10.366 47.832 -1.025 7.605 0.071 Z" fill="rgb(245, 245, 245)" height="61.921473126237345px" id="bTg9efNyw" width="138.51199999999997px"/><path d="M 10.138 0.548 L 12.018 6.185 L 17.961 6.231 C 18.73 6.237 19.049 7.219 18.431 7.676 L 13.65 11.207 L 15.443 16.873 C 15.675 17.607 14.839 18.214 14.214 17.766 L 9.379 14.31 L 4.544 17.766 C 3.918 18.214 3.083 17.607 3.315 16.873 L 5.108 11.207 L 0.327 7.676 C -0.292 7.219 0.027 6.237 0.796 6.231 L 6.739 6.185 L 8.619 0.548 C 8.862 -0.183 9.894 -0.183 10.138 0.548 Z" fill="rgb(245, 245, 245)" height="17.91960670288428px" id="O0CEZ6vpv" transform="translate(60.991 59.75)" width="18.7565376021994px"/><path d="M 4.365 0.236 L 5.174 2.662 L 7.732 2.682 C 8.063 2.684 8.201 3.107 7.934 3.304 L 5.876 4.823 L 6.647 7.262 C 6.747 7.578 6.388 7.839 6.118 7.646 L 4.037 6.159 L 1.956 7.646 C 1.687 7.839 1.327 7.578 1.427 7.262 L 2.198 4.823 L 0.14 3.304 C -0.126 3.108 0.011 2.685 0.342 2.682 L 2.9 2.662 L 3.709 0.236 C 3.815 -0.079 4.26 -0.079 4.365 0.236 Z" fill="rgb(245, 245, 245)" height="7.712282427997806px" id="lCSq4gWlc" transform="translate(89.863 74.646)" width="8.075170272227865px"/><path d="M 4.365 0.235 L 5.174 2.661 L 7.732 2.681 C 8.063 2.683 8.201 3.106 7.934 3.303 L 5.876 4.822 L 6.647 7.261 C 6.747 7.577 6.388 7.838 6.118 7.645 L 4.037 6.158 L 1.956 7.645 C 1.687 7.838 1.327 7.578 1.427 7.261 L 2.198 4.822 L 0.14 3.303 C -0.126 3.107 0.011 2.684 0.342 2.681 L 2.9 2.661 L 3.709 0.235 C 3.815 -0.078 4.26 -0.078 4.365 0.235 Z" fill="rgb(245, 245, 245)" height="7.711532427997767px" id="IsSCgSKbh" transform="translate(56.777 49.352)" width="8.075170272227844px"/><path d="M 4.365 0.235 L 5.174 2.661 L 7.732 2.681 C 8.063 2.683 8.201 3.106 7.934 3.303 L 5.876 4.822 L 6.647 7.261 C 6.747 7.577 6.388 7.838 6.118 7.645 L 4.037 6.158 L 1.956 7.645 C 1.687 7.838 1.327 7.578 1.427 7.261 L 2.198 4.822 L 0.14 3.303 C -0.126 3.107 0.011 2.684 0.342 2.681 L 2.9 2.661 L 3.709 0.235 C 3.816 -0.078 4.26 -0.078 4.365 0.235 Z" fill="rgb(245, 245, 245)" height="7.711532427997767px" id="TW2NtG63f" transform="translate(11.969 46.41)" width="8.075170272227838px"/><path d="M 4.365 0.235 L 5.174 2.661 L 7.732 2.681 C 8.063 2.683 8.201 3.106 7.934 3.303 L 5.876 4.822 L 6.647 7.261 C 6.747 7.577 6.388 7.838 6.118 7.645 L 4.037 6.158 L 1.956 7.645 C 1.687 7.838 1.327 7.577 1.427 7.261 L 2.198 4.822 L 0.14 3.303 C -0.126 3.107 0.011 2.684 0.342 2.681 L 2.9 2.661 L 3.709 0.235 C 3.816 -0.078 4.261 -0.078 4.365 0.235 Z" fill="rgb(245, 245, 245)" height="7.710782427997771px" id="s_erDFpu_" transform="translate(49.453 73.81)" width="8.075170272227844px"/><path d="M 3.569 0.193 L 4.231 2.177 L 6.323 2.194 C 6.593 2.196 6.706 2.542 6.489 2.703 L 4.806 3.945 L 5.437 5.939 C 5.519 6.197 5.225 6.411 5.004 6.253 L 3.302 5.037 L 1.6 6.253 C 1.379 6.411 1.086 6.197 1.167 5.939 L 1.798 3.945 L 0.115 2.703 C -0.102 2.542 0.009 2.196 0.281 2.194 L 2.373 2.177 L 3.035 0.193 C 3.12 -0.064 3.483 -0.064 3.569 0.193 Z" fill="rgb(245, 245, 245)" height="6.306769772597434px" id="dusRwlxlw" transform="translate(29.625 44.76)" width="6.6027792152261px"/><path d="M 4.464 0.242 L 5.292 2.724 L 7.908 2.744 C 8.247 2.746 8.387 3.179 8.114 3.38 L 6.01 4.934 L 6.799 7.429 C 6.902 7.752 6.533 8.019 6.258 7.822 L 4.129 6.3 L 2 7.822 C 1.724 8.02 1.357 7.751 1.459 7.429 L 2.248 4.934 L 0.144 3.38 C -0.129 3.179 0.012 2.746 0.35 2.744 L 2.966 2.724 L 3.794 0.242 C 3.902 -0.081 4.357 -0.081 4.464 0.242 Z" fill="rgb(245, 245, 245)" height="7.889096442946011px" id="FpqSfzWHc" transform="translate(91.559 3.75)" width="8.25829728228689px"/><path d="M 3.569 0.193 L 4.231 2.177 L 6.323 2.194 C 6.593 2.196 6.706 2.542 6.489 2.703 L 4.806 3.945 L 5.437 5.939 C 5.519 6.197 5.225 6.411 5.004 6.253 L 3.302 5.037 L 1.6 6.253 C 1.379 6.411 1.086 6.197 1.167 5.939 L 1.798 3.945 L 0.115 2.703 C -0.102 2.542 0.009 2.197 0.281 2.194 L 2.373 2.177 L 3.035 0.193 C 3.12 -0.064 3.483 -0.064 3.569 0.193 Z" fill="rgb(245, 245, 245)" height="6.3067697725973915px" id="qIdFBWWdp" transform="translate(15.647 32.622)" width="6.602779215226105px"/><path d="M 5.406 0.291 L 6.408 3.297 L 9.576 3.321 C 9.986 3.324 10.156 3.847 9.826 4.091 L 7.277 5.973 L 8.233 8.993 C 8.357 9.384 7.912 9.708 7.578 9.469 L 5 7.627 L 2.422 9.469 C 2.089 9.707 1.643 9.384 1.767 8.993 L 2.723 5.973 L 0.174 4.091 C -0.156 3.847 0.014 3.324 0.424 3.321 L 3.592 3.297 L 4.594 0.291 C 4.727 -0.097 5.277 -0.097 5.406 0.291 Z" fill="rgb(245, 245, 245)" height="9.550662337295933px" id="e7G6cbAKf" transform="translate(23.91 60.487)" width="10.000311588842724px"/><path d="M 3.401 0.184 L 4.031 2.075 L 6.024 2.09 C 6.282 2.092 6.389 2.421 6.182 2.574 L 4.579 3.758 L 5.18 5.658 C 5.258 5.904 4.978 6.107 4.767 5.957 L 3.146 4.798 L 1.524 5.957 C 1.314 6.107 1.034 5.904 1.111 5.658 L 1.712 3.758 L 0.109 2.574 C -0.098 2.421 0.009 2.092 0.267 2.09 L 2.26 2.075 L 2.89 0.184 C 2.973 -0.061 3.32 -0.061 3.401 0.184 Z" fill="rgb(245, 245, 245)" height="6.00804378735296px" id="wSeVAZjIw" transform="translate(103.706 75.329)" width="6.291188041482457px"/><path d="M 4.365 0.236 L 5.174 2.662 L 7.732 2.682 C 8.063 2.684 8.201 3.107 7.934 3.304 L 5.876 4.823 L 6.647 7.262 C 6.747 7.578 6.388 7.839 6.118 7.646 L 4.037 6.159 L 1.956 7.646 C 1.687 7.839 1.327 7.578 1.427 7.262 L 2.198 4.823 L 0.14 3.304 C -0.126 3.108 0.011 2.685 0.342 2.682 L 2.9 2.662 L 3.709 0.236 C 3.815 -0.079 4.26 -0.079 4.365 0.236 Z" fill="rgb(245, 245, 245)" height="7.712282427997778px" id="geZET5ldv" transform="translate(109.716 60.846)" width="8.075170272227865px"/></g></g></svg>)
Regional Deployments for iGaming
X1 Contra 1
X1 Contra 1 delivers real-time PvP casual games to its Brazilian player base through cost-effective hosting & regional deployments, ensuring data and legal compliance.
Case Study

" width="512.0010000000001px"><path d="M 503.172 335.449 L 8.828 335.449 C 3.953 335.449 0 331.496 0 326.621 L 0 8.828 C 0 3.953 3.953 0 8.828 0 L 503.173 0 C 508.048 0 512.001 3.953 512.001 8.828 L 512.001 326.621 C 512 331.497 508.047 335.449 503.172 335.449 Z" fill="rgb(65, 71, 155)" height="335.44900000000007px" id="oRUr3tSM2" transform="translate(0 0)" width="512.0010000000001px"/><path d="M 247.172 0 L 231.838 0 L 150.068 53.574 L 150.068 0 L 105.93 0 L 105.93 53.574 L 24.16 0 L 8.828 0 C 3.953 0 0 3.952 0 8.827 L 0 15.829 L 70.155 61.792 L 0 61.792 L 0 105.93 L 70.155 105.93 L 0 151.894 L 0 158.896 C 0 163.771 3.953 167.724 8.828 167.724 L 24.162 167.724 L 105.932 114.15 L 105.932 167.724 L 150.07 167.724 L 150.07 114.15 L 231.839 167.724 L 247.173 167.724 C 252.048 167.724 256.001 163.771 256.001 158.896 L 256.001 151.894 L 185.846 105.931 L 256 105.931 L 256 61.793 L 185.845 61.793 L 256 15.83 L 256 8.828 C 256 3.952 252.047 0 247.172 0 Z" fill="rgb(245, 245, 245)" height="167.72399999999996px" id="JN7k2Rbkt" transform="translate(0 0.001)" width="256.0010000000001px"/><g d="M 256 70.621 L 141.241 70.621 L 141.241 0 L 114.759 0 L 114.759 70.621 L 0 70.621 L 0 97.103 L 114.759 97.103 L 114.759 167.724 L 141.241 167.724 L 141.241 97.103 L 256 97.103 Z M 97.103 61.793 L 4.207 1.492 C 1.735 3.056 0 5.685 0 8.827 L 0 9.285 L 80.889 61.793 Z M 166.283 61.793 L 254.657 4.427 C 253.121 1.828 250.411 0 247.172 0 L 245.263 0 L 150.069 61.793 Z M 89.474 105.931 L 1.269 163.187 C 2.79 165.849 5.542 167.724 8.828 167.724 L 10.493 167.724 L 105.689 105.931 Z M 255.86 159.589 L 173.194 105.931 L 156.98 105.931 L 250.854 166.866 C 253.666 165.561 255.595 162.826 255.86 159.589 Z M 395.474 279.837 C 395.116 279.837 394.755 279.724 394.448 279.509 L 384 272.043 L 373.551 279.509 C 373.245 279.724 372.883 279.837 372.525 279.837 C 372.159 279.837 371.797 279.724 371.487 279.5 C 370.875 279.052 370.612 278.259 370.84 277.535 L 374.715 265.293 L 364.388 257.673 C 363.776 257.216 363.522 256.432 363.755 255.708 C 363.992 254.984 364.66 254.492 365.423 254.484 L 378.264 254.38 L 382.325 242.199 C 382.567 241.484 383.243 240.992 384.002 240.992 C 384.761 240.992 385.438 241.483 385.679 242.199 L 389.74 254.38 L 402.581 254.484 C 403.344 254.493 404.012 254.984 404.249 255.708 C 404.482 256.432 404.227 257.216 403.616 257.673 L 393.289 265.293 L 397.164 277.535 C 397.392 278.259 397.13 279.052 396.517 279.5 C 396.203 279.724 395.837 279.837 395.474 279.837 Z" fill="transparent" height="279.83700439453116px" id="iohiX_nhu" transform="translate(0 0.001)" width="404.3343130299322px"><path d="M 256 70.621 L 141.241 70.621 L 141.241 0 L 114.759 0 L 114.759 70.621 L 0 70.621 L 0 97.103 L 114.759 97.103 L 114.759 167.724 L 141.241 167.724 L 141.241 97.103 L 256 97.103 Z" fill="rgb(255, 75, 85)" height="167.724px" id="u_QvVDyhk" width="256px"/><path d="M 97.103 60.301 L 4.207 0 C 1.735 1.564 0 4.193 0 7.335 L 0 7.793 L 80.889 60.301 Z" fill="rgb(255, 75, 85)" height="60.30099999999999px" id="VrtjWyLYe" transform="translate(0 1.492)" width="97.103px"/><path d="M 16.214 61.793 L 104.588 4.427 C 103.052 1.828 100.342 0 97.103 0 L 95.194 0 L 0 61.793 Z" fill="rgb(255, 75, 85)" height="61.793000000000006px" id="AcASLTAjz" transform="translate(150.069 0)" width="104.58800000000002px"/><path d="M 88.205 0 L 0 57.256 C 1.521 59.918 4.273 61.793 7.559 61.793 L 9.224 61.793 L 104.42 0 Z" fill="rgb(255, 75, 85)" height="61.793000000000006px" id="u8eftdJGu" transform="translate(1.269 105.931)" width="104.41999999999999px"/><path d="M 98.88 53.658 L 16.214 0 L 0 0 L 93.874 60.935 C 96.686 59.63 98.615 56.895 98.88 53.658 Z" fill="rgb(255, 75, 85)" height="60.935px" id="j2ee5cEF6" transform="translate(156.98 105.931)" width="98.88000000000002px"/><path d="M 31.804 38.845 C 31.446 38.845 31.085 38.732 30.778 38.517 L 20.33 31.051 L 9.881 38.517 C 9.575 38.732 9.213 38.845 8.855 38.845 C 8.489 38.845 8.127 38.732 7.817 38.508 C 7.205 38.06 6.942 37.267 7.17 36.543 L 11.045 24.301 L 0.718 16.681 C 0.106 16.224 -0.148 15.44 0.085 14.716 C 0.322 13.992 0.99 13.5 1.753 13.492 L 14.594 13.388 L 18.655 1.207 C 18.897 0.492 19.573 0 20.332 0 C 21.091 0 21.768 0.491 22.009 1.207 L 26.07 13.388 L 38.911 13.492 C 39.674 13.501 40.342 13.992 40.579 14.716 C 40.812 15.44 40.557 16.224 39.946 16.681 L 29.619 24.301 L 33.494 36.543 C 33.722 37.267 33.46 38.06 32.847 38.508 C 32.533 38.732 32.167 38.845 31.804 38.845 Z" fill="rgb(255, 75, 85)" height="38.844999999999914px" id="RKPrtsJ7l" transform="translate(363.67 240.992)" width="40.66478788344784px"/></g><path d="M 22.095 3.531 L 26.556 16.909 L 40.658 17.018 L 29.313 25.395 L 33.567 38.84 L 22.095 30.641 L 10.622 38.842 L 14.876 25.397 L 3.531 17.02 L 17.633 16.911 L 22.095 3.531 M 22.095 0 C 20.576 0 19.226 0.972 18.745 2.414 L 15.082 13.398 L 3.504 13.488 C 1.985 13.499 0.643 14.482 0.173 15.928 C -0.297 17.374 0.212 18.957 1.433 19.86 L 10.747 26.738 L 7.255 37.777 C 6.797 39.226 7.317 40.806 8.546 41.699 C 9.165 42.148 9.893 42.373 10.622 42.373 C 11.341 42.373 12.061 42.153 12.676 41.714 L 22.096 34.981 L 31.516 41.714 C 32.131 42.152 32.85 42.373 33.569 42.373 C 34.297 42.373 35.026 42.148 35.645 41.699 C 36.874 40.805 37.394 39.226 36.936 37.777 L 33.444 26.738 L 42.758 19.86 C 43.981 18.957 44.488 17.374 44.018 15.928 C 43.548 14.483 42.207 13.499 40.687 13.488 L 29.109 13.398 L 25.446 2.414 C 24.964 0.973 23.614 0 22.095 0 Z" fill="rgb(245, 245, 245)" height="42.372999999999934px" id="ByJ397rbf" transform="translate(361.905 239.228)" width="44.191510438092266px"/><path d="M 31.804 38.844 C 31.442 38.844 31.085 38.731 30.778 38.516 L 20.33 31.043 L 9.881 38.517 C 9.575 38.732 9.213 38.845 8.855 38.845 C 8.493 38.845 8.127 38.732 7.817 38.508 C 7.205 38.06 6.942 37.267 7.17 36.543 L 11.045 24.301 L 0.718 16.672 C 0.106 16.215 -0.148 15.422 0.085 14.707 C 0.322 13.983 0.994 13.491 1.753 13.483 L 14.594 13.388 L 18.655 1.207 C 18.897 0.492 19.573 0 20.332 0 C 21.091 0 21.768 0.491 22.009 1.207 L 26.07 13.388 L 38.911 13.483 C 39.67 13.492 40.342 13.983 40.579 14.707 C 40.812 15.422 40.557 16.215 39.946 16.672 L 29.619 24.301 L 33.494 36.543 C 33.722 37.267 33.46 38.06 32.847 38.508 C 32.533 38.732 32.167 38.844 31.804 38.844 Z" fill="rgb(255, 75, 85)" height="38.84499999999997px" id="aNUwPW0UJ" transform="translate(363.67 98.674)" width="40.66478788344784px"/><path d="M 22.095 3.531 L 26.556 16.909 L 40.658 17.018 L 29.313 25.395 L 33.567 38.841 L 22.095 30.64 L 10.622 38.841 L 14.876 25.395 L 3.531 17.018 L 17.633 16.909 L 22.095 3.531 M 22.095 0 C 20.576 0 19.226 0.972 18.745 2.414 L 15.082 13.398 L 3.504 13.488 C 1.985 13.499 0.643 14.482 0.173 15.928 C -0.297 17.374 0.212 18.957 1.433 19.86 L 10.747 26.738 L 7.255 37.777 C 6.797 39.226 7.317 40.806 8.546 41.699 C 9.165 42.148 9.893 42.373 10.622 42.373 C 11.341 42.373 12.061 42.153 12.676 41.714 L 22.096 34.981 L 31.516 41.714 C 32.131 42.152 32.85 42.373 33.569 42.373 C 34.297 42.373 35.026 42.148 35.645 41.699 C 36.874 40.805 37.394 39.226 36.936 37.777 L 33.444 26.738 L 42.758 19.86 C 43.981 18.957 44.488 17.374 44.018 15.928 C 43.548 14.482 42.207 13.499 40.687 13.488 L 29.109 13.398 L 25.446 2.414 C 24.964 0.972 23.614 0 22.095 0 Z" fill="rgb(245, 245, 245)" height="42.37299999999999px" id="a6u1Vdmyv" transform="translate(361.905 96.907)" width="44.191510438092266px"/><path d="M 31.803 38.845 C 31.441 38.845 31.084 38.732 30.777 38.517 L 20.33 31.043 L 9.881 38.517 C 9.575 38.732 9.213 38.845 8.855 38.845 C 8.493 38.845 8.127 38.732 7.817 38.508 C 7.205 38.06 6.942 37.267 7.17 36.543 L 11.045 24.301 L 0.718 16.672 C 0.106 16.215 -0.148 15.422 0.085 14.707 C 0.322 13.983 0.994 13.491 1.753 13.483 L 14.594 13.388 L 18.655 1.207 C 18.897 0.492 19.573 0 20.332 0 C 21.091 0 21.768 0.491 22.009 1.207 L 26.07 13.388 L 38.911 13.483 C 39.67 13.492 40.342 13.983 40.579 14.707 C 40.812 15.422 40.557 16.215 39.946 16.672 L 29.619 24.301 L 33.494 36.543 C 33.722 37.267 33.46 38.06 32.847 38.508 C 32.532 38.732 32.166 38.845 31.803 38.845 Z" fill="rgb(255, 75, 85)" height="38.84499999999997px" id="FlA4ZQrf5" transform="translate(425.464 142.811)" width="40.66478788344784px"/><path d="M 22.095 3.531 L 26.556 16.909 L 40.658 17.018 L 29.313 25.395 L 33.567 38.841 L 22.094 30.64 L 10.621 38.841 L 14.875 25.396 L 3.53 17.019 L 17.632 16.91 L 22.095 3.531 M 22.095 0 C 20.576 0 19.226 0.972 18.745 2.414 L 15.082 13.398 L 3.504 13.488 C 1.985 13.499 0.643 14.482 0.173 15.928 C -0.297 17.374 0.212 18.957 1.433 19.86 L 10.747 26.738 L 7.255 37.777 C 6.797 39.226 7.317 40.806 8.546 41.699 C 9.165 42.148 9.893 42.373 10.622 42.373 C 11.341 42.373 12.061 42.153 12.675 41.714 L 22.095 34.981 L 31.515 41.714 C 32.13 42.152 32.849 42.373 33.569 42.373 C 34.297 42.373 35.026 42.148 35.645 41.699 C 36.874 40.805 37.394 39.226 36.936 37.777 L 33.444 26.738 L 42.758 19.86 C 43.981 18.957 44.488 17.374 44.018 15.928 C 43.548 14.482 42.207 13.499 40.687 13.488 L 29.109 13.398 L 25.446 2.414 C 24.964 0.972 23.615 0 22.095 0 Z" fill="rgb(245, 245, 245)" height="42.37299999999996px" id="W5itgutsT" transform="translate(423.698 141.045)" width="44.19151043809232px"/><path d="M 31.803 38.845 C 31.441 38.845 31.084 38.732 30.777 38.517 L 20.33 31.043 L 9.881 38.517 C 9.575 38.732 9.213 38.845 8.855 38.845 C 8.493 38.845 8.127 38.732 7.817 38.508 C 7.205 38.06 6.942 37.267 7.17 36.543 L 11.045 24.301 L 0.718 16.672 C 0.106 16.215 -0.148 15.422 0.085 14.707 C 0.322 13.983 0.994 13.491 1.753 13.483 L 14.594 13.388 L 18.655 1.207 C 18.897 0.492 19.573 0 20.332 0 C 21.091 0 21.768 0.491 22.009 1.207 L 26.07 13.388 L 38.911 13.483 C 39.67 13.492 40.342 13.983 40.579 14.707 C 40.812 15.422 40.557 16.215 39.946 16.672 L 29.619 24.301 L 33.494 36.543 C 33.722 37.267 33.46 38.06 32.847 38.508 C 32.532 38.733 32.166 38.845 31.803 38.845 Z" fill="rgb(255, 75, 85)" height="38.84500000000003px" id="ZR0QmOJss" transform="translate(301.878 160.466)" width="40.6647878834479px"/><path d="M 22.095 3.531 L 26.556 16.909 L 40.658 17.018 L 29.313 25.395 L 33.567 38.841 L 22.094 30.64 L 10.621 38.841 L 14.875 25.395 L 3.53 17.018 L 17.632 16.909 L 22.095 3.531 M 22.095 0 C 20.576 0 19.226 0.972 18.745 2.414 L 15.082 13.398 L 3.504 13.488 C 1.985 13.499 0.643 14.482 0.173 15.928 C -0.297 17.374 0.212 18.957 1.433 19.86 L 10.747 26.738 L 7.255 37.777 C 6.797 39.226 7.317 40.806 8.546 41.699 C 9.165 42.148 9.893 42.373 10.622 42.373 C 11.341 42.373 12.061 42.153 12.675 41.714 L 22.095 34.981 L 31.515 41.714 C 32.13 42.152 32.849 42.373 33.568 42.373 C 34.296 42.373 35.025 42.148 35.644 41.699 C 36.873 40.805 37.393 39.226 36.935 37.777 L 33.443 26.738 L 42.757 19.86 C 43.98 18.957 44.487 17.374 44.017 15.928 C 43.547 14.482 42.206 13.499 40.686 13.488 L 29.108 13.398 L 25.445 2.414 C 24.964 0.972 23.614 0 22.095 0 Z" fill="rgb(245, 245, 245)" height="42.372999999999934px" id="vDCsZAdom" transform="translate(300.112 158.7)" width="44.19051043809229px"/></g></svg>)
Pay Only When Players Play: Affordable Multiplayer Infrastructure
Meltdown Interactive
How Edgegap helped indie developer Meltdown Interactive Media solve cost-effective scaling and matchmaking without the complexity, so they could focus on building the game.
Case Study

One Edgegap platform, three very different networking profiles
Warped Games
How Warped Games runs a social hub, real-time co-op, and turn-based co-op, all on the same Edgegap deployment API and the same container pipeline.
Case Study
" width="512.001px"><path d="M 512 111.817 L 0 111.817 L 0 8.828 C 0 3.953 3.953 0 8.828 0 L 503.173 0 C 508.048 0 512.001 3.953 512.001 8.828 L 512 111.817 Z" fill="rgb(255, 75, 85)" height="111.81700000000001px" id="vQYTMiGey" transform="translate(0 0)" width="512.001px"/><path d="M 503.172 111.816 L 8.828 111.816 C 3.953 111.816 0 107.863 0 102.988 L 0 0 L 512 0 L 512 102.988 C 512 107.864 508.047 111.816 503.172 111.816 Z" fill="rgb(70, 70, 85)" height="111.81600000000003px" id="DALciVNY9" transform="translate(0 223.633)" width="512px"/><path d="M 0 111.81 L 0 0 L 512 0 L 512 111.81 Z" fill="rgb(245, 245, 245)" height="111.80999999999997px" id="MWcFh48hf" transform="translate(0 111.815)" width="512px"/><path d="M 56.373 26.707 C 56.373 22.33 52.084 19.238 47.932 20.623 L 40.128 23.224 L 38.233 11.78 C 37.1 4.954 31.25 0 24.327 0 L 17.028 0 L 9.394 9.396 L 19.503 9.396 L 16.674 23.368 L 8.441 20.624 C 4.288 19.239 0 22.331 0 26.708 L 0 74.183 L 11.363 62.82 L 6.009 78.881 L 0.001 78.881 L 0.001 88.277 L 56.374 88.277 L 56.374 78.881 L 50.366 78.881 L 45.012 62.82 L 56.375 74.183 L 56.375 26.707 Z M 23.49 78.879 L 15.916 78.879 L 21.124 64.97 L 23.49 67.991 L 23.49 78.879 Z M 32.884 78.879 L 32.884 67.991 L 35.25 64.97 L 40.458 78.879 Z M 28.187 61.85 C 28.187 61.85 13.653 52.014 14.241 33.664 C 14.241 33.664 23.197 32.196 28.187 24.268 C 33.178 32.195 42.134 33.664 42.134 33.664 C 42.721 52.015 28.187 61.85 28.187 61.85 Z" fill="rgb(240, 199, 39)" height="88.27700000000002px" id="TGF8Mq4HK" transform="translate(227.813 123.588)" width="56.375px"/></g></svg>)
Pool Live Tour Max
RETA Games
Case Study

Korea’s Web3 POP Extraction Shooter Goes Global, Instantly
NDUS Entertainment
How XOCIETY easily added Edgegap orchestration & integrated custom matchmaking working alongside Edgegap Ping Beacons to optimize latency.
Case Study

Multiplayer in Every Dimension
Arcadia.tv
Discover how Arcadia.tv uses Edgegap's edge network to deliver an innovative, team and location-based athletic VR sport.
Case Study

F2P Mobile Fighter Cuts Infrastructure Costs With Just-in-Time Servers
Game Changers Worldwide
How Game Changer Worldwide hosted Rumble Rush's real-time 3v3 PvP globally on mobile.
Case Study
Key reasons why they chose Edgegap
Discover the impact of Edgegap's automated game server orchestration for a flawless multiplayer experience.