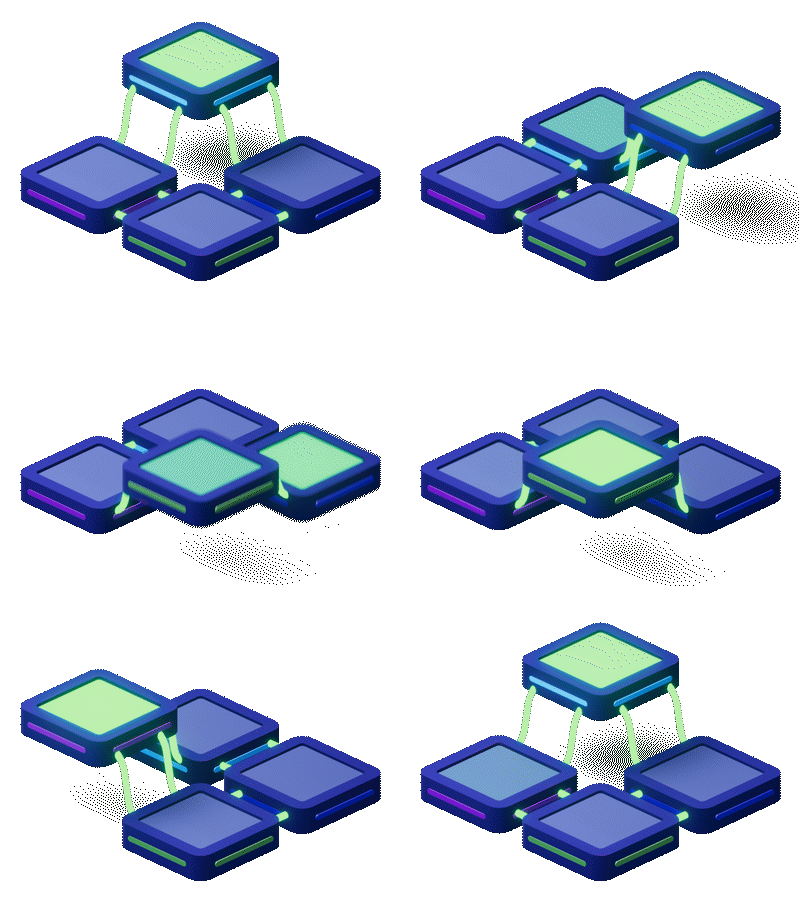
本指南向您展示如何保留 Unity Gaming Services (UGS) Matchmaker,并在 Edgegap 的专属游戏服务器上托管每场比赛:当 UGS 组成一场比赛时,Edgegap 会在玩家附近部署一台服务器,UGS 会将其地址分发给每位玩家。
一旦您的游戏服务器完成容器化,Edgegap 即可通过简单的 API 调用将其按需部署到全球 615+ 个边缘云节点,并完全按用量计费:无需租用整台服务器、预配置或在比赛间隙保持运行。对于需要预留容量的持久服务器,Edgegap 提供了专用机群 (Private Fleets)。
两者之间的桥梁是 Edgegap 的分配器 (allocator),这是一个由 Unity 官方分发的轻量级 Cloud Code 模块。当比赛形成时,UGS 会调用它,它会请求 Edgegap 部署您的服务器,然后将服务器的地址和端口返回给 UGS,再由 UGS 传递给您的玩家。

本指南涵盖:
准备一个可用的 Edgegap 应用版本及您的 UGS 项目
将您的编程智能体连接到 Edgegap(可选)
开启 UGS 服务
配置并部署 Edgegap 的分配器
将匹配客户端添加到您的游戏中
创建您的队列和比赛规则
使用两名玩家进行测试
您可以通过两种方式进行操作,也可以结合使用:
使用编程智能体。将 Claude Code、Cursor 或其他智能体连接到 Edgegap MCP 服务器及其 agent skills。智能体将配置分配器、编写匹配客户端并检查您的应用版本及部署。您只需在 Unity 和 Unity Cloud 控制面板中进行点击操作、管理密钥以及进行游戏测试。
手动操作。以下每个步骤均可在没有智能体的情况下完成。
更喜欢无需 Cloud Code 的托管撮合服务?请参阅 Unity 對局配對 SDK。
1. 开始之前
一个免费的 Edgegap 账户。请验证您的电子邮箱。测试无需信用卡。
游戏服务器的一个正常运行的 Edgegap 应用版本:即您至少部署并加入过一次的服务器。UGS 将在每场比赛中部署该版本,因此它需要一个功能完备的容器化游戏服务器来实现端到端运行。如果您目前还没有,请参考我们的指南:
已关联到 Unity Cloud 的 Unity 项目(前往 Edit → Project Settings → Services 可查看已关联的项目及其 ID)。
.NET SDK 8 或更高版本,用于部署 Cloud Code 模块。使用
dotnet --version检查版本。Edgegap API 令牌,可从 Dashboard → User Settings → Tokens 获取。它将在第 4 步中存入 Cloud Code 密钥,切勿用于其他任何地方:该令牌适用于整个组织,因此切勿将其放入您的项目、游戏客户端、游戏服务器或聊天中。
在此,我们使用 Edgegap 对 Unity Boss Room 示例的复刻版本,该版本已作为专用服务器运行,并包含匹配客户端。
2. 将您的代码代理连接到 Edgegap
如果您全程手动操作,请跳过此步骤。
Edgegap MCP 服务器允许您的智能体检查您的应用和版本、部署测试服务器并读取您账户上的日志。edgegap-deployments-api 智能体技能为它提供了部署 Edgegap 服务器的后端规则(包括 UGS Cloud Code):令牌的存放位置、将服务器部署在玩家附近以及处理错误。
Claude Code:安装 Edgegap 插件。它会同时添加 MCP 服务器和技能,并在安装过程中要求提供您的 API 令牌(存储在系统的凭据存储中):
/plugin marketplace add edgegap/edgegap-agent-skills,然后运行 /plugin install edgegap@edgegap。重启会话。
如果只需要 MCP 服务器,而不需要插件?请在您自己的终端中运行以下命令:claude mcp add --transport http edgegap https://mcp.edgegap.dev/mcp -H "Authorization: token YOUR_EDGEGAP_API_TOKEN" --scope user。切勿两者都做,否则您将拥有两个 edgegap 服务器。
Cursor、VS Code 和其他支持发送请求头的客户端:添加 https://mcp.edgegap.dev/mcp 并附带请求头 Authorization: token YOUR_EDGEGAP_API_TOKEN,然后使用 npx skills add edgegap/edgegap-agent-skills --skill "*" 安装技能。
Claude Desktop:自定义连接器无法发送请求头,因此请改用本地服务器(Node 18+):{ "mcpServers": { "edgegap": { "command": "npx", "args": ["-y", "@edgegap/mcp"] } } }。它会在首次使用时要求提供令牌。
检查其是否正常工作:
“列出我的 Edgegap 应用及其版本,以及每个版本的端口。”
请记下确切的应用程序名称、版本名称和端口名称:步骤 4 会用到它们。
3. 开启 UGS 服务
此集成使用三项 UGS 服务:Authentication、Matchmaker 和 Cloud Code。跳过你的项目中已有的服务。
在 Unity 中,打开Window → Package Manager,将来源设置为 Unity Registry,然后安装 Cloud Code 和 Multiplayer Services(其中包含 Matchmaker 并会引入 Authentication)。
在 cloud.unity.com 上,打开你的项目并启用 Authentication、Matchmaker 和 Cloud Code。
请注意你的环境(默认为 production)。密钥、模块和队列必须全部位于同一个环境中。
4. 配置并部署 Edgegap 的分配器 (allocator)
分配器位于 Unity 的 matchmaker hosting providers 存储库中,独立于您的游戏项目。
将其克隆到您的项目旁边:
git clone https://github.com/Unity-Technologies/matchmaker-hosting-providers.git打开 Edgegap 分配器的
EdgegapAllocator.cs并设置标记为TODO的三个常量,直接从 Edgegap 仪表板复制,不要重新手动输入:ApplicationName(您的应用程序)、VersionName(您的应用版本)和PortName(gameport)。将EdgegapApiTokenSecretName保留为EDGEGAP_API_TOKEN。在 Unity Cloud 仪表板中,在Administration → Secrets下,在同一环境中添加一个机密:键为
EDGEGAP_API_TOKEN,值仅为您自己的 Edgegap API 令牌,不包含多余的单词或空格。在 Unity 中,在项目中创建一个 Cloud Code C# Module Reference,并将其指向克隆存储库中的分配器解决方案文件 (
.sln)。如果将其指向其他任何内容,将部署一个空模板,尽管看起来像是部署成功了。打开 Services → Deployment,勾选该模块,选择您的环境,然后选择 Deploy Selected。
检查是否成功生效:在 Unity Cloud 仪表板中,该模块会显示两个端点:
Matchmaker_AllocateServer和Matchmaker_PollAllocation,每个端点都会返回分配器自己的类型。如果返回类型仅为“string”,则表示引用指向了错误的文件。

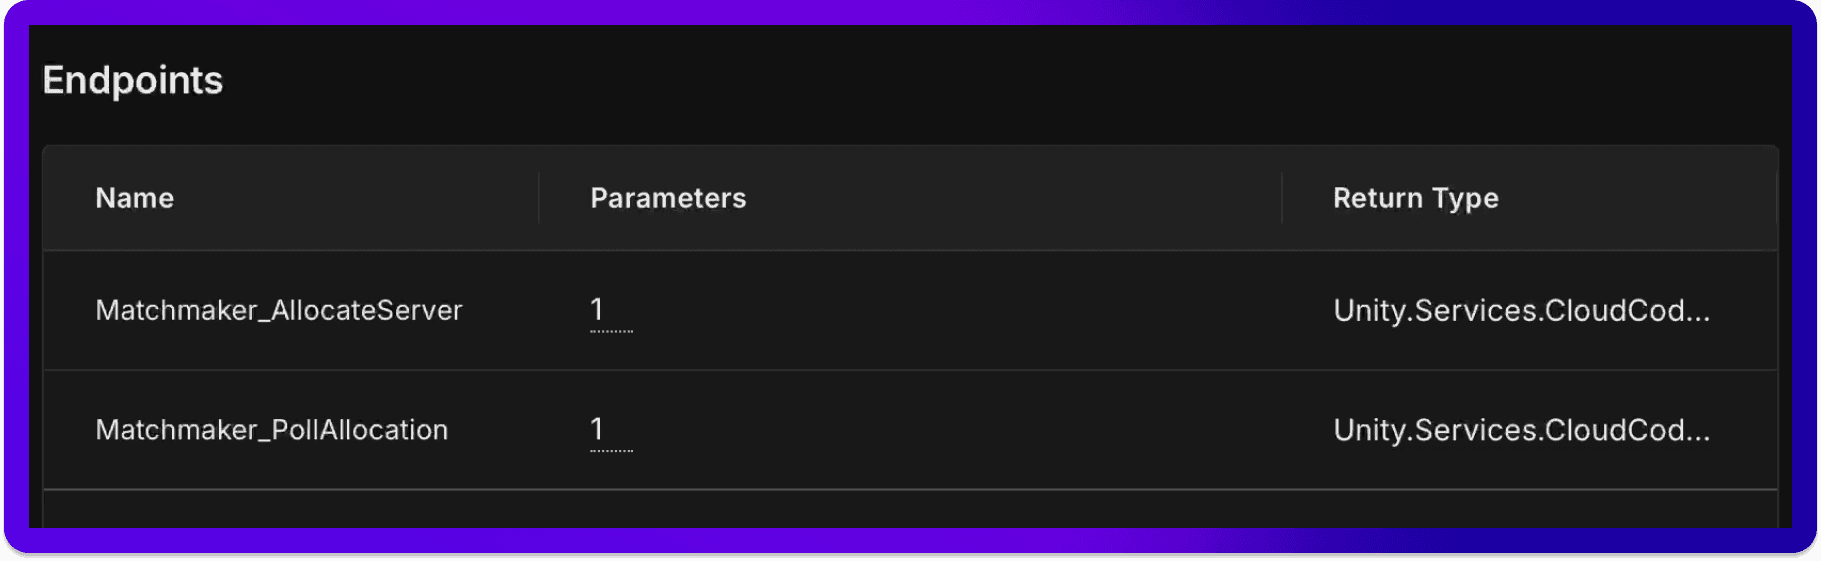
配合您的智能体使用:“在克隆的 matchmaker-hosting-providers 存储库中,将 EdgegapAllocator.cs 中的 ApplicationName、VersionName 和 PortName 设置为我的 Edgegap 应用、版本和端口。不要更改机密名称,也不要在任何地方写入我的令牌。”机密的添加和模块的部署需要您自行完成。
以下是我们结合 Edgegap 使用 UGS Matchmaker 的视频教程,其中使用了 Edgegap 派生的 Boss Room 版本:
5. 将匹配客户端添加到您的游戏中
您的游戏需要一个客户端来完成以下操作:让玩家登录、在您的队列中创建票证(ticket)、等待分配,然后连接到服务器。仅连接调用取决于您的网络代码(在 Boss Room 中为 StartClientIp)。
在每位玩家的票证中发送其公网 IP。Edgegap 会根据玩家的位置来部署服务器;若没有 IP,部署将回退到默认位置。将其作为 player_ip 添加到票证的属性中;Edgegap 文档中包含用于获取该 IP 的代码片段。
还没有客户端?向任何 AI 编码助手提供以下提示词:
“在不更改我的网络代码的情况下,为我的游戏添加一个独立的 Unity Gaming Services Matchmaker 客户端。首先,进行审核(只读)并告诉我:我的项目用于通过地址和端口将客户端连接到服务器的方法(文件、行号、签名以及端口参数的类型),以及所使用的传输层协议(transport)。然后创建一个 MonoBehaviour,用于初始化 UGS 并匿名登录;为了进行同机测试,在登录前为每个运行实例设置唯一的配置文件(profile);获取玩家的公网 IP;使用已登录的玩家 ID 以及作为 player_ip 属性的 IP 在序列化的队列名称字段上创建票证;最多每 3 秒轮询一次票证,重试失败的轮询,直到收到分配或超时;然后将分配的 IP 和端口传递给我的连接方法,并将端口转换为其所需的类型。添加一个临时的屏幕‘Matchmake’按钮。保持代码精简并附带注释。”
然后将其添加到您的初始场景中:创建一个名为 Matchmaker 的空游戏对象,添加该组件,并将其队列名称设置为您在步骤 6 中创建的队列。
6. 创建队列和匹配规则
在 Unity Cloud 仪表板中,打开 Matchmaker:
创建一个队列(例如
mygame-queue),在此测试中每个票据最多包含 2 名玩家。在队列中创建一个池,并将其托管类型设置为 Hosting via Cloud Code。将其指向您的模块、其 allocate 端点及其 poll 端点。默认的分配超时时间为 Edgegap 留出足够的时间来启动服务器。
为最简单的测试设置匹配规则:一个队伍,队伍数量为 1,玩家数量最少和最多均为 2。保持回填(backfill)处于关闭状态。
保存。队列变为激活状态,现在您的配对程序即可部署到 Edgegap。
然后根据 Unity 的 Matchmaker 文档针对您的游戏调整规则(队伍大小、技能范围、区域)。Edgegap 只需要分配器。
7. 双人测试
在一台机器上运行两个客户端。使用 Edgegap 的 Boss Room 分支时,请使用 ParrelSync(已包含),而不是 Multiplayer Play Mode。
在两个客户端中都选择 Matchmake。UGS 会将两张票证分组,调用您的分配器,并且 Edgegap 会在玩家附近部署一台服务器。您可以在 Edgegap 控制面板中看到它出现,并带有撮合程序的标记。
两名玩家会自动连接到同一台服务器。服务器的容器日志会显示输入了两张票证,输出了一场比赛。
离开比赛:比赛结束时,您的服务器会自动停止其自身的部署(请参阅您的服务器指南),因此您只需在玩家游玩时付费。
分配器通过轮询 Edgegap 的状态 API 来获取每台服务器的地址,这对于大多数游戏来说已经足够了。对于超大规模的发布活动(数万名并发玩家),请改用 Edgegap 的就绪 webhook,相关说明请参阅 Edgegap 文档。
正从 Multiplay 迁移?Edgegap 的文档将 Multiplay 概念对应到了 Edgegap。更喜欢无需维护 Cloud Code 的托管撮合系统?请参阅Unity 對局配對 SDK。
准备上线?让您的代理运行 edgegap-launch 技能的检查清单:版本发布、重启策略、最长持续时间、成本控制。
遇到困难?让您的代理加载 edgegap-troubleshoot,或在 Edgegap Discord 上向我们的团队和其他工作室咨询。
常见问题
关于在 Edgegap 专属服务器上托管 Unity Gaming Services Matchmaker 比赛的常见问题。
我可以在继续使用 Unity 的 UGS 匹配系统(Matchmaker)的同时,将服务器托管在 Edgegap 上吗?
是的。将您的队列和规则保留在 UGS 中,并将 Edgegap 的分配器添加为 Cloud Code 模块。当比赛形成时,它会在 Edgegap 上部署您的服务器,并将地址和端口返回给 UGS,UGS 再将其提供给您的玩家。
适用于 UGS 的 Edgegap 分配器是官方的吗?
是的。这是一个官方且经过 Unity 批准的集成,发布在 Unity 的 matchmaker 托管提供商代码库中。您只需设置应用程序、版本和端口,将令牌添加为 Secret,然后进行部署即可。
我的 Edgegap API 令牌应该配置在 UGS 的哪里?
只能保存在名为 EDGEGAP_API_TOKEN 的 Cloud Code 密钥中,且该密钥需与您的模块和队列位于同一环境中。切勿保存在您的游戏客户端、游戏服务器或项目文件中。
Edgegap 是如何为 UGS 比赛选择服务器位置的?
通过玩家匹配工单中发送的公网 IP 地址,Edgegap 为整个组选取 ping 值最低的位置。如果没有 IP,部署将回退到默认位置。
我应该使用 UGS Matchmaker 还是 Edgegap 的撮合系统?
如果您的游戏已在使用 UGS 的撮合系统或其他 Unity Gaming Services,请继续保留它。Edgegap 的撮合系统采用托管模式,可免费测试,无需 Cloud Code,并能自动在玩家附近部署服务器。

客户
了解更多已接入 Edgegap 的客户案例
提供 31 个从其他平台迁移至 Edgegap 的工作室案例研究。

" width="512.001px"><path d="M 503.172 335.449 L 8.828 335.449 C 3.953 335.449 0 331.496 0 326.621 L 0 8.828 C 0 3.953 3.953 0 8.828 0 L 503.173 0 C 508.048 0 512.001 3.953 512.001 8.828 L 512.001 326.621 C 512 331.497 508.047 335.449 503.172 335.449 Z" fill="rgb(245, 245, 245)" height="335.44900000000007px" id="Ef8xUEsN1" transform="translate(0 0)" width="512.001px"/><g d="M 512 25.805 L 0 25.805 L 0 8.828 C 0 3.953 3.953 0 8.828 0 L 503.173 0 C 508.048 0 512.001 3.953 512.001 8.828 L 512 25.805 Z M 0 129.019 L 0 103.215 L 512 103.215 L 512 129.019 Z M 0 77.409 L 0 51.605 L 512 51.605 L 512 77.409 Z M 512 180.627 L 8.828 180.627 C 3.953 180.627 0 176.674 0 171.799 L 0 154.822 L 512 154.822 Z M 0 283.849 L 0 258.045 L 512 258.045 L 512 283.849 Z M 503.172 335.449 L 8.828 335.449 C 3.953 335.449 0 331.496 0 326.621 L 0 309.645 L 512 309.645 L 512 326.622 C 512 331.497 508.047 335.449 503.172 335.449 Z M 0 232.239 L 0 206.435 L 512 206.435 L 512 232.239 Z" fill="transparent" height="335.44898901367185px" id="DuXUCmwlK" transform="translate(0 0)" width="512.001px"><path d="M 512 25.805 L 0 25.805 L 0 8.828 C 0 3.953 3.953 0 8.828 0 L 503.173 0 C 508.048 0 512.001 3.953 512.001 8.828 L 512 25.805 Z" fill="rgb(255, 75, 85)" height="25.805000000000007px" id="nkfHKvOft" width="512.001px"/><path d="M 0 25.804 L 0 0 L 512 0 L 512 25.804 Z" fill="rgb(255, 75, 85)" height="25.803999999999988px" id="feRiBFumj" transform="translate(0 103.215)" width="512px"/><path d="M 0 25.804 L 0 0 L 512 0 L 512 25.804 Z" fill="rgb(255, 75, 85)" height="25.803999999999974px" id="fRN_72QiR" transform="translate(0 51.605)" width="512px"/><path d="M 512 25.805 L 8.828 25.805 C 3.953 25.805 0 21.852 0 16.977 L 0 0 L 512 0 Z" fill="rgb(255, 75, 85)" height="25.80499999999995px" id="quqGY_mqy" transform="translate(0 154.822)" width="512px"/><path d="M 0 25.804 L 0 0 L 512 0 L 512 25.804 Z" fill="rgb(255, 75, 85)" height="25.803999999999974px" id="wILMFtF89" transform="translate(0 258.045)" width="512px"/><path d="M 503.172 25.804 L 8.828 25.804 C 3.953 25.804 0 21.851 0 16.976 L 0 0 L 512 0 L 512 16.977 C 512 21.852 508.047 25.804 503.172 25.804 Z" fill="rgb(255, 75, 85)" height="25.803999999999974px" id="snPoHI_aw" transform="translate(0 309.645)" width="512px"/><path d="M 0 25.804 L 0 0 L 512 0 L 512 25.804 Z" fill="rgb(255, 75, 85)" height="25.803999999999974px" id="oiaqIY9TT" transform="translate(0 206.435)" width="512px"/></g><path d="M 229.517 0 L 8.828 0 C 3.953 0 0 3.952 0 8.827 L 0 171.797 C 0 176.672 3.953 180.625 8.828 180.625 L 229.518 180.625 C 234.393 180.625 238.346 176.672 238.346 171.797 L 238.346 8.827 C 238.345 3.952 234.392 0 229.517 0 Z" fill="rgb(65, 71, 155)" height="180.625px" id="Hg2itSn3m" transform="translate(0 0.001)" width="238.346px"/><g d="M 10.536 0.569 L 12.49 6.429 L 18.667 6.476 C 19.467 6.483 19.798 7.503 19.155 7.978 L 14.186 11.648 L 16.05 17.537 C 16.292 18.299 15.423 18.931 14.772 18.465 L 9.747 14.874 L 4.722 18.466 C 4.071 18.931 3.204 18.3 3.444 17.538 L 5.308 11.649 L 0.339 7.979 C -0.304 7.503 0.027 6.484 0.827 6.477 L 7.004 6.43 L 8.958 0.57 C 9.21 -0.19 10.282 -0.19 10.536 0.569 Z M 10.536 31.223 L 12.49 37.083 L 18.667 37.13 C 19.467 37.137 19.798 38.157 19.155 38.632 L 14.186 42.302 L 16.05 48.191 C 16.292 48.953 15.423 49.585 14.772 49.119 L 9.747 45.528 L 4.722 49.12 C 4.071 49.585 3.204 48.954 3.444 48.192 L 5.308 42.303 L 0.339 38.633 C -0.304 38.157 0.027 37.138 0.827 37.131 L 7.004 37.084 L 8.958 31.224 C 9.21 30.465 10.282 30.465 10.536 31.223 Z M 10.536 61.877 L 12.49 67.737 L 18.667 67.784 C 19.467 67.791 19.798 68.811 19.155 69.286 L 14.186 72.956 L 16.05 78.845 C 16.292 79.607 15.423 80.239 14.772 79.773 L 9.747 76.182 L 4.722 79.774 C 4.071 80.239 3.204 79.608 3.444 78.846 L 5.308 72.957 L 0.339 69.287 C -0.304 68.811 0.027 67.792 0.827 67.785 L 7.004 67.738 L 8.958 61.878 C 9.21 61.119 10.282 61.119 10.536 61.877 Z M 10.536 92.532 L 12.49 98.392 L 18.667 98.439 C 19.467 98.446 19.798 99.466 19.155 99.941 L 14.186 103.611 L 16.05 109.5 C 16.292 110.262 15.423 110.894 14.772 110.428 L 9.747 106.837 L 4.722 110.429 C 4.071 110.894 3.204 110.263 3.444 109.501 L 5.308 103.612 L 0.339 99.942 C -0.304 99.466 0.027 98.447 0.827 98.44 L 7.004 98.393 L 8.958 92.533 C 9.21 91.773 10.282 91.773 10.536 92.532 Z M 10.536 123.186 L 12.49 129.046 L 18.667 129.093 C 19.467 129.1 19.798 130.12 19.155 130.595 L 14.186 134.265 L 16.05 140.154 C 16.292 140.916 15.423 141.548 14.772 141.082 L 9.747 137.491 L 4.722 141.083 C 4.071 141.548 3.204 140.917 3.444 140.155 L 5.308 134.266 L 0.339 130.596 C -0.304 130.12 0.027 129.101 0.827 129.094 L 7.004 129.047 L 8.958 123.187 C 9.21 122.426 10.282 122.426 10.536 123.186 Z M 34.329 15.598 L 36.283 21.458 L 42.46 21.505 C 43.26 21.512 43.591 22.532 42.948 23.007 L 37.979 26.677 L 39.843 32.566 C 40.085 33.328 39.216 33.96 38.565 33.494 L 33.54 29.902 L 28.515 33.494 C 27.864 33.959 26.997 33.328 27.237 32.566 L 29.101 26.677 L 24.132 23.007 C 23.489 22.531 23.82 21.512 24.62 21.505 L 30.797 21.458 L 32.751 15.598 C 33.002 14.84 34.076 14.84 34.329 15.598 Z M 34.329 46.253 L 36.283 52.113 L 42.46 52.16 C 43.26 52.167 43.591 53.187 42.948 53.662 L 37.979 57.332 L 39.843 63.221 C 40.085 63.983 39.216 64.615 38.565 64.149 L 33.54 60.557 L 28.515 64.149 C 27.864 64.614 26.997 63.984 27.237 63.221 L 29.101 57.332 L 24.132 53.662 C 23.489 53.186 23.82 52.167 24.62 52.16 L 30.797 52.113 L 32.751 46.253 C 33.002 45.494 34.076 45.494 34.329 46.253 Z M 34.329 76.907 L 36.283 82.767 L 42.46 82.814 C 43.26 82.821 43.591 83.841 42.948 84.316 L 37.979 87.986 L 39.843 93.875 C 40.085 94.637 39.216 95.269 38.565 94.803 L 33.54 91.211 L 28.515 94.803 C 27.864 95.268 26.997 94.637 27.237 93.875 L 29.101 87.986 L 24.132 84.316 C 23.489 83.84 23.82 82.821 24.62 82.814 L 30.797 82.767 L 32.751 76.907 C 33.002 76.148 34.076 76.148 34.329 76.907 Z M 34.329 107.561 L 36.283 113.421 L 42.46 113.468 C 43.26 113.475 43.591 114.495 42.948 114.97 L 37.979 118.64 L 39.843 124.529 C 40.085 125.291 39.216 125.923 38.565 125.457 L 33.54 121.865 L 28.515 125.457 C 27.864 125.922 26.997 125.291 27.237 124.529 L 29.101 118.64 L 24.132 114.97 C 23.489 114.494 23.82 113.475 24.62 113.468 L 30.797 113.421 L 32.751 107.561 C 33.002 106.803 34.076 106.803 34.329 107.561 Z M 58.122 0.569 L 60.076 6.429 L 66.253 6.476 C 67.053 6.483 67.384 7.503 66.741 7.978 L 61.772 11.648 L 63.636 17.537 C 63.878 18.299 63.009 18.931 62.358 18.465 L 57.333 14.873 L 52.308 18.465 C 51.657 18.93 50.79 18.299 51.03 17.537 L 52.894 11.648 L 47.925 7.978 C 47.282 7.502 47.613 6.483 48.413 6.476 L 54.59 6.429 L 56.544 0.569 C 56.796 -0.19 57.869 -0.19 58.122 0.569 Z M 58.122 31.223 L 60.076 37.083 L 66.253 37.13 C 67.053 37.137 67.384 38.157 66.741 38.632 L 61.772 42.302 L 63.636 48.191 C 63.878 48.953 63.009 49.585 62.358 49.119 L 57.333 45.527 L 52.308 49.119 C 51.657 49.584 50.79 48.953 51.03 48.191 L 52.894 42.302 L 47.925 38.632 C 47.282 38.156 47.613 37.137 48.413 37.13 L 54.59 37.083 L 56.544 31.223 C 56.796 30.465 57.869 30.465 58.122 31.223 Z M 58.122 61.877 L 60.076 67.737 L 66.253 67.784 C 67.053 67.791 67.384 68.811 66.741 69.286 L 61.772 72.956 L 63.636 78.845 C 63.878 79.607 63.009 80.239 62.358 79.773 L 57.333 76.181 L 52.308 79.773 C 51.657 80.238 50.79 79.607 51.03 78.845 L 52.894 72.956 L 47.925 69.286 C 47.282 68.81 47.613 67.791 48.413 67.784 L 54.59 67.737 L 56.544 61.877 C 56.796 61.119 57.869 61.119 58.122 61.877 Z M 58.122 92.532 L 60.076 98.392 L 66.253 98.439 C 67.053 98.446 67.384 99.466 66.741 99.941 L 61.772 103.611 L 63.636 109.5 C 63.878 110.262 63.009 110.894 62.358 110.428 L 57.333 106.836 L 52.308 110.428 C 51.657 110.893 50.79 110.262 51.03 109.5 L 52.894 103.611 L 47.925 99.941 C 47.282 99.465 47.613 98.446 48.413 98.439 L 54.59 98.392 L 56.544 92.532 C 56.796 91.773 57.869 91.773 58.122 92.532 Z M 58.122 123.186 L 60.076 129.046 L 66.253 129.093 C 67.053 129.1 67.384 130.12 66.741 130.595 L 61.772 134.265 L 63.636 140.154 C 63.878 140.916 63.009 141.548 62.358 141.082 L 57.333 137.49 L 52.308 141.082 C 51.657 141.547 50.79 140.916 51.03 140.154 L 52.894 134.265 L 47.925 130.595 C 47.282 130.119 47.613 129.1 48.413 129.093 L 54.59 129.046 L 56.544 123.186 C 56.796 122.426 57.869 122.426 58.122 123.186 Z M 81.916 15.598 L 83.87 21.458 L 90.047 21.505 C 90.847 21.512 91.178 22.532 90.535 23.007 L 85.566 26.677 L 87.43 32.566 C 87.672 33.328 86.803 33.96 86.152 33.494 L 81.127 29.902 L 76.102 33.494 C 75.451 33.959 74.584 33.328 74.824 32.566 L 76.688 26.677 L 71.719 23.007 C 71.076 22.531 71.407 21.512 72.207 21.505 L 78.384 21.458 L 80.338 15.598 C 80.589 14.84 81.663 14.84 81.916 15.598 Z M 81.916 46.253 L 83.87 52.113 L 90.047 52.16 C 90.847 52.167 91.178 53.187 90.535 53.662 L 85.566 57.332 L 87.43 63.221 C 87.672 63.983 86.803 64.615 86.152 64.149 L 81.127 60.557 L 76.102 64.149 C 75.451 64.614 74.584 63.984 74.824 63.221 L 76.688 57.332 L 71.719 53.662 C 71.076 53.186 71.407 52.167 72.207 52.16 L 78.384 52.113 L 80.338 46.253 C 80.589 45.494 81.663 45.494 81.916 46.253 Z M 81.916 76.907 L 83.87 82.767 L 90.047 82.814 C 90.847 82.821 91.178 83.841 90.535 84.316 L 85.566 87.986 L 87.43 93.875 C 87.672 94.637 86.803 95.269 86.152 94.803 L 81.127 91.211 L 76.102 94.803 C 75.451 95.268 74.584 94.637 74.824 93.875 L 76.688 87.986 L 71.719 84.316 C 71.076 83.84 71.407 82.821 72.207 82.814 L 78.384 82.767 L 80.338 76.907 C 80.589 76.148 81.663 76.148 81.916 76.907 Z M 81.916 107.561 L 83.87 113.421 L 90.047 113.468 C 90.847 113.475 91.178 114.495 90.535 114.97 L 85.566 118.64 L 87.43 124.529 C 87.672 125.291 86.803 125.923 86.152 125.457 L 81.127 121.865 L 76.102 125.457 C 75.451 125.922 74.584 125.291 74.824 124.529 L 76.688 118.64 L 71.719 114.97 C 71.076 114.494 71.407 113.475 72.207 113.468 L 78.384 113.421 L 80.338 107.561 C 80.589 106.803 81.663 106.803 81.916 107.561 Z M 105.709 0.569 L 107.663 6.429 L 113.84 6.476 C 114.64 6.483 114.971 7.503 114.328 7.978 L 109.359 11.648 L 111.223 17.537 C 111.465 18.299 110.596 18.931 109.945 18.465 L 104.919 14.873 L 99.894 18.465 C 99.243 18.93 98.376 18.299 98.616 17.537 L 100.48 11.648 L 95.511 7.978 C 94.868 7.502 95.199 6.483 95.999 6.476 L 102.176 6.429 L 104.13 0.569 C 104.383 -0.19 105.456 -0.19 105.709 0.569 Z M 105.709 31.223 L 107.663 37.083 L 113.84 37.13 C 114.64 37.137 114.971 38.157 114.328 38.632 L 109.359 42.302 L 111.223 48.191 C 111.465 48.953 110.596 49.585 109.945 49.119 L 104.919 45.527 L 99.894 49.119 C 99.243 49.584 98.376 48.953 98.616 48.191 L 100.48 42.302 L 95.511 38.632 C 94.868 38.156 95.199 37.137 95.999 37.13 L 102.176 37.083 L 104.13 31.223 C 104.383 30.465 105.456 30.465 105.709 31.223 Z M 105.709 61.877 L 107.663 67.737 L 113.84 67.784 C 114.64 67.791 114.971 68.811 114.328 69.286 L 109.359 72.956 L 111.223 78.845 C 111.465 79.607 110.596 80.239 109.945 79.773 L 104.919 76.181 L 99.894 79.773 C 99.243 80.238 98.376 79.607 98.616 78.845 L 100.48 72.956 L 95.511 69.286 C 94.868 68.81 95.199 67.791 95.999 67.784 L 102.176 67.737 L 104.13 61.877 C 104.383 61.119 105.456 61.119 105.709 61.877 Z M 105.709 92.532 L 107.663 98.392 L 113.84 98.439 C 114.64 98.446 114.971 99.466 114.328 99.941 L 109.359 103.611 L 111.223 109.5 C 111.465 110.262 110.596 110.894 109.945 110.428 L 104.919 106.836 L 99.894 110.428 C 99.243 110.893 98.376 110.262 98.616 109.5 L 100.48 103.611 L 95.511 99.941 C 94.868 99.465 95.199 98.446 95.999 98.439 L 102.176 98.392 L 104.13 92.532 C 104.383 91.773 105.456 91.773 105.709 92.532 Z M 105.709 123.186 L 107.663 129.046 L 113.84 129.093 C 114.64 129.1 114.971 130.12 114.328 130.595 L 109.359 134.265 L 111.223 140.154 C 111.465 140.916 110.596 141.548 109.945 141.082 L 104.919 137.49 L 99.894 141.082 C 99.243 141.547 98.376 140.916 98.616 140.154 L 100.48 134.265 L 95.511 130.595 C 94.868 130.119 95.199 129.1 95.999 129.093 L 102.176 129.046 L 104.13 123.186 C 104.383 122.426 105.456 122.426 105.709 123.186 Z M 129.502 15.598 L 131.456 21.458 L 137.633 21.505 C 138.433 21.512 138.764 22.532 138.121 23.007 L 133.152 26.677 L 135.016 32.566 C 135.258 33.328 134.389 33.96 133.738 33.494 L 128.713 29.902 L 123.688 33.494 C 123.037 33.959 122.17 33.328 122.41 32.566 L 124.274 26.677 L 119.305 23.007 C 118.662 22.531 118.993 21.512 119.793 21.505 L 125.97 21.458 L 127.924 15.598 C 128.177 14.84 129.249 14.84 129.502 15.598 Z M 129.502 46.253 L 131.456 52.113 L 137.633 52.16 C 138.433 52.167 138.764 53.187 138.121 53.662 L 133.152 57.332 L 135.016 63.221 C 135.258 63.983 134.389 64.615 133.738 64.149 L 128.713 60.557 L 123.688 64.149 C 123.037 64.614 122.17 63.984 122.41 63.221 L 124.274 57.332 L 119.305 53.662 C 118.662 53.186 118.993 52.167 119.793 52.16 L 125.97 52.113 L 127.924 46.253 C 128.177 45.494 129.249 45.494 129.502 46.253 Z M 129.502 76.907 L 131.456 82.767 L 137.633 82.814 C 138.433 82.821 138.764 83.841 138.121 84.316 L 133.152 87.986 L 135.016 93.875 C 135.258 94.637 134.389 95.269 133.738 94.803 L 128.713 91.211 L 123.688 94.803 C 123.037 95.268 122.17 94.637 122.41 93.875 L 124.274 87.986 L 119.305 84.316 C 118.662 83.84 118.993 82.821 119.793 82.814 L 125.97 82.767 L 127.924 76.907 C 128.177 76.148 129.249 76.148 129.502 76.907 Z M 129.502 107.561 L 131.456 113.421 L 137.633 113.468 C 138.433 113.475 138.764 114.495 138.121 114.97 L 133.152 118.64 L 135.016 124.529 C 135.258 125.291 134.389 125.923 133.738 125.457 L 128.713 121.865 L 123.688 125.457 C 123.037 125.922 122.17 125.291 122.41 124.529 L 124.274 118.64 L 119.305 114.97 C 118.662 114.494 118.993 113.475 119.793 113.468 L 125.97 113.421 L 127.924 107.561 C 128.177 106.803 129.249 106.803 129.502 107.561 Z M 153.296 0.569 L 155.25 6.429 L 161.427 6.476 C 162.227 6.483 162.558 7.503 161.915 7.978 L 156.946 11.648 L 158.81 17.537 C 159.052 18.299 158.183 18.931 157.532 18.465 L 152.507 14.873 L 147.482 18.465 C 146.831 18.93 145.964 18.299 146.204 17.537 L 148.068 11.648 L 143.099 7.978 C 142.456 7.502 142.787 6.483 143.587 6.476 L 149.764 6.429 L 151.718 0.569 C 151.969 -0.19 153.043 -0.19 153.296 0.569 Z M 153.296 31.223 L 155.25 37.083 L 161.427 37.13 C 162.227 37.137 162.558 38.157 161.915 38.632 L 156.946 42.302 L 158.81 48.191 C 159.052 48.953 158.183 49.585 157.532 49.119 L 152.507 45.527 L 147.482 49.119 C 146.831 49.584 145.964 48.953 146.204 48.191 L 148.068 42.302 L 143.099 38.632 C 142.456 38.156 142.787 37.137 143.587 37.13 L 149.764 37.083 L 151.718 31.223 C 151.969 30.465 153.043 30.465 153.296 31.223 Z M 153.296 61.877 L 155.25 67.737 L 161.427 67.784 C 162.227 67.791 162.558 68.811 161.915 69.286 L 156.946 72.956 L 158.81 78.845 C 159.052 79.607 158.183 80.239 157.532 79.773 L 152.507 76.181 L 147.482 79.773 C 146.831 80.238 145.964 79.607 146.204 78.845 L 148.068 72.956 L 143.099 69.286 C 142.456 68.81 142.787 67.791 143.587 67.784 L 149.764 67.737 L 151.718 61.877 C 151.969 61.119 153.043 61.119 153.296 61.877 Z M 153.296 92.532 L 155.25 98.392 L 161.427 98.439 C 162.227 98.446 162.558 99.466 161.915 99.941 L 156.946 103.611 L 158.81 109.5 C 159.052 110.262 158.183 110.894 157.532 110.428 L 152.507 106.836 L 147.482 110.428 C 146.831 110.893 145.964 110.262 146.204 109.5 L 148.068 103.611 L 143.099 99.941 C 142.456 99.465 142.787 98.446 143.587 98.439 L 149.764 98.392 L 151.718 92.532 C 151.969 91.773 153.043 91.773 153.296 92.532 Z M 153.296 123.186 L 155.25 129.046 L 161.427 129.093 C 162.227 129.1 162.558 130.12 161.915 130.595 L 156.946 134.265 L 158.81 140.154 C 159.052 140.916 158.183 141.548 157.532 141.082 L 152.507 137.49 L 147.482 141.082 C 146.831 141.547 145.964 140.916 146.204 140.154 L 148.068 134.265 L 143.099 130.595 C 142.456 130.119 142.787 129.1 143.587 129.093 L 149.764 129.046 L 151.718 123.186 C 151.969 122.426 153.043 122.426 153.296 123.186 Z M 177.089 15.598 L 179.043 21.458 L 185.22 21.505 C 186.02 21.512 186.351 22.532 185.708 23.007 L 180.739 26.677 L 182.603 32.566 C 182.845 33.328 181.976 33.96 181.325 33.494 L 176.3 29.902 L 171.275 33.494 C 170.624 33.959 169.757 33.328 169.997 32.566 L 171.861 26.677 L 166.892 23.007 C 166.249 22.531 166.58 21.512 167.38 21.505 L 173.557 21.458 L 175.511 15.598 C 175.763 14.84 176.837 14.84 177.089 15.598 Z M 177.089 46.253 L 179.043 52.113 L 185.22 52.16 C 186.02 52.167 186.351 53.187 185.708 53.662 L 180.739 57.332 L 182.603 63.221 C 182.845 63.983 181.976 64.615 181.325 64.149 L 176.3 60.557 L 171.275 64.149 C 170.624 64.614 169.757 63.984 169.997 63.221 L 171.861 57.332 L 166.892 53.662 C 166.249 53.186 166.58 52.167 167.38 52.16 L 173.557 52.113 L 175.511 46.253 C 175.763 45.494 176.837 45.494 177.089 46.253 Z M 177.089 76.907 L 179.043 82.767 L 185.22 82.814 C 186.02 82.821 186.351 83.841 185.708 84.316 L 180.739 87.986 L 182.603 93.875 C 182.845 94.637 181.976 95.269 181.325 94.803 L 176.3 91.211 L 171.275 94.803 C 170.624 95.268 169.757 94.637 169.997 93.875 L 171.861 87.986 L 166.892 84.316 C 166.249 83.84 166.58 82.821 167.38 82.814 L 173.557 82.767 L 175.511 76.907 C 175.763 76.148 176.837 76.148 177.089 76.907 Z M 177.089 107.561 L 179.043 113.421 L 185.22 113.468 C 186.02 113.475 186.351 114.495 185.708 114.97 L 180.739 118.64 L 182.603 124.529 C 182.845 125.291 181.976 125.923 181.325 125.457 L 176.3 121.865 L 171.275 125.457 C 170.624 125.922 169.757 125.291 169.997 124.529 L 171.861 118.64 L 166.892 114.97 C 166.249 114.494 166.58 113.475 167.38 113.468 L 173.557 113.421 L 175.511 107.561 C 175.763 106.803 176.837 106.803 177.089 107.561 Z M 200.883 0.569 L 202.837 6.429 L 209.014 6.476 C 209.814 6.483 210.145 7.503 209.502 7.978 L 204.533 11.648 L 206.397 17.537 C 206.639 18.299 205.77 18.931 205.119 18.465 L 200.094 14.873 L 195.069 18.465 C 194.418 18.93 193.551 18.299 193.791 17.537 L 195.655 11.648 L 190.686 7.978 C 190.043 7.502 190.374 6.483 191.174 6.476 L 197.351 6.429 L 199.305 0.569 C 199.557 -0.19 200.629 -0.19 200.883 0.569 Z M 200.883 31.223 L 202.837 37.083 L 209.014 37.13 C 209.814 37.137 210.145 38.157 209.502 38.632 L 204.533 42.302 L 206.397 48.191 C 206.639 48.953 205.77 49.585 205.119 49.119 L 200.094 45.527 L 195.069 49.119 C 194.418 49.584 193.551 48.953 193.791 48.191 L 195.655 42.302 L 190.686 38.632 C 190.043 38.156 190.374 37.137 191.174 37.13 L 197.351 37.083 L 199.305 31.223 C 199.557 30.465 200.629 30.465 200.883 31.223 Z M 200.883 61.877 L 202.837 67.737 L 209.014 67.784 C 209.814 67.791 210.145 68.811 209.502 69.286 L 204.533 72.956 L 206.397 78.845 C 206.639 79.607 205.77 80.239 205.119 79.773 L 200.094 76.181 L 195.069 79.773 C 194.418 80.238 193.551 79.607 193.791 78.845 L 195.655 72.956 L 190.686 69.286 C 190.043 68.81 190.374 67.791 191.174 67.784 L 197.351 67.737 L 199.305 61.877 C 199.557 61.119 200.629 61.119 200.883 61.877 Z M 200.883 92.532 L 202.837 98.392 L 209.014 98.439 C 209.814 98.446 210.145 99.466 209.502 99.941 L 204.533 103.611 L 206.397 109.5 C 206.639 110.262 205.77 110.894 205.119 110.428 L 200.094 106.836 L 195.069 110.428 C 194.418 110.893 193.551 110.262 193.791 109.5 L 195.655 103.611 L 190.686 99.941 C 190.043 99.465 190.374 98.446 191.174 98.439 L 197.351 98.392 L 199.305 92.532 C 199.557 91.773 200.629 91.773 200.883 92.532 Z M 200.883 123.186 L 202.837 129.046 L 209.014 129.093 C 209.814 129.1 210.145 130.12 209.502 130.595 L 204.533 134.265 L 206.397 140.154 C 206.639 140.916 205.77 141.548 205.119 141.082 L 200.094 137.49 L 195.069 141.082 C 194.418 141.547 193.551 140.916 193.791 140.154 L 195.655 134.265 L 190.686 130.595 C 190.043 130.119 190.374 129.1 191.174 129.093 L 197.351 129.046 L 199.305 123.186 C 199.557 122.426 200.629 122.426 200.883 123.186 Z" fill="transparent" height="141.24202375386588px" id="enVcIjLC_" transform="translate(14.253 19.693)" width="209.8417176622597px"><path d="M 10.536 0.569 L 12.49 6.429 L 18.667 6.476 C 19.467 6.483 19.798 7.503 19.155 7.978 L 14.186 11.648 L 16.05 17.537 C 16.292 18.299 15.423 18.931 14.772 18.465 L 9.747 14.874 L 4.722 18.466 C 4.071 18.931 3.204 18.3 3.444 17.538 L 5.308 11.649 L 0.339 7.979 C -0.304 7.503 0.027 6.484 0.827 6.477 L 7.004 6.43 L 8.958 0.57 C 9.21 -0.19 10.282 -0.19 10.536 0.569 Z" fill="rgb(245, 245, 245)" height="18.624902599161874px" id="QebijiJ_X" transform="translate(0 0)" width="19.494717540189406px"/><path d="M 10.536 0.568 L 12.49 6.428 L 18.667 6.475 C 19.467 6.482 19.798 7.502 19.155 7.977 L 14.186 11.647 L 16.05 17.536 C 16.292 18.298 15.423 18.93 14.772 18.464 L 9.747 14.873 L 4.722 18.465 C 4.071 18.93 3.204 18.299 3.444 17.537 L 5.308 11.648 L 0.339 7.978 C -0.304 7.502 0.027 6.483 0.827 6.476 L 7.004 6.429 L 8.958 0.569 C 9.21 -0.19 10.282 -0.19 10.536 0.568 Z" fill="rgb(245, 245, 245)" height="18.62415259924327px" id="NHoevwh2y" transform="translate(0 30.655)" width="19.494717540189406px"/><path d="M 10.536 0.568 L 12.49 6.428 L 18.667 6.475 C 19.467 6.482 19.798 7.502 19.155 7.977 L 14.186 11.647 L 16.05 17.536 C 16.292 18.298 15.423 18.93 14.772 18.464 L 9.747 14.873 L 4.722 18.465 C 4.071 18.93 3.204 18.299 3.444 17.537 L 5.308 11.648 L 0.339 7.978 C -0.304 7.502 0.027 6.483 0.827 6.476 L 7.004 6.429 L 8.958 0.569 C 9.21 -0.19 10.282 -0.19 10.536 0.568 Z" fill="rgb(245, 245, 245)" height="18.624152599243274px" id="urftzs2DP" transform="translate(0 61.309)" width="19.494717540189406px"/><path d="M 10.536 0.569 L 12.49 6.429 L 18.667 6.476 C 19.467 6.483 19.798 7.503 19.155 7.978 L 14.186 11.648 L 16.05 17.537 C 16.292 18.299 15.423 18.931 14.772 18.465 L 9.747 14.874 L 4.722 18.466 C 4.071 18.931 3.204 18.3 3.444 17.538 L 5.308 11.649 L 0.339 7.979 C -0.304 7.503 0.027 6.484 0.827 6.477 L 7.004 6.43 L 8.958 0.57 C 9.21 -0.19 10.282 -0.19 10.536 0.569 Z" fill="rgb(245, 245, 245)" height="18.6249025991619px" id="fmEX9skq2" transform="translate(0 91.963)" width="19.494717540189406px"/><path d="M 10.536 0.57 L 12.49 6.43 L 18.667 6.477 C 19.467 6.484 19.798 7.504 19.155 7.979 L 14.186 11.649 L 16.05 17.538 C 16.292 18.3 15.423 18.932 14.772 18.466 L 9.747 14.875 L 4.722 18.467 C 4.071 18.932 3.204 18.301 3.444 17.539 L 5.308 11.65 L 0.339 7.98 C -0.304 7.504 0.027 6.485 0.827 6.478 L 7.004 6.431 L 8.958 0.571 C 9.21 -0.19 10.282 -0.19 10.536 0.57 Z" fill="rgb(245, 245, 245)" height="18.625652599080723px" id="oaWAW51QX" transform="translate(0 122.616)" width="19.494717540189406px"/><path d="M 10.536 0.568 L 12.49 6.428 L 18.667 6.475 C 19.467 6.482 19.798 7.502 19.155 7.978 L 14.186 11.647 L 16.05 17.537 C 16.292 18.299 15.423 18.931 14.772 18.464 L 9.747 14.872 L 4.722 18.464 C 4.071 18.93 3.204 18.299 3.444 17.537 L 5.308 11.647 L 0.339 7.978 C -0.304 7.502 0.027 6.482 0.827 6.475 L 7.004 6.428 L 8.958 0.568 C 9.209 -0.189 10.283 -0.189 10.536 0.568 Z" fill="rgb(245, 245, 245)" height="18.62369138688665px" id="jZHlg8t2R" transform="translate(23.793 15.03)" width="19.49471754018942px"/><path d="M 10.536 0.569 L 12.49 6.429 L 18.667 6.476 C 19.467 6.483 19.798 7.503 19.155 7.978 L 14.186 11.648 L 16.05 17.537 C 16.292 18.299 15.423 18.931 14.772 18.465 L 9.747 14.873 L 4.722 18.465 C 4.071 18.93 3.204 18.3 3.444 17.537 L 5.308 11.648 L 0.339 7.978 C -0.304 7.502 0.027 6.483 0.827 6.476 L 7.004 6.429 L 8.958 0.569 C 9.209 -0.19 10.283 -0.19 10.536 0.569 Z" fill="rgb(245, 245, 245)" height="18.624441386886673px" id="ppLhuvUp6" transform="translate(23.793 45.684)" width="19.49471754018942px"/><path d="M 10.536 0.569 L 12.49 6.429 L 18.667 6.476 C 19.467 6.483 19.798 7.503 19.155 7.978 L 14.186 11.648 L 16.05 17.537 C 16.292 18.299 15.423 18.931 14.772 18.465 L 9.747 14.873 L 4.722 18.465 C 4.071 18.93 3.204 18.299 3.444 17.537 L 5.308 11.648 L 0.339 7.978 C -0.304 7.502 0.027 6.483 0.827 6.476 L 7.004 6.429 L 8.958 0.569 C 9.209 -0.19 10.283 -0.19 10.536 0.569 Z" fill="rgb(245, 245, 245)" height="18.624441386886673px" id="YFq3Z1UPk" transform="translate(23.793 76.338)" width="19.49471754018942px"/><path d="M 10.536 0.569 L 12.49 6.429 L 18.667 6.476 C 19.467 6.483 19.798 7.503 19.155 7.978 L 14.186 11.648 L 16.05 17.537 C 16.292 18.299 15.423 18.931 14.772 18.465 L 9.747 14.873 L 4.722 18.465 C 4.071 18.93 3.204 18.299 3.444 17.537 L 5.308 11.648 L 0.339 7.978 C -0.304 7.502 0.027 6.483 0.827 6.476 L 7.004 6.429 L 8.958 0.569 C 9.209 -0.189 10.283 -0.189 10.536 0.569 Z" fill="rgb(245, 245, 245)" height="18.62369138688669px" id="bJ2lbqUPC" transform="translate(23.793 106.993)" width="19.49471754018942px"/><path d="M 10.536 0.569 L 12.49 6.429 L 18.667 6.476 C 19.467 6.483 19.798 7.503 19.155 7.978 L 14.186 11.648 L 16.05 17.537 C 16.292 18.299 15.423 18.931 14.772 18.465 L 9.747 14.873 L 4.722 18.465 C 4.071 18.93 3.204 18.299 3.444 17.537 L 5.308 11.648 L 0.339 7.978 C -0.304 7.502 0.027 6.483 0.827 6.476 L 7.004 6.429 L 8.958 0.569 C 9.21 -0.19 10.283 -0.19 10.536 0.569 Z" fill="rgb(245, 245, 245)" height="18.624441386886666px" id="zVHyqrGJn" transform="translate(47.586 0)" width="19.49471754018944px"/><path d="M 10.536 0.569 L 12.49 6.429 L 18.667 6.476 C 19.467 6.483 19.798 7.503 19.155 7.978 L 14.186 11.648 L 16.05 17.537 C 16.292 18.299 15.423 18.931 14.772 18.465 L 9.747 14.873 L 4.722 18.465 C 4.071 18.93 3.204 18.299 3.444 17.537 L 5.308 11.648 L 0.339 7.978 C -0.304 7.502 0.027 6.483 0.827 6.476 L 7.004 6.429 L 8.958 0.569 C 9.21 -0.19 10.283 -0.19 10.536 0.569 Z" fill="rgb(245, 245, 245)" height="18.623691386886676px" id="kdpUelwqj" transform="translate(47.586 30.655)" width="19.49471754018944px"/><path d="M 10.536 0.569 L 12.49 6.429 L 18.667 6.476 C 19.467 6.483 19.798 7.503 19.155 7.978 L 14.186 11.648 L 16.05 17.537 C 16.292 18.299 15.423 18.931 14.772 18.465 L 9.747 14.873 L 4.722 18.465 C 4.071 18.93 3.204 18.299 3.444 17.537 L 5.308 11.648 L 0.339 7.978 C -0.304 7.502 0.027 6.483 0.827 6.476 L 7.004 6.429 L 8.958 0.569 C 9.21 -0.189 10.283 -0.189 10.536 0.569 Z" fill="rgb(245, 245, 245)" height="18.623691386886676px" id="VjWODxuXE" transform="translate(47.586 61.309)" width="19.49471754018944px"/><path d="M 10.536 0.569 L 12.49 6.429 L 18.667 6.476 C 19.467 6.483 19.798 7.503 19.155 7.978 L 14.186 11.648 L 16.05 17.537 C 16.292 18.299 15.423 18.931 14.772 18.465 L 9.747 14.873 L 4.722 18.465 C 4.071 18.93 3.204 18.299 3.444 17.537 L 5.308 11.648 L 0.339 7.978 C -0.304 7.502 0.027 6.483 0.827 6.476 L 7.004 6.429 L 8.958 0.569 C 9.21 -0.19 10.283 -0.19 10.536 0.569 Z" fill="rgb(245, 245, 245)" height="18.624441386886673px" id="kFHWXXExE" transform="translate(47.586 91.963)" width="19.49471754018944px"/><path d="M 10.536 0.57 L 12.49 6.43 L 18.667 6.477 C 19.467 6.484 19.798 7.504 19.155 7.979 L 14.186 11.649 L 16.05 17.538 C 16.292 18.3 15.423 18.932 14.772 18.466 L 9.747 14.874 L 4.722 18.466 C 4.071 18.931 3.204 18.3 3.444 17.538 L 5.308 11.649 L 0.339 7.979 C -0.304 7.503 0.027 6.484 0.827 6.477 L 7.004 6.43 L 8.958 0.57 C 9.21 -0.19 10.283 -0.19 10.536 0.57 Z" fill="rgb(245, 245, 245)" height="18.625191386886655px" id="ynLTrqDC9" transform="translate(47.586 122.616)" width="19.49471754018944px"/><path d="M 10.536 0.568 L 12.49 6.428 L 18.667 6.475 C 19.467 6.482 19.798 7.502 19.155 7.978 L 14.186 11.647 L 16.05 17.537 C 16.292 18.299 15.423 18.931 14.772 18.464 L 9.747 14.872 L 4.722 18.464 C 4.071 18.93 3.204 18.299 3.444 17.537 L 5.308 11.647 L 0.339 7.978 C -0.304 7.502 0.027 6.482 0.827 6.475 L 7.004 6.428 L 8.958 0.568 C 9.209 -0.189 10.283 -0.189 10.536 0.568 Z" fill="rgb(245, 245, 245)" height="18.62369138688665px" id="INY9C_6W2" transform="translate(71.38 15.03)" width="19.494717540189413px"/><path d="M 10.536 0.569 L 12.49 6.429 L 18.667 6.476 C 19.467 6.483 19.798 7.503 19.155 7.978 L 14.186 11.648 L 16.05 17.537 C 16.292 18.299 15.423 18.931 14.772 18.465 L 9.747 14.873 L 4.722 18.465 C 4.071 18.93 3.204 18.3 3.444 17.537 L 5.308 11.648 L 0.339 7.978 C -0.304 7.502 0.027 6.483 0.827 6.476 L 7.004 6.429 L 8.958 0.569 C 9.209 -0.19 10.283 -0.19 10.536 0.569 Z" fill="rgb(245, 245, 245)" height="18.624441386886673px" id="Kr_Bhh4B9" transform="translate(71.38 45.684)" width="19.494717540189413px"/><path d="M 10.536 0.569 L 12.49 6.429 L 18.667 6.476 C 19.467 6.483 19.798 7.503 19.155 7.978 L 14.186 11.648 L 16.05 17.537 C 16.292 18.299 15.423 18.931 14.772 18.465 L 9.747 14.873 L 4.722 18.465 C 4.071 18.93 3.204 18.299 3.444 17.537 L 5.308 11.648 L 0.339 7.978 C -0.304 7.502 0.027 6.483 0.827 6.476 L 7.004 6.429 L 8.958 0.569 C 9.209 -0.19 10.283 -0.19 10.536 0.569 Z" fill="rgb(245, 245, 245)" height="18.624441386886673px" id="NP905AaRQ" transform="translate(71.38 76.338)" width="19.494717540189413px"/><path d="M 10.536 0.569 L 12.49 6.429 L 18.667 6.476 C 19.467 6.483 19.798 7.503 19.155 7.978 L 14.186 11.648 L 16.05 17.537 C 16.292 18.299 15.423 18.931 14.772 18.465 L 9.747 14.873 L 4.722 18.465 C 4.071 18.93 3.204 18.299 3.444 17.537 L 5.308 11.648 L 0.339 7.978 C -0.304 7.502 0.027 6.483 0.827 6.476 L 7.004 6.429 L 8.958 0.569 C 9.209 -0.189 10.283 -0.189 10.536 0.569 Z" fill="rgb(245, 245, 245)" height="18.62369138688669px" id="PxeFgAfKj" transform="translate(71.38 106.993)" width="19.494717540189413px"/><path d="M 10.537 0.569 L 12.491 6.429 L 18.668 6.476 C 19.468 6.483 19.799 7.503 19.156 7.978 L 14.187 11.648 L 16.051 17.537 C 16.293 18.299 15.424 18.931 14.773 18.465 L 9.747 14.873 L 4.722 18.465 C 4.071 18.93 3.204 18.299 3.444 17.537 L 5.308 11.648 L 0.339 7.978 C -0.304 7.502 0.027 6.483 0.827 6.476 L 7.004 6.429 L 8.958 0.569 C 9.211 -0.19 10.284 -0.19 10.537 0.569 Z" fill="rgb(245, 245, 245)" height="18.624441386886666px" id="f0gRXo7wH" transform="translate(95.172 0)" width="19.495717540189418px"/><path d="M 10.537 0.569 L 12.491 6.429 L 18.668 6.476 C 19.468 6.483 19.799 7.503 19.156 7.978 L 14.187 11.648 L 16.051 17.537 C 16.293 18.299 15.424 18.931 14.773 18.465 L 9.747 14.873 L 4.722 18.465 C 4.071 18.93 3.204 18.299 3.444 17.537 L 5.308 11.648 L 0.339 7.978 C -0.304 7.502 0.027 6.483 0.827 6.476 L 7.004 6.429 L 8.958 0.569 C 9.211 -0.19 10.284 -0.19 10.537 0.569 Z" fill="rgb(245, 245, 245)" height="18.623691386886676px" id="H_cgif1Kb" transform="translate(95.172 30.655)" width="19.495717540189418px"/><path d="M 10.537 0.569 L 12.491 6.429 L 18.668 6.476 C 19.468 6.483 19.799 7.503 19.156 7.978 L 14.187 11.648 L 16.051 17.537 C 16.293 18.299 15.424 18.931 14.773 18.465 L 9.747 14.873 L 4.722 18.465 C 4.071 18.93 3.204 18.299 3.444 17.537 L 5.308 11.648 L 0.339 7.978 C -0.304 7.502 0.027 6.483 0.827 6.476 L 7.004 6.429 L 8.958 0.569 C 9.211 -0.189 10.284 -0.189 10.537 0.569 Z" fill="rgb(245, 245, 245)" height="18.623691386886676px" id="XzZbx7Okw" transform="translate(95.172 61.309)" width="19.495717540189418px"/><path d="M 10.537 0.569 L 12.491 6.429 L 18.668 6.476 C 19.468 6.483 19.799 7.503 19.156 7.978 L 14.187 11.648 L 16.051 17.537 C 16.293 18.299 15.424 18.931 14.773 18.465 L 9.747 14.873 L 4.722 18.465 C 4.071 18.93 3.204 18.299 3.444 17.537 L 5.308 11.648 L 0.339 7.978 C -0.304 7.502 0.027 6.483 0.827 6.476 L 7.004 6.429 L 8.958 0.569 C 9.211 -0.19 10.284 -0.19 10.537 0.569 Z" fill="rgb(245, 245, 245)" height="18.624441386886673px" id="qaty5Waf5" transform="translate(95.172 91.963)" width="19.495717540189418px"/><path d="M 10.537 0.57 L 12.491 6.43 L 18.668 6.477 C 19.468 6.484 19.799 7.504 19.156 7.979 L 14.187 11.649 L 16.051 17.538 C 16.293 18.3 15.424 18.932 14.773 18.466 L 9.747 14.874 L 4.722 18.466 C 4.071 18.931 3.204 18.3 3.444 17.538 L 5.308 11.649 L 0.339 7.979 C -0.304 7.503 0.027 6.484 0.827 6.477 L 7.004 6.43 L 8.958 0.57 C 9.211 -0.19 10.284 -0.19 10.537 0.57 Z" fill="rgb(245, 245, 245)" height="18.625191386886655px" id="dN51AoRdI" transform="translate(95.172 122.616)" width="19.495717540189418px"/><path d="M 10.536 0.568 L 12.49 6.428 L 18.667 6.475 C 19.467 6.482 19.798 7.502 19.155 7.978 L 14.186 11.647 L 16.05 17.537 C 16.292 18.299 15.423 18.931 14.772 18.464 L 9.747 14.872 L 4.722 18.464 C 4.071 18.93 3.204 18.299 3.444 17.537 L 5.308 11.647 L 0.339 7.978 C -0.304 7.502 0.027 6.482 0.827 6.475 L 7.004 6.428 L 8.958 0.568 C 9.211 -0.189 10.283 -0.189 10.536 0.568 Z" fill="rgb(245, 245, 245)" height="18.62369138688665px" id="khhCWngtl" transform="translate(118.966 15.03)" width="19.494717540189413px"/><path d="M 10.536 0.569 L 12.49 6.429 L 18.667 6.476 C 19.467 6.483 19.798 7.503 19.155 7.978 L 14.186 11.648 L 16.05 17.537 C 16.292 18.299 15.423 18.931 14.772 18.465 L 9.747 14.873 L 4.722 18.465 C 4.071 18.93 3.204 18.3 3.444 17.537 L 5.308 11.648 L 0.339 7.978 C -0.304 7.502 0.027 6.483 0.827 6.476 L 7.004 6.429 L 8.958 0.569 C 9.211 -0.19 10.283 -0.19 10.536 0.569 Z" fill="rgb(245, 245, 245)" height="18.624441386886673px" id="OpSxSGX2p" transform="translate(118.966 45.684)" width="19.494717540189413px"/><path d="M 10.536 0.569 L 12.49 6.429 L 18.667 6.476 C 19.467 6.483 19.798 7.503 19.155 7.978 L 14.186 11.648 L 16.05 17.537 C 16.292 18.299 15.423 18.931 14.772 18.465 L 9.747 14.873 L 4.722 18.465 C 4.071 18.93 3.204 18.299 3.444 17.537 L 5.308 11.648 L 0.339 7.978 C -0.304 7.502 0.027 6.483 0.827 6.476 L 7.004 6.429 L 8.958 0.569 C 9.211 -0.19 10.283 -0.19 10.536 0.569 Z" fill="rgb(245, 245, 245)" height="18.624441386886673px" id="Fp_nZxnBc" transform="translate(118.966 76.338)" width="19.494717540189413px"/><path d="M 10.536 0.569 L 12.49 6.429 L 18.667 6.476 C 19.467 6.483 19.798 7.503 19.155 7.978 L 14.186 11.648 L 16.05 17.537 C 16.292 18.299 15.423 18.931 14.772 18.465 L 9.747 14.873 L 4.722 18.465 C 4.071 18.93 3.204 18.299 3.444 17.537 L 5.308 11.648 L 0.339 7.978 C -0.304 7.502 0.027 6.483 0.827 6.476 L 7.004 6.429 L 8.958 0.569 C 9.211 -0.189 10.283 -0.189 10.536 0.569 Z" fill="rgb(245, 245, 245)" height="18.62369138688669px" id="NGJ0Zu_rO" transform="translate(118.966 106.993)" width="19.494717540189413px"/><path d="M 10.536 0.569 L 12.49 6.429 L 18.667 6.476 C 19.467 6.483 19.798 7.503 19.155 7.978 L 14.186 11.648 L 16.05 17.537 C 16.292 18.299 15.423 18.931 14.772 18.465 L 9.747 14.873 L 4.722 18.465 C 4.071 18.93 3.204 18.299 3.444 17.537 L 5.308 11.648 L 0.339 7.978 C -0.304 7.502 0.027 6.483 0.827 6.476 L 7.004 6.429 L 8.958 0.569 C 9.209 -0.19 10.283 -0.19 10.536 0.569 Z" fill="rgb(245, 245, 245)" height="18.624441386886666px" id="BEIl4Je_E" transform="translate(142.76 0)" width="19.494717540189413px"/><path d="M 10.536 0.569 L 12.49 6.429 L 18.667 6.476 C 19.467 6.483 19.798 7.503 19.155 7.978 L 14.186 11.648 L 16.05 17.537 C 16.292 18.299 15.423 18.931 14.772 18.465 L 9.747 14.873 L 4.722 18.465 C 4.071 18.93 3.204 18.299 3.444 17.537 L 5.308 11.648 L 0.339 7.978 C -0.304 7.502 0.027 6.483 0.827 6.476 L 7.004 6.429 L 8.958 0.569 C 9.209 -0.19 10.283 -0.19 10.536 0.569 Z" fill="rgb(245, 245, 245)" height="18.623691386886676px" id="L3LLd2qSS" transform="translate(142.76 30.655)" width="19.494717540189413px"/><path d="M 10.536 0.569 L 12.49 6.429 L 18.667 6.476 C 19.467 6.483 19.798 7.503 19.155 7.978 L 14.186 11.648 L 16.05 17.537 C 16.292 18.299 15.423 18.931 14.772 18.465 L 9.747 14.873 L 4.722 18.465 C 4.071 18.93 3.204 18.299 3.444 17.537 L 5.308 11.648 L 0.339 7.978 C -0.304 7.502 0.027 6.483 0.827 6.476 L 7.004 6.429 L 8.958 0.569 C 9.209 -0.189 10.283 -0.189 10.536 0.569 Z" fill="rgb(245, 245, 245)" height="18.623691386886676px" id="C26ZhMQno" transform="translate(142.76 61.309)" width="19.494717540189413px"/><path d="M 10.536 0.569 L 12.49 6.429 L 18.667 6.476 C 19.467 6.483 19.798 7.503 19.155 7.978 L 14.186 11.648 L 16.05 17.537 C 16.292 18.299 15.423 18.931 14.772 18.465 L 9.747 14.873 L 4.722 18.465 C 4.071 18.93 3.204 18.299 3.444 17.537 L 5.308 11.648 L 0.339 7.978 C -0.304 7.502 0.027 6.483 0.827 6.476 L 7.004 6.429 L 8.958 0.569 C 9.209 -0.19 10.283 -0.19 10.536 0.569 Z" fill="rgb(245, 245, 245)" height="18.624441386886673px" id="lpcZI_knR" transform="translate(142.76 91.963)" width="19.494717540189413px"/><path d="M 10.536 0.57 L 12.49 6.43 L 18.667 6.477 C 19.467 6.484 19.798 7.504 19.155 7.979 L 14.186 11.649 L 16.05 17.538 C 16.292 18.3 15.423 18.932 14.772 18.466 L 9.747 14.874 L 4.722 18.466 C 4.071 18.931 3.204 18.3 3.444 17.538 L 5.308 11.649 L 0.339 7.979 C -0.304 7.503 0.027 6.484 0.827 6.477 L 7.004 6.43 L 8.958 0.57 C 9.209 -0.19 10.283 -0.19 10.536 0.57 Z" fill="rgb(245, 245, 245)" height="18.625191386886655px" id="LKKi1miyN" transform="translate(142.76 122.616)" width="19.494717540189413px"/><path d="M 10.536 0.568 L 12.49 6.428 L 18.667 6.475 C 19.467 6.482 19.798 7.502 19.155 7.978 L 14.186 11.647 L 16.05 17.537 C 16.292 18.299 15.423 18.931 14.772 18.464 L 9.747 14.872 L 4.722 18.464 C 4.071 18.93 3.204 18.299 3.444 17.537 L 5.308 11.647 L 0.339 7.978 C -0.304 7.502 0.027 6.482 0.827 6.475 L 7.004 6.428 L 8.958 0.568 C 9.21 -0.189 10.284 -0.189 10.536 0.568 Z" fill="rgb(245, 245, 245)" height="18.62369138688665px" id="So7JAfykC" transform="translate(166.553 15.03)" width="19.494717540189413px"/><path d="M 10.536 0.569 L 12.49 6.429 L 18.667 6.476 C 19.467 6.483 19.798 7.503 19.155 7.978 L 14.186 11.648 L 16.05 17.537 C 16.292 18.299 15.423 18.931 14.772 18.465 L 9.747 14.873 L 4.722 18.465 C 4.071 18.93 3.204 18.3 3.444 17.537 L 5.308 11.648 L 0.339 7.978 C -0.304 7.502 0.027 6.483 0.827 6.476 L 7.004 6.429 L 8.958 0.569 C 9.21 -0.19 10.284 -0.19 10.536 0.569 Z" fill="rgb(245, 245, 245)" height="18.624441386886673px" id="i_X58HtKq" transform="translate(166.553 45.684)" width="19.494717540189413px"/><path d="M 10.536 0.569 L 12.49 6.429 L 18.667 6.476 C 19.467 6.483 19.798 7.503 19.155 7.978 L 14.186 11.648 L 16.05 17.537 C 16.292 18.299 15.423 18.931 14.772 18.465 L 9.747 14.873 L 4.722 18.465 C 4.071 18.93 3.204 18.299 3.444 17.537 L 5.308 11.648 L 0.339 7.978 C -0.304 7.502 0.027 6.483 0.827 6.476 L 7.004 6.429 L 8.958 0.569 C 9.21 -0.19 10.284 -0.19 10.536 0.569 Z" fill="rgb(245, 245, 245)" height="18.624441386886673px" id="sYLKdPWes" transform="translate(166.553 76.338)" width="19.494717540189413px"/><path d="M 10.536 0.569 L 12.49 6.429 L 18.667 6.476 C 19.467 6.483 19.798 7.503 19.155 7.978 L 14.186 11.648 L 16.05 17.537 C 16.292 18.299 15.423 18.931 14.772 18.465 L 9.747 14.873 L 4.722 18.465 C 4.071 18.93 3.204 18.299 3.444 17.537 L 5.308 11.648 L 0.339 7.978 C -0.304 7.502 0.027 6.483 0.827 6.476 L 7.004 6.429 L 8.958 0.569 C 9.21 -0.189 10.284 -0.189 10.536 0.569 Z" fill="rgb(245, 245, 245)" height="18.62369138688669px" id="lgKPxTzNc" transform="translate(166.553 106.993)" width="19.494717540189413px"/><path d="M 10.536 0.569 L 12.49 6.429 L 18.667 6.476 C 19.467 6.483 19.798 7.503 19.155 7.978 L 14.186 11.648 L 16.05 17.537 C 16.292 18.299 15.423 18.931 14.772 18.465 L 9.747 14.873 L 4.722 18.465 C 4.071 18.93 3.204 18.299 3.444 17.537 L 5.308 11.648 L 0.339 7.978 C -0.304 7.502 0.027 6.483 0.827 6.476 L 7.004 6.429 L 8.958 0.569 C 9.21 -0.19 10.282 -0.19 10.536 0.569 Z" fill="rgb(245, 245, 245)" height="18.624441386886666px" id="YJBDLjcnH" transform="translate(190.347 0)" width="19.494717540189384px"/><path d="M 10.536 0.569 L 12.49 6.429 L 18.667 6.476 C 19.467 6.483 19.798 7.503 19.155 7.978 L 14.186 11.648 L 16.05 17.537 C 16.292 18.299 15.423 18.931 14.772 18.465 L 9.747 14.873 L 4.722 18.465 C 4.071 18.93 3.204 18.299 3.444 17.537 L 5.308 11.648 L 0.339 7.978 C -0.304 7.502 0.027 6.483 0.827 6.476 L 7.004 6.429 L 8.958 0.569 C 9.21 -0.19 10.282 -0.19 10.536 0.569 Z" fill="rgb(245, 245, 245)" height="18.623691386886676px" id="h0B4xCWqU" transform="translate(190.347 30.655)" width="19.494717540189384px"/><path d="M 10.536 0.569 L 12.49 6.429 L 18.667 6.476 C 19.467 6.483 19.798 7.503 19.155 7.978 L 14.186 11.648 L 16.05 17.537 C 16.292 18.299 15.423 18.931 14.772 18.465 L 9.747 14.873 L 4.722 18.465 C 4.071 18.93 3.204 18.299 3.444 17.537 L 5.308 11.648 L 0.339 7.978 C -0.304 7.502 0.027 6.483 0.827 6.476 L 7.004 6.429 L 8.958 0.569 C 9.21 -0.189 10.282 -0.189 10.536 0.569 Z" fill="rgb(245, 245, 245)" height="18.623691386886676px" id="Zd8vecdZV" transform="translate(190.347 61.309)" width="19.494717540189384px"/><path d="M 10.536 0.569 L 12.49 6.429 L 18.667 6.476 C 19.467 6.483 19.798 7.503 19.155 7.978 L 14.186 11.648 L 16.05 17.537 C 16.292 18.299 15.423 18.931 14.772 18.465 L 9.747 14.873 L 4.722 18.465 C 4.071 18.93 3.204 18.299 3.444 17.537 L 5.308 11.648 L 0.339 7.978 C -0.304 7.502 0.027 6.483 0.827 6.476 L 7.004 6.429 L 8.958 0.569 C 9.21 -0.19 10.282 -0.19 10.536 0.569 Z" fill="rgb(245, 245, 245)" height="18.624441386886673px" id="MMpBqeWtB" transform="translate(190.347 91.963)" width="19.494717540189384px"/><path d="M 10.536 0.57 L 12.49 6.43 L 18.667 6.477 C 19.467 6.484 19.798 7.504 19.155 7.979 L 14.186 11.649 L 16.05 17.538 C 16.292 18.3 15.423 18.932 14.772 18.466 L 9.747 14.874 L 4.722 18.466 C 4.071 18.931 3.204 18.3 3.444 17.538 L 5.308 11.649 L 0.339 7.979 C -0.304 7.503 0.027 6.484 0.827 6.477 L 7.004 6.43 L 8.958 0.57 C 9.21 -0.19 10.282 -0.19 10.536 0.57 Z" fill="rgb(245, 245, 245)" height="18.625191386886655px" id="RU3NMhoZd" transform="translate(190.347 122.616)" width="19.494717540189384px"/></g></g></svg>)
《以太之战 2》完美的全球发布
Aether Studios
了解Aether Studios是如何快速添加Edgegap并向他们的社区交付完美的启动和后启动服务的。
Case Study

" width="512.0010000000001px"><path d="M 503.172 335.449 L 8.828 335.449 C 3.953 335.449 0 331.496 0 326.621 L 0 8.828 C 0 3.953 3.953 0 8.828 0 L 503.173 0 C 508.048 0 512.001 3.953 512.001 8.828 L 512.001 326.621 C 512 331.497 508.047 335.449 503.172 335.449 Z" fill="rgb(65, 71, 155)" height="335.44900000000007px" id="ONvuEWaqr" transform="translate(0 0)" width="512.0010000000001px"/><path d="M 247.172 0 L 231.838 0 L 150.068 53.574 L 150.068 0 L 105.93 0 L 105.93 53.574 L 24.16 0 L 8.828 0 C 3.953 0 0 3.952 0 8.827 L 0 15.829 L 70.155 61.792 L 0 61.792 L 0 105.93 L 70.155 105.93 L 0 151.894 L 0 158.896 C 0 163.771 3.953 167.724 8.828 167.724 L 24.162 167.724 L 105.932 114.15 L 105.932 167.724 L 150.07 167.724 L 150.07 114.15 L 231.839 167.724 L 247.173 167.724 C 252.048 167.724 256.001 163.771 256.001 158.896 L 256.001 151.894 L 185.846 105.931 L 256 105.931 L 256 61.793 L 185.845 61.793 L 256 15.83 L 256 8.828 C 256 3.952 252.047 0 247.172 0 Z" fill="rgb(245, 245, 245)" height="167.72399999999996px" id="GUmgchOlg" transform="translate(0 0.001)" width="256.0010000000001px"/><g d="M 256 70.621 L 141.241 70.621 L 141.241 0 L 114.759 0 L 114.759 70.621 L 0 70.621 L 0 97.103 L 114.759 97.103 L 114.759 167.724 L 141.241 167.724 L 141.241 97.103 L 256 97.103 Z M 97.103 61.793 L 4.207 1.492 C 1.735 3.056 0 5.685 0 8.827 L 0 9.285 L 80.889 61.793 Z M 166.283 61.793 L 254.657 4.427 C 253.121 1.828 250.411 0 247.172 0 L 245.263 0 L 150.069 61.793 Z M 89.474 105.931 L 1.269 163.187 C 2.79 165.849 5.542 167.724 8.828 167.724 L 10.493 167.724 L 105.689 105.931 Z M 255.86 159.589 L 173.194 105.931 L 156.98 105.931 L 250.854 166.866 C 253.666 165.561 255.595 162.826 255.86 159.589 Z" fill="transparent" height="167.724px" id="cSLZBdSvU" transform="translate(0 0.001)" width="256px"><path d="M 256 70.621 L 141.241 70.621 L 141.241 0 L 114.759 0 L 114.759 70.621 L 0 70.621 L 0 97.103 L 114.759 97.103 L 114.759 167.724 L 141.241 167.724 L 141.241 97.103 L 256 97.103 Z" fill="rgb(255, 75, 85)" height="167.724px" id="r2Lr8paf8" width="256px"/><path d="M 97.103 60.301 L 4.207 0 C 1.735 1.564 0 4.193 0 7.335 L 0 7.793 L 80.889 60.301 Z" fill="rgb(255, 75, 85)" height="60.30099999999999px" id="PC8xW9NFh" transform="translate(0 1.492)" width="97.103px"/><path d="M 16.214 61.793 L 104.588 4.427 C 103.052 1.828 100.342 0 97.103 0 L 95.194 0 L 0 61.793 Z" fill="rgb(255, 75, 85)" height="61.793000000000006px" id="HmYUgAs52" transform="translate(150.069 0)" width="104.58800000000002px"/><path d="M 88.205 0 L 0 57.256 C 1.521 59.918 4.273 61.793 7.559 61.793 L 9.224 61.793 L 104.42 0 Z" fill="rgb(255, 75, 85)" height="61.793000000000006px" id="gm8wSFSGZ" transform="translate(1.269 105.931)" width="104.41999999999999px"/><path d="M 98.88 53.658 L 16.214 0 L 0 0 L 93.874 60.935 C 96.686 59.63 98.615 56.895 98.88 53.658 Z" fill="rgb(255, 75, 85)" height="60.935px" id="g7qMKJ3Wr" transform="translate(156.98 105.931)" width="98.88000000000002px"/></g><g d="M 42.098 157.089 L 48.761 179.086 L 70.114 170.581 C 71.936 169.855 73.592 171.933 72.48 173.547 L 59.436 192.471 L 79.398 203.862 C 81.101 204.834 80.51 207.424 78.554 207.561 L 55.625 209.162 L 59.166 231.872 C 59.468 233.81 57.074 234.963 55.748 233.518 L 40.2 216.59 L 24.652 233.518 C 23.326 234.962 20.932 233.809 21.234 231.872 L 24.775 209.162 L 1.846 207.561 C -0.11 207.424 -0.701 204.834 1.002 203.862 L 20.964 192.471 L 7.92 173.547 C 6.808 171.933 8.464 169.855 10.286 170.581 L 31.639 179.086 L 38.302 157.089 C 38.873 155.212 41.53 155.212 42.098 157.089 Z M 304.706 0.688 L 307.961 11.433 L 318.391 7.279 C 319.28 6.925 320.09 7.939 319.546 8.728 L 313.175 17.973 L 322.926 23.538 C 323.758 24.012 323.469 25.278 322.513 25.344 L 311.313 26.126 L 313.042 37.219 C 313.19 38.166 312.02 38.729 311.372 38.023 L 303.777 29.754 L 296.182 38.023 C 295.534 38.728 294.365 38.165 294.512 37.219 L 296.241 26.126 L 285.041 25.344 C 284.085 25.278 283.796 24.012 284.628 23.538 L 294.379 17.973 L 288.008 8.728 C 287.464 7.939 288.274 6.925 289.163 7.279 L 299.593 11.433 L 302.848 0.688 C 303.13 -0.229 304.429 -0.229 304.706 0.688 Z M 232.129 83.164 L 235.384 93.909 L 245.814 89.755 C 246.703 89.401 247.513 90.415 246.969 91.204 L 240.598 100.449 L 250.349 106.014 C 251.181 106.488 250.892 107.754 249.936 107.82 L 238.736 108.602 L 240.465 119.695 C 240.613 120.642 239.443 121.205 238.795 120.499 L 231.2 112.23 L 223.605 120.499 C 222.957 121.204 221.788 120.641 221.935 119.695 L 223.664 108.602 L 212.464 107.82 C 211.508 107.754 211.219 106.488 212.051 106.014 L 221.802 100.449 L 215.431 91.204 C 214.887 90.415 215.697 89.401 216.586 89.755 L 227.016 93.909 L 230.271 83.164 C 230.553 82.247 231.851 82.247 232.129 83.164 Z M 373.37 47.853 L 376.625 58.598 L 387.055 54.444 C 387.944 54.09 388.754 55.104 388.21 55.893 L 381.839 65.138 L 391.59 70.703 C 392.422 71.177 392.133 72.443 391.177 72.509 L 379.977 73.291 L 381.706 84.384 C 381.854 85.331 380.684 85.894 380.037 85.188 L 372.442 76.919 L 364.847 85.188 C 364.199 85.893 363.03 85.33 363.177 84.384 L 364.906 73.291 L 353.706 72.509 C 352.75 72.443 352.461 71.177 353.293 70.703 L 363.044 65.138 L 356.673 55.893 C 356.129 55.104 356.939 54.09 357.828 54.444 L 368.258 58.598 L 371.513 47.853 C 371.794 46.936 373.092 46.936 373.37 47.853 Z M 304.706 189.095 L 307.961 199.84 L 318.391 195.685 C 319.28 195.331 320.09 196.345 319.546 197.134 L 313.175 206.379 L 322.926 211.944 C 323.758 212.418 323.469 213.684 322.513 213.75 L 311.313 214.532 L 313.042 225.625 C 313.19 226.572 312.02 227.135 311.372 226.429 L 303.777 218.16 L 296.182 226.429 C 295.534 227.134 294.365 226.571 294.512 225.625 L 296.241 214.532 L 285.041 213.75 C 284.085 213.684 283.796 212.418 284.628 211.944 L 294.379 206.379 L 288.008 197.134 C 287.464 196.345 288.274 195.331 289.163 195.685 L 299.593 199.84 L 302.848 189.095 C 303.13 188.178 304.429 188.178 304.706 189.095 Z M 329.888 102.472 L 327.275 110.308 L 319.016 110.372 C 317.947 110.381 317.503 111.745 318.364 112.38 L 325.008 117.287 L 322.516 125.162 C 322.194 126.182 323.355 127.025 324.224 126.403 L 330.944 121.6 L 337.664 126.403 C 338.534 127.025 339.694 126.181 339.372 125.162 L 336.88 117.287 L 343.524 112.38 C 344.385 111.744 343.941 110.381 342.872 110.372 L 334.613 110.308 L 332 102.472 C 331.661 101.457 330.226 101.457 329.888 102.472 Z" fill="transparent" height="234.16663387836536px" id="Omk3PigsP" transform="translate(88.573 58.766)" width="392.07946959689326px"><path d="M 42.098 1.408 L 48.761 23.405 L 70.114 14.9 C 71.936 14.174 73.592 16.252 72.48 17.866 L 59.436 36.79 L 79.398 48.181 C 81.101 49.153 80.51 51.743 78.554 51.88 L 55.625 53.481 L 59.166 76.191 C 59.468 78.129 57.074 79.282 55.748 77.837 L 40.2 60.909 L 24.652 77.837 C 23.326 79.281 20.932 78.128 21.234 76.191 L 24.775 53.481 L 1.846 51.88 C -0.11 51.743 -0.701 49.153 1.002 48.181 L 20.964 36.79 L 7.92 17.866 C 6.808 16.252 8.464 14.174 10.286 14.9 L 31.639 23.405 L 38.302 1.408 C 38.873 -0.469 41.53 -0.469 42.098 1.408 Z" fill="rgb(245, 245, 245)" height="78.48563412250599px" id="fYQnRYK1R" transform="translate(0 155.681)" width="80.40008303312064px"/><path d="M 20.567 0.688 L 23.822 11.433 L 34.252 7.279 C 35.141 6.925 35.951 7.939 35.407 8.728 L 29.036 17.973 L 38.787 23.538 C 39.619 24.012 39.33 25.278 38.374 25.344 L 27.174 26.126 L 28.903 37.219 C 29.051 38.166 27.881 38.729 27.233 38.023 L 19.638 29.754 L 12.043 38.023 C 11.395 38.728 10.226 38.165 10.373 37.219 L 12.102 26.126 L 0.902 25.344 C -0.054 25.278 -0.343 24.012 0.489 23.538 L 10.24 17.973 L 3.869 8.728 C 3.325 7.939 4.135 6.925 5.024 7.279 L 15.454 11.433 L 18.709 0.688 C 18.991 -0.229 20.29 -0.229 20.567 0.688 Z" fill="rgb(245, 245, 245)" height="38.339856082326236px" id="xWQ8ul9f2" transform="translate(284.139 0)" width="39.27685021212767px"/><path d="M 20.567 0.688 L 23.822 11.433 L 34.252 7.279 C 35.141 6.925 35.951 7.939 35.407 8.728 L 29.036 17.973 L 38.787 23.538 C 39.619 24.012 39.33 25.278 38.374 25.344 L 27.174 26.126 L 28.903 37.219 C 29.051 38.166 27.881 38.729 27.233 38.023 L 19.638 29.754 L 12.043 38.023 C 11.395 38.728 10.226 38.165 10.373 37.219 L 12.102 26.126 L 0.902 25.344 C -0.054 25.278 -0.343 24.012 0.489 23.538 L 10.24 17.973 L 3.869 8.728 C 3.325 7.939 4.135 6.925 5.024 7.279 L 15.454 11.433 L 18.709 0.688 C 18.991 -0.229 20.289 -0.229 20.567 0.688 Z" fill="rgb(245, 245, 245)" height="38.339856082326236px" id="FPh7KrM7r" transform="translate(211.562 82.476)" width="39.2768502121277px"/><path d="M 20.566 0.688 L 23.821 11.433 L 34.251 7.279 C 35.14 6.925 35.95 7.939 35.406 8.728 L 29.035 17.973 L 38.786 23.538 C 39.618 24.012 39.329 25.278 38.373 25.344 L 27.173 26.126 L 28.902 37.219 C 29.05 38.166 27.88 38.729 27.233 38.023 L 19.638 29.754 L 12.043 38.023 C 11.395 38.728 10.226 38.165 10.373 37.219 L 12.102 26.126 L 0.902 25.344 C -0.054 25.278 -0.343 24.012 0.489 23.538 L 10.24 17.973 L 3.869 8.728 C 3.325 7.939 4.135 6.925 5.024 7.279 L 15.454 11.433 L 18.709 0.688 C 18.99 -0.229 20.288 -0.229 20.566 0.688 Z" fill="rgb(245, 245, 245)" height="38.339856082326264px" id="uCwvZ9Smz" transform="translate(352.804 47.165)" width="39.27585021212769px"/><path d="M 20.567 0.688 L 23.822 11.433 L 34.252 7.278 C 35.141 6.924 35.951 7.938 35.407 8.727 L 29.036 17.972 L 38.787 23.537 C 39.619 24.011 39.33 25.277 38.374 25.343 L 27.174 26.125 L 28.903 37.218 C 29.051 38.165 27.881 38.728 27.233 38.022 L 19.638 29.753 L 12.043 38.022 C 11.395 38.727 10.226 38.164 10.373 37.218 L 12.102 26.125 L 0.902 25.343 C -0.054 25.277 -0.343 24.011 0.489 23.537 L 10.24 17.972 L 3.869 8.727 C 3.325 7.938 4.135 6.924 5.024 7.278 L 15.454 11.433 L 18.709 0.688 C 18.991 -0.229 20.29 -0.229 20.567 0.688 Z" fill="rgb(245, 245, 245)" height="38.33885608232623px" id="rWM9Mwb0Y" transform="translate(284.139 188.407)" width="39.27685021212767px"/><path d="M 11.978 0.761 L 9.365 8.597 L 1.106 8.661 C 0.037 8.67 -0.407 10.034 0.454 10.669 L 7.098 15.576 L 4.606 23.451 C 4.284 24.471 5.445 25.314 6.314 24.692 L 13.034 19.889 L 19.754 24.692 C 20.624 25.314 21.784 24.47 21.462 23.451 L 18.97 15.576 L 25.614 10.669 C 26.475 10.033 26.031 8.67 24.962 8.661 L 16.703 8.597 L 14.09 0.761 C 13.751 -0.254 12.316 -0.254 11.978 0.761 Z" fill="rgb(245, 245, 245)" height="24.90477517194006px" id="oNJ4MMpCs" transform="translate(317.91 101.71)" width="26.068572725630133px"/></g></g></svg>)
克服因虚拟现实在竞技Multiplay中使用WiFi而引入的延迟
Halfbrick Studios
Discover how Halfbrick successfully launched & maintains a multiplayer-focused Early Access on META Quest's VR platform.
Case Study
" width="512.0020000000002px"><path d="M 503.172 335.449 L 8.828 335.449 C 3.953 335.449 0 331.496 0 326.621 L 0 8.828 C 0 3.953 3.953 0 8.828 0 L 503.173 0 C 508.048 0 512.001 3.953 512.001 8.828 L 512.001 326.621 C 512 331.496 508.047 335.449 503.172 335.449 Z" fill="rgb(65, 71, 155)" height="335.44900000000007px" id="yyH2D1DI9" transform="translate(0 0)" width="512.0010000000001px"/><path d="M 512 8.828 C 512 3.953 508.047 0 503.172 0 L 463.677 0 L 300.137 107.147 L 300.137 0 L 211.861 0 L 211.861 107.147 L 48.322 0 L 8.828 0 C 3.953 0 0 3.953 0 8.828 L 0 31.659 L 140.309 123.586 L 0 123.586 L 0 211.862 L 140.309 211.862 L 0 303.79 L 0 326.621 C 0 331.496 3.953 335.449 8.828 335.449 L 48.323 335.449 L 211.863 228.302 L 211.863 335.449 L 300.139 335.449 L 300.139 228.302 L 463.679 335.449 L 503.174 335.449 C 508.049 335.449 512.002 331.496 512.002 326.621 L 512.002 303.79 L 371.693 211.863 L 512 211.863 L 512 123.587 L 371.691 123.587 L 512 31.659 Z" fill="rgb(245, 245, 245)" height="335.44899999999996px" id="b6Y_9_Nmp" transform="translate(0 0)" width="512.0020000000002px"/><g d="M 512 141.242 L 282.483 141.242 L 282.483 0 L 229.517 0 L 229.517 141.242 L 0 141.242 L 0 194.207 L 229.517 194.207 L 229.517 335.449 L 282.483 335.449 L 282.483 194.207 L 512 194.207 Z M 178.948 211.862 L 0.25 327.859 C 0.875 332.122 4.39 335.449 8.827 335.449 L 20.986 335.449 L 211.376 211.863 L 178.948 211.863 Z M 346.388 211.862 L 313.96 211.862 L 504.073 335.266 C 508.504 334.794 512.001 331.176 512.001 326.62 L 512.001 319.362 Z M 0 18.573 L 161.779 123.587 L 194.207 123.587 L 5.143 0.861 C 2.123 2.264 0 5.279 0 8.828 Z M 332.566 123.587 L 511.693 7.31 C 510.949 3.188 507.509 0.001 503.172 0.001 L 490.525 0.001 L 300.138 123.587 Z" fill="transparent" height="335.449px" id="qOqNZNTkq" transform="translate(0 0)" width="512.0009914550781px"><path d="M 512 141.242 L 282.483 141.242 L 282.483 0 L 229.517 0 L 229.517 141.242 L 0 141.242 L 0 194.207 L 229.517 194.207 L 229.517 335.449 L 282.483 335.449 L 282.483 194.207 L 512 194.207 Z" fill="rgb(255, 75, 85)" height="335.449px" id="wdNznAHgp" width="512px"/><path d="M 178.698 0 L 0 115.997 C 0.625 120.26 4.14 123.587 8.577 123.587 L 20.736 123.587 L 211.126 0.001 L 178.698 0.001 Z" fill="rgb(255, 75, 85)" height="123.58699999999999px" id="ipi6c7oPr" transform="translate(0.25 211.862)" width="211.12599999999998px"/><path d="M 32.428 0 L 0 0 L 190.113 123.404 C 194.544 122.932 198.041 119.314 198.041 114.758 L 198.041 107.5 Z" fill="rgb(255, 75, 85)" height="123.404px" id="pwgtGo_iw" transform="translate(313.96 211.862)" width="198.041px"/><path d="M 0 17.712 L 161.779 122.726 L 194.207 122.726 L 5.143 0 C 2.123 1.403 0 4.418 0 7.967 Z" fill="rgb(255, 75, 85)" height="122.726px" id="YGw5MRgIz" transform="translate(0 0.861)" width="194.207px"/><path d="M 32.428 123.586 L 211.555 7.309 C 210.811 3.187 207.371 0 203.034 0 L 190.387 0 L 0 123.586 Z" fill="rgb(255, 75, 85)" height="123.586px" id="LKFs809KW" transform="translate(300.138 0.001)" width="211.555px"/></g></g></svg>)
MENA的社交应用添加了在线游戏
WOLF
了解这款在中东和北非地区广受欢迎的社交应用如何轻松地将 matchmaking 和多人游戏编排添加到 WOLF Qanawat。
Case Study

" width="512.0010000000001px"><path d="M 503.172 335.449 L 8.828 335.449 C 3.953 335.449 0 331.496 0 326.621 L 0 8.828 C 0 3.953 3.953 0 8.828 0 L 503.173 0 C 508.048 0 512.001 3.953 512.001 8.828 L 512.001 326.621 C 512 331.497 508.047 335.449 503.172 335.449 Z" fill="rgb(255, 75, 85)" height="335.44900000000007px" id="SNQmZukZi" transform="translate(0 0)" width="512.0010000000001px"/><g d="M 186.827 58.028 L 200.664 76.129 L 222.27 68.897 C 223.478 68.493 224.506 69.859 223.782 70.907 L 210.843 89.66 L 224.398 107.974 C 225.156 108.998 224.174 110.397 222.954 110.033 L 201.12 103.522 L 187.892 122.072 C 187.153 123.109 185.517 122.608 185.486 121.335 L 184.931 98.558 L 163.201 91.709 C 161.986 91.326 161.957 89.617 163.159 89.194 L 184.65 81.628 L 184.448 58.845 C 184.436 57.571 186.054 57.016 186.827 58.028 Z M 110.309 158.937 C 71.314 158.937 39.682 127.304 39.682 88.274 C 39.682 49.316 71.315 17.612 110.309 17.612 C 124.817 17.612 138.196 22.074 149.346 29.626 C 151.053 30.782 153.002 28.539 151.573 27.053 C 134.909 9.728 111.325 -0.841 85.175 0.052 C 40.249 1.585 3.057 37.605 0.186 82.465 C -3.101 133.848 37.585 176.551 88.241 176.551 C 113.194 176.551 135.62 166.119 151.634 149.439 C 153.049 147.966 151.096 145.756 149.405 146.902 C 138.243 154.471 124.842 158.937 110.309 158.937 Z" fill="transparent" height="176.5514615414524px" id="ukfOWsxib" transform="translate(66.647 79.449)" width="224.6639984455675px"><path d="M 24.554 0.523 L 38.391 18.624 L 59.997 11.392 C 61.205 10.988 62.233 12.354 61.509 13.402 L 48.57 32.155 L 62.125 50.469 C 62.883 51.493 61.901 52.892 60.681 52.528 L 38.847 46.017 L 25.619 64.567 C 24.88 65.604 23.244 65.103 23.213 63.83 L 22.658 41.053 L 0.928 34.204 C -0.287 33.821 -0.316 32.112 0.886 31.689 L 22.377 24.123 L 22.175 1.34 C 22.163 0.066 23.781 -0.489 24.554 0.523 Z" fill="rgb(245, 245, 245)" height="65.12552054851531px" id="mbIdfSroO" transform="translate(162.274 57.505)" width="62.390469392833126px"/><path d="M 110.309 158.937 C 71.314 158.937 39.682 127.304 39.682 88.274 C 39.682 49.316 71.315 17.612 110.309 17.612 C 124.817 17.612 138.196 22.074 149.346 29.626 C 151.053 30.782 153.002 28.539 151.573 27.053 C 134.909 9.728 111.325 -0.841 85.175 0.052 C 40.249 1.585 3.057 37.605 0.186 82.465 C -3.101 133.848 37.585 176.551 88.241 176.551 C 113.194 176.551 135.62 166.119 151.634 149.439 C 153.049 147.966 151.096 145.756 149.405 146.902 C 138.243 154.471 124.842 158.937 110.309 158.937 Z" fill="rgb(245, 245, 245)" height="176.5514615414524px" id="PMGcfUOiV" width="152.12110077269674px"/></g></g></svg>)
混合编排让开球策略随时应对任何流量做好准备
Birch Games
混合编排如何帮助 Birch Games 应对流量——将免流出费用的 Fleets 与无区域限制云相结合。
Case Study
" width="512.0010000000001px"><g d="M 503.172 335.449 L 8.828 335.449 C 3.953 335.449 0 331.496 0 326.621 L 0 8.828 C 0 3.953 3.953 0 8.828 0 L 503.173 0 C 508.048 0 512.001 3.953 512.001 8.828 L 512.001 326.621 C 512 331.497 508.047 335.449 503.172 335.449 Z M 114.76 335.455 L 114.76 0.005 L 397.24 0.005 L 397.24 335.455 Z" fill="transparent" height="335.4549999998882px" id="QVOdJ4c3U" transform="translate(0 0)" width="512.001px"><path d="M 503.172 335.449 L 8.828 335.449 C 3.953 335.449 0 331.496 0 326.621 L 0 8.828 C 0 3.953 3.953 0 8.828 0 L 503.173 0 C 508.048 0 512.001 3.953 512.001 8.828 L 512.001 326.621 C 512 331.497 508.047 335.449 503.172 335.449 Z" fill="rgb(245, 245, 245)" height="335.44899999999996px" id="wF_JuDDdb" width="512.001px"/><path d="M 0 335.45 L 0 0 L 282.48 0 L 282.48 335.45 Z" fill="rgb(245, 245, 245)" height="335.44999999999993px" id="BDMWsWel0" transform="translate(114.76 0.005)" width="282.48px"/></g><g d="M 8.828 0 C 3.953 0 0 3.952 0 8.827 L 0 326.62 C 0 331.495 3.953 335.448 8.828 335.448 L 114.759 335.448 L 114.759 0 Z M 503.172 0 L 397.241 0 L 397.241 335.448 L 503.172 335.448 C 508.047 335.448 512 331.495 512 326.62 L 512 8.827 C 512 3.952 508.047 0 503.172 0 Z M 309.569 206.484 L 361.952 176.552 L 349.932 170.542 C 346.561 168.856 344.631 165.216 345.13 161.479 L 349.041 132.157 L 326.864 138.609 C 321.965 140.035 316.881 137.021 315.779 132.04 L 313.655 122.44 L 292.832 146.81 C 289.945 150.188 284.446 147.608 285.199 143.228 L 294.092 91.52 L 280.477 95.244 C 276.5 96.332 272.3 94.522 270.361 90.884 L 256.024 64.013 L 256.024 63.973 L 256.014 63.993 L 256.003 63.973 L 256.003 64.013 L 241.666 90.884 C 239.725 94.521 235.525 96.331 231.548 95.244 L 217.932 91.52 L 226.825 143.228 C 227.578 147.606 222.078 150.187 219.191 146.81 L 198.368 122.44 L 196.244 132.04 C 195.142 137.022 190.058 140.034 185.159 138.609 L 162.982 132.157 L 166.893 161.479 C 167.392 165.215 165.462 168.856 162.091 170.542 L 150.071 176.552 L 202.454 206.485 C 207.88 209.586 210.258 216.162 208.069 222.015 L 203.591 233.992 L 248.476 230.16 C 250.96 229.948 253.074 231.948 253.001 234.439 L 251.587 282.483 L 260.415 282.483 L 259 234.437 C 258.927 231.945 261.041 229.946 263.525 230.158 L 308.431 233.992 L 303.953 222.015 C 301.766 216.161 304.143 209.584 309.569 206.484 Z" fill="transparent" height="335.448px" id="Xzi3AP5Xz" transform="translate(0 0.001)" width="511.9999973144531px"><path d="M 8.828 0 C 3.953 0 0 3.952 0 8.827 L 0 326.62 C 0 331.495 3.953 335.448 8.828 335.448 L 114.759 335.448 L 114.759 0 Z" fill="rgb(255, 75, 85)" height="335.448px" id="EYGeKz2xE" width="114.759px"/><path d="M 105.931 0 L 0 0 L 0 335.448 L 105.931 335.448 C 110.806 335.448 114.759 331.495 114.759 326.62 L 114.759 8.827 C 114.759 3.952 110.806 0 105.931 0 Z" fill="rgb(255, 75, 85)" height="335.448px" id="nueA_ymwG" transform="translate(397.241 0)" width="114.75900000000001px"/><path d="M 159.498 142.511 L 211.881 112.579 L 199.861 106.569 C 196.49 104.883 194.56 101.243 195.059 97.506 L 198.97 68.184 L 176.793 74.636 C 171.894 76.062 166.81 73.048 165.708 68.067 L 163.584 58.467 L 142.761 82.837 C 139.874 86.215 134.375 83.635 135.128 79.255 L 144.021 27.547 L 130.406 31.271 C 126.429 32.359 122.229 30.549 120.29 26.911 L 105.953 0.04 L 105.953 0 L 105.943 0.02 L 105.932 0 L 105.932 0.04 L 91.595 26.911 C 89.654 30.548 85.454 32.358 81.477 31.271 L 67.861 27.547 L 76.754 79.255 C 77.507 83.633 72.007 86.214 69.12 82.837 L 48.297 58.467 L 46.173 68.067 C 45.071 73.049 39.987 76.061 35.088 74.636 L 12.911 68.184 L 16.822 97.506 C 17.321 101.242 15.391 104.883 12.02 106.569 L 0 112.579 L 52.383 142.512 C 57.809 145.613 60.187 152.189 57.998 158.042 L 53.52 170.019 L 98.405 166.187 C 100.889 165.975 103.003 167.975 102.93 170.466 L 101.516 218.51 L 110.344 218.51 L 108.929 170.464 C 108.856 167.972 110.97 165.973 113.454 166.185 L 158.36 170.019 L 153.882 158.042 C 151.695 152.188 154.072 145.611 159.498 142.511 Z" fill="rgb(255, 75, 85)" height="218.5099999999999px" id="vf0MUM7tN" transform="translate(150.071 63.973)" width="211.88099999999997px"/></g></g></svg>)
7天血月
The Fun Pimps & iLLOGIKA
了解 Illogika 如何大幅降低服务器成本,并确保提供《七日杀 (7 Days to Die)》玩家所期望的在线体验。
Case Study

真实的在线战争需要终极的协调
Highwire Games
了解Highwire对性能的需求如何需要只有Edgegap才能提供的编排。
Case Study

22,000 条评价、4.8 颗星以及自动扩展的基础架构
Sinn Studios
一个由 Slack 提供支持的简单集成,如何让 Sinn Studio 的热门 VR 游戏快速上线并保持稳定运行。
Case Study

" width="512.0000078124999px"><path d="M 170.667 335.449 L 8.828 335.449 C 3.953 335.449 0 331.496 0 326.621 L 0 8.828 C 0 3.953 3.953 0 8.828 0 L 170.667 0 Z" fill="rgb(65, 71, 155)" height="335.44900000000007px" id="oFMLHlRjX" transform="translate(0 0)" width="170.66699999999975px"/><path d="M 0 335.45 L 0 0 L 170.67 0 L 170.67 335.45 Z" fill="rgb(245, 245, 245)" height="335.44999999999993px" id="bJAhRrOsu" transform="translate(170.67 0.005)" width="170.66999999999996px"/><path d="M 161.839 335.448 L 0 335.448 L 0 0 L 161.839 0 C 166.714 0 170.667 3.953 170.667 8.828 L 170.667 326.621 C 170.667 331.497 166.714 335.448 161.839 335.448 Z" fill="rgb(255, 75, 85)" height="335.448px" id="g1RxeskUA" transform="translate(341.333 0.001)" width="170.66699999999992px"/></g></svg>)
动态服务器编排
Under NDA - AAA Studio
了解世界上最大的AAA工作室之一如何通过边缘计算改善其对等多人游戏体验。
Case Study

对于 AAA 格斗游戏的近零延迟
AAA Studio - Under NDA
一个未宣布的项目如何实现了最低延迟,并改善了其1v1游戏中的公平性。
Case Study

Play Gods with Multiplayer Physics
Squido Studio
Learn how Squido uses Edgegap's highligh optimized game servers to deliver mind-bending & chaotic VR gameplay.
Case Study

全面托管的解决方案为独立游戏节省时间 多人VR恐怖游戏
Dirty Pearl Studios
了解Dirty Pearl Studios如何通过Edgegap的轻松集成和自动编排,以及其Nakama集成,节省了开发时间。
Case Study
即时全球服务器部署以促进协作式XR医学教育
AlensiaXR
AlensiaXR如何利用Edgegap为全球医学生提供低延迟、始终可用的共享解剖课程。
Case Study

" width="512.0010000000001px"><path d="M 0 0 L 512 0 L 512 158.897 C 512 163.772 508.047 167.725 503.172 167.725 L 8.828 167.725 C 3.953 167.725 0 163.772 0 158.897 Z" fill="rgb(255, 75, 85)" height="167.72499999999923px" id="YJE0c7GLE" transform="translate(0 167.725)" width="512px"/><path d="M 512 167.725 L 0 167.725 L 0 8.828 C 0 3.953 3.953 0 8.828 0 L 503.173 0 C 508.048 0 512.001 3.953 512.001 8.828 L 512 167.725 Z" fill="rgb(245, 245, 245)" height="167.72500000000002px" id="XDGHOpzwZ" transform="translate(0 0)" width="512.0010000000001px"/></g></svg>)
守光人:具有专用服务器的 VR 社交合作游戏
Spectral Games
Spectral Games 如何在无需任何服务器经验的情况下,利用 Edgegap Matchmaking 和 Server Browser 为其 VR 社交大厅启动专用服务器。
Case Study

全球范围内快速可靠的部署,适用于PvPvE挑战者Gravebound
Crater Studios
Edgegap 的调度和配对如何帮助 Crater Studios 使他们能够将重心从基础设施转移到游戏玩法上。
Case Study

" width="512.0010000000001px"><path d="M 503.172 335.449 L 8.828 335.449 C 3.953 335.449 0 331.496 0 326.621 L 0 8.828 C 0 3.953 3.953 0 8.828 0 L 503.173 0 C 508.048 0 512.001 3.953 512.001 8.828 L 512.001 326.621 C 512 331.497 508.047 335.449 503.172 335.449 Z" fill="rgb(65, 115, 205)" height="335.44900000000007px" id="c30zpw8rU" transform="translate(0 0)" width="512.0010000000001px"/><path d="M 512 141.241 L 211.862 141.241 L 211.862 0 L 158.897 0 L 158.897 141.241 L 0 141.241 L 0 194.207 L 158.897 194.207 L 158.897 335.448 L 211.862 335.448 L 211.862 194.207 L 512 194.207 Z" fill="rgb(255, 225, 90)" height="335.4480000000001px" id="vJVGripqv" transform="translate(0 0.001)" width="512px"/></g></svg>)
快速扩展网络元宇宙
Hiber
了解Hiber如何通过Edgegap消除服务器容量规划中的猜测。
Case Study

高硬件要求和自定义游戏服务器池
Alderon Games
了解Alderon Games如何瞬间利用全球多个供应商的自定义游戏服务器池来支持其热门MMO。
Case Study

独立开发者的简单集成
WhaleFood Games
阅读关于WhaleFood Games如何使用Edgegap解决其网络代码问题的文章。
Case Study

" width="512.0010000000001px"><path d="M 512 167.725 L 0 167.725 L 0 8.828 C 0 3.953 3.953 0 8.828 0 L 503.173 0 C 508.048 0 512.001 3.953 512.001 8.828 L 512 167.725 Z" fill="rgb(200, 65, 75)" height="167.72500000000002px" id="CxXieiVuO" transform="translate(0 0)" width="512.0010000000001px"/><path d="M 0 0 L 512 0 L 512 158.897 C 512 163.772 508.047 167.725 503.172 167.725 L 8.828 167.725 C 3.953 167.725 0 163.772 0 158.897 Z" fill="rgb(245, 245, 245)" height="167.72499999999923px" id="Ngt78qjyi" transform="translate(0 167.725)" width="512px"/></g></svg>)
推动东南亚首款电子竞技游戏的尖端技术。
Anantarupa Studios
了解Edgegap如何通过一个无缝解决方案简化复杂基础设施和尖端技术,从而改变东南亚的游戏格局。
Case Study

" width="512.001px"><path d="M 512 111.817 L 0 111.817 L 0 8.828 C 0 3.953 3.953 0 8.828 0 L 503.173 0 C 508.048 0 512.001 3.953 512.001 8.828 L 512 111.817 Z" fill="rgb(245, 245, 245)" height="111.81700000000001px" id="EGwGlIKuR" width="512.001px"/><path d="M 503.172 111.816 L 8.828 111.816 C 3.953 111.816 0 107.863 0 102.988 L 0 0 L 512 0 L 512 102.988 C 512 107.864 508.047 111.816 503.172 111.816 Z" fill="rgb(255, 75, 85)" height="111.81600000000003px" id="amGDoEPua" transform="translate(0 223.633)" width="512px"/><path d="M 0 111.81 L 0 0 L 512 0 L 512 111.81 Z" fill="rgb(65, 71, 155)" height="111.80999999999997px" id="SAoZfFEJY" transform="translate(0 111.815)" width="512px"/><path d="M 64.018 167.147 C 61.405 165.646 0 129.931 0 75.034 L 0 0 L 132.414 0 L 132.414 75.034 C 132.414 129.931 71.009 165.646 68.396 167.147 L 66.207 168.396 Z" fill="rgb(255, 75, 85)" height="168.396px" id="u_PaEQybT" transform="translate(66.207 83.863)" width="132.414px"/><path d="M 69.36 48.552 L 48.551 51.293 L 41.616 51.293 L 41.616 38.875 L 45.777 38.875 L 62.423 41.616 L 60.169 31.939 L 62.423 22.262 L 45.777 25.002 L 41.616 25.002 L 41.616 20.808 L 44.356 0 L 34.68 2.819 L 25.004 0 L 27.744 20.808 L 27.744 25.002 L 23.581 25.002 L 6.936 22.262 L 9.19 31.939 L 6.936 41.616 L 23.581 38.875 L 27.744 38.875 L 27.744 51.293 L 20.808 51.293 L 0 48.552 L 2.818 58.228 L 0 67.905 L 20.808 65.164 L 27.744 65.164 L 27.744 97.104 L 41.616 97.104 L 41.616 65.164 L 48.551 65.164 L 69.36 67.905 L 66.542 58.228 Z" fill="rgb(245, 245, 245)" height="97.10400000000001px" id="YjflMXOAP" transform="translate(97.734 97.104)" width="69.36000000000001px"/><path d="M 44.009 0 C 34.891 0 27.071 5.532 23.707 13.419 C 23.113 13.37 22.545 13.241 21.94 13.241 C 10.189 13.241 0.674 22.451 0 34.032 C 17.875 56.036 40.264 69.148 41.82 70.043 L 44.009 71.293 L 46.198 70.043 C 47.754 69.148 70.143 56.037 88.018 34.032 C 87.344 22.451 77.829 13.241 66.078 13.241 C 65.473 13.241 64.905 13.37 64.311 13.419 C 60.947 5.532 53.127 0 44.009 0 Z" fill="rgb(65, 71, 155)" height="71.293px" id="WT5YdQe9l" transform="translate(88.405 180.966)" width="88.01799999999997px"/><path d="M 132.414 8.828 C 132.414 8.828 132.414 61.794 132.414 79.449 C 132.414 132.415 70.621 167.725 70.621 167.725 C 70.621 167.725 8.828 132.415 8.828 79.449 C 8.828 61.794 8.828 8.828 8.828 8.828 L 132.414 8.828 M 141.241 0 L 132.413 0 L 8.828 0 L 0 0 L 0 8.828 L 0 79.449 C 0 136.877 63.537 173.843 66.241 175.389 L 70.621 177.892 L 75.001 175.389 C 77.706 173.843 141.242 136.876 141.242 79.449 L 141.242 8.828 L 141.242 0 Z" fill="rgb(245, 245, 245)" height="177.89199999999997px" id="E_CZMIWSc" transform="translate(61.793 79.449)" width="141.24199999999996px"/></g></svg>)
一次打击。全球抵达。
Triple Hill Interactive
Triple Hill Interactive如何利用Edgegap的编排来提供低延迟,并提高在每毫秒都至关重要的游戏类型中的公平性。
Case Study

" width="512.0010000000001px"><path d="M 503.172 335.449 L 8.828 335.449 C 3.953 335.449 0 331.496 0 326.621 L 0 8.828 C 0 3.953 3.953 0 8.828 0 L 503.173 0 C 508.048 0 512.001 3.953 512.001 8.828 L 512.001 326.621 C 512 331.497 508.047 335.449 503.172 335.449 Z" fill="rgb(245, 245, 245)" height="335.44900000000007px" id="cCCLct8Da" transform="translate(0 0)" width="512.0010000000001px"/><path d="M 129.808 14.808 C 89.245 -12.233 34.458 -1.178 7.434 39.314 C -6.121 59.525 -0.611 86.988 19.669 100.509 C 39.934 114.03 67.309 108.539 80.83 88.257 C 94.351 67.976 121.744 62.553 142.008 76.003 C 162.306 89.524 167.765 116.987 154.225 137.198 C 181.267 96.638 170.336 41.85 129.808 14.808" fill="rgb(255, 75, 85)" height="137.19811402970538px" id="v5sfYHDtN" transform="translate(175.201 79.449)" width="169.07020884275516px"/><path d="M 14.833 0 C 1.278 20.211 6.788 47.674 27.068 61.195 C 47.333 74.716 74.708 69.225 88.229 48.943 C 101.75 28.662 129.143 23.239 149.407 36.689 C 169.705 50.21 175.164 77.673 161.624 97.884 C 134.618 138.516 79.849 149.433 39.286 122.391 C -1.24 95.351 -12.208 40.563 14.833 0" fill="rgb(65, 71, 155)" height="137.2355828090993px" id="gTXnIXsU0" transform="translate(167.801 118.764)" width="169.06172709346876px"/><g d="M 263.669 24.868 L 279.704 48.97 C 281.051 50.995 280.506 53.729 278.485 55.082 L 274.419 57.805 C 272.39 59.163 269.644 58.617 268.29 56.585 L 252.235 32.489 C 250.884 30.462 251.432 27.723 253.458 26.37 L 257.544 23.642 C 259.574 22.287 262.317 22.836 263.669 24.868 Z M 288.409 62.029 L 304.496 86.116 C 305.854 88.15 305.299 90.902 303.259 92.25 L 299.175 94.949 C 297.149 96.289 294.421 95.738 293.072 93.719 L 276.994 69.657 C 275.64 67.631 276.184 64.89 278.211 63.535 L 282.285 60.811 C 284.312 59.456 287.054 60.001 288.409 62.029 Z M 280.838 13.41 L 321.667 74.683 C 323.019 76.711 322.47 79.451 320.442 80.803 L 316.34 83.537 C 314.312 84.89 311.571 84.341 310.219 82.313 L 269.376 21.044 C 268.023 19.015 268.573 16.273 270.603 14.922 L 274.718 12.183 C 276.747 10.834 279.486 11.382 280.838 13.41 Z M 297.96 1.97 L 314.03 26.119 C 315.384 28.153 314.828 30.899 312.789 32.246 L 308.703 34.946 C 306.675 36.286 303.946 35.735 302.598 33.712 L 286.516 9.595 C 285.163 7.567 285.712 4.826 287.74 3.474 L 291.839 0.742 C 293.866 -0.611 296.608 -0.062 297.96 1.97 Z M 322.716 39.209 L 338.761 63.308 C 340.111 65.334 339.564 68.07 337.541 69.423 L 333.466 72.147 C 331.437 73.504 328.691 72.956 327.339 70.924 L 311.294 46.825 C 309.945 44.799 310.491 42.063 312.514 40.71 L 316.589 37.986 C 318.617 36.629 321.363 37.176 322.716 39.209 Z M 46.47 169.66 L 87.294 230.867 C 88.646 232.894 88.1 235.634 86.072 236.987 L 81.984 239.717 C 79.956 241.071 77.215 240.524 75.861 238.495 L 35.037 177.288 C 33.685 175.261 34.231 172.521 36.259 171.168 L 40.347 168.438 C 42.375 167.084 45.117 167.632 46.47 169.66 Z M 29.331 181.109 L 45.359 205.15 C 46.71 207.176 46.165 209.911 44.142 211.266 L 40.076 213.988 C 38.049 215.345 35.305 214.8 33.95 212.771 L 17.903 188.736 C 16.549 186.709 17.095 183.968 19.123 182.614 L 23.209 179.886 C 25.236 178.533 27.978 179.08 29.331 181.109 Z M 54.1 218.283 L 70.146 242.385 C 71.496 244.411 70.949 247.148 68.924 248.5 L 64.846 251.226 C 62.817 252.582 60.074 252.035 58.72 250.005 L 42.664 225.908 C 41.313 223.881 41.861 221.142 43.886 219.789 L 47.974 217.059 C 50.004 215.703 52.747 216.252 54.1 218.283 Z M 12.191 192.554 L 52.989 253.764 C 54.34 255.79 53.793 258.528 51.77 259.882 L 47.693 262.608 C 45.665 263.964 42.922 263.418 41.568 261.388 L 0.746 200.186 C -0.607 198.158 -0.058 195.417 1.97 194.064 L 6.072 191.33 C 8.098 189.978 10.839 190.526 12.191 192.554 Z M 35.043 86.12 L 75.861 24.863 C 77.214 22.833 79.956 22.285 81.985 23.639 L 86.072 26.368 C 88.099 27.721 88.645 30.461 87.294 32.488 L 46.46 93.711 C 45.11 95.734 42.379 96.284 40.352 94.942 L 36.281 92.247 C 34.243 90.899 33.689 88.152 35.043 86.12 Z M 17.896 74.687 L 58.721 13.418 C 60.074 11.388 62.818 10.84 64.847 12.196 L 68.924 14.922 C 70.948 16.275 71.494 19.011 70.144 21.038 L 29.33 82.31 C 27.977 84.34 25.235 84.889 23.206 83.534 L 19.118 80.805 C 17.092 79.453 16.545 76.714 17.896 74.687 Z M 0.739 63.303 L 41.568 1.973 C 42.921 -0.058 45.666 -0.607 47.695 0.749 L 51.772 3.475 C 53.796 4.828 54.342 7.562 52.994 9.589 L 12.19 70.928 C 10.839 72.959 8.096 73.509 6.067 72.156 L 1.965 69.422 C -0.062 68.07 -0.61 65.331 0.739 63.303 Z M 252.242 230.867 L 268.289 206.832 C 269.644 204.803 272.388 204.258 274.415 205.615 L 278.481 208.338 C 280.504 209.692 281.048 212.428 279.698 214.454 L 263.67 238.494 C 262.317 240.523 259.575 241.071 257.547 239.717 L 253.461 236.989 C 251.434 235.635 250.888 232.895 252.242 230.867 Z M 276.992 193.819 L 293.065 169.665 C 294.417 167.635 297.159 167.085 299.188 168.438 L 303.284 171.168 C 305.313 172.521 305.861 175.264 304.507 177.292 L 288.4 201.408 C 287.049 203.431 284.318 203.979 282.291 202.635 L 278.229 199.943 C 276.194 198.594 275.64 195.85 276.992 193.819 Z M 269.375 242.376 L 285.432 218.278 C 286.784 216.249 289.525 215.7 291.554 217.053 L 295.658 219.79 C 297.685 221.142 298.233 223.88 296.883 225.909 L 280.836 250.009 C 279.485 252.038 276.746 252.588 274.716 251.237 L 270.601 248.498 C 268.573 247.147 268.023 244.405 269.375 242.376 Z M 294.152 205.141 L 310.218 181.099 C 311.572 179.074 314.31 178.528 316.337 179.879 L 320.439 182.613 C 322.468 183.966 323.016 186.709 321.66 188.737 L 305.595 212.779 C 304.242 214.804 301.503 215.35 299.477 213.999 L 295.374 211.265 C 293.343 209.914 292.796 207.17 294.152 205.141 Z M 286.52 253.759 L 302.595 229.703 C 303.945 227.684 306.672 227.134 308.698 228.473 L 312.784 231.173 C 314.823 232.521 315.379 235.27 314.023 237.304 L 297.96 261.392 C 296.608 263.42 293.867 263.967 291.839 262.616 L 287.74 259.884 C 285.711 258.53 285.164 255.787 286.52 253.759 Z M 311.303 216.647 L 327.338 192.562 C 328.691 190.531 331.436 189.982 333.465 191.339 L 337.537 194.061 C 339.562 195.415 340.107 198.154 338.755 200.18 L 322.706 224.233 C 321.357 226.257 318.623 226.806 316.596 225.462 L 312.536 222.772 C 310.503 221.424 309.95 218.679 311.303 216.647 Z" fill="transparent" height="263.3571318398189px" id="lCNvJODvG" transform="translate(86.251 36.047)" width="339.5021952064517px"><path d="M 12.175 1.969 L 28.21 26.071 C 29.557 28.096 29.012 30.83 26.991 32.183 L 22.925 34.906 C 20.896 36.264 18.15 35.718 16.796 33.686 L 0.741 9.59 C -0.61 7.563 -0.062 4.824 1.964 3.471 L 6.05 0.743 C 8.08 -0.612 10.823 -0.063 12.175 1.969 Z" fill="rgb(70, 70, 85)" height="35.653004887132894px" id="ycHGraynn" transform="translate(251.494 22.898)" width="28.949224226348377px"/><path d="M 12.159 1.963 L 28.246 26.05 C 29.604 28.084 29.049 30.836 27.009 32.184 L 22.925 34.883 C 20.899 36.223 18.171 35.672 16.822 33.653 L 0.744 9.591 C -0.61 7.565 -0.066 4.824 1.961 3.469 L 6.035 0.745 C 8.062 -0.61 10.804 -0.065 12.159 1.963 Z" fill="rgb(70, 70, 85)" height="35.61505162784737px" id="ODMXhao7B" transform="translate(276.25 60.066)" width="28.98986021520443px"/><path d="M 12.204 1.966 L 53.033 63.239 C 54.385 65.267 53.836 68.007 51.808 69.359 L 47.706 72.093 C 45.678 73.446 42.937 72.897 41.585 70.869 L 0.742 9.6 C -0.611 7.571 -0.061 4.829 1.969 3.478 L 6.084 0.739 C 8.113 -0.61 10.852 -0.062 12.204 1.966 Z" fill="rgb(70, 70, 85)" height="72.83552656291968px" id="gAtjDJ8Ik" transform="translate(268.635 11.443)" width="53.77405604083742px"/><path d="M 12.186 1.97 L 28.256 26.119 C 29.61 28.153 29.054 30.899 27.015 32.246 L 22.929 34.946 C 20.901 36.286 18.172 35.735 16.824 33.712 L 0.742 9.595 C -0.611 7.567 -0.062 4.826 1.966 3.474 L 6.065 0.742 C 8.092 -0.611 10.834 -0.062 12.186 1.97 Z" fill="rgb(70, 70, 85)" height="35.67789736965542px" id="f0upNkuAE" transform="translate(285.774 0)" width="28.99624208292397px"/><path d="M 12.162 1.968 L 28.207 26.067 C 29.557 28.093 29.01 30.829 26.987 32.182 L 22.912 34.906 C 20.883 36.263 18.137 35.715 16.785 33.683 L 0.74 9.584 C -0.609 7.558 -0.063 4.822 1.96 3.469 L 6.035 0.745 C 8.063 -0.612 10.809 -0.065 12.162 1.968 Z" fill="rgb(70, 70, 85)" height="35.65170389226978px" id="g1IvjgcHB" transform="translate(310.554 37.24)" width="28.948026505279813px"/><path d="M 12.175 1.965 L 52.999 63.172 C 54.351 65.199 53.805 67.939 51.777 69.292 L 47.689 72.022 C 45.661 73.376 42.92 72.829 41.566 70.8 L 0.742 9.593 C -0.61 7.566 -0.064 4.826 1.964 3.473 L 6.052 0.743 C 8.08 -0.611 10.822 -0.063 12.175 1.965 Z" fill="rgb(70, 70, 85)" height="72.76560416064711px" id="DfSn3Pc_i" transform="translate(34.295 167.695)" width="53.74158297919352px"/><path d="M 12.172 1.966 L 28.2 26.007 C 29.551 28.033 29.006 30.768 26.983 32.123 L 22.917 34.845 C 20.89 36.202 18.146 35.657 16.791 33.628 L 0.744 9.593 C -0.61 7.566 -0.064 4.825 1.964 3.471 L 6.05 0.743 C 8.077 -0.61 10.819 -0.063 12.172 1.966 Z" fill="rgb(70, 70, 85)" height="35.59099170245332px" id="jByoEFF0s" transform="translate(17.16 179.143)" width="28.94190201423369px"/><path d="M 12.177 1.968 L 28.223 26.07 C 29.573 28.096 29.026 30.833 27.001 32.185 L 22.923 34.911 C 20.894 36.267 18.151 35.72 16.797 33.69 L 0.741 9.593 C -0.61 7.566 -0.062 4.827 1.963 3.474 L 6.051 0.744 C 8.081 -0.612 10.824 -0.063 12.177 1.968 Z" fill="rgb(70, 70, 85)" height="35.65609443432436px" id="cfwvk0dN9" transform="translate(41.923 216.315)" width="28.96370280245386px"/><path d="M 12.187 1.966 L 52.985 63.176 C 54.336 65.202 53.789 67.94 51.766 69.294 L 47.689 72.02 C 45.661 73.376 42.918 72.83 41.564 70.8 L 0.742 9.598 C -0.611 7.57 -0.062 4.829 1.966 3.476 L 6.068 0.742 C 8.094 -0.61 10.835 -0.062 12.187 1.966 Z" fill="rgb(70, 70, 85)" height="72.76486523911214px" id="IqyALdEZR" transform="translate(0.004 190.588)" width="53.726594621300734px"/><path d="M 0.741 63.224 L 41.559 1.967 C 42.912 -0.063 45.654 -0.611 47.683 0.743 L 51.77 3.472 C 53.797 4.825 54.343 7.565 52.992 9.592 L 12.158 70.815 C 10.808 72.838 8.077 73.388 6.05 72.046 L 1.979 69.351 C -0.059 68.003 -0.613 65.256 0.741 63.224 Z" fill="rgb(70, 70, 85)" height="72.77986922325502px" id="eu7akUuuY" transform="translate(34.303 22.896)" width="53.7333925108759px"/><path d="M 0.741 63.236 L 41.566 1.967 C 42.919 -0.063 45.663 -0.611 47.692 0.745 L 51.769 3.471 C 53.793 4.824 54.339 7.56 52.989 9.587 L 12.175 70.859 C 10.822 72.889 8.08 73.438 6.051 72.083 L 1.963 69.354 C -0.063 68.002 -0.61 65.263 0.741 63.236 Z" fill="rgb(70, 70, 85)" height="72.82608281373737px" id="BqIoabpdS" transform="translate(17.155 11.451)" width="53.730324651495074px"/><path d="M 0.739 63.298 L 41.568 1.968 C 42.921 -0.063 45.666 -0.612 47.695 0.744 L 51.772 3.47 C 53.796 4.823 54.342 7.557 52.994 9.584 L 12.19 70.923 C 10.839 72.954 8.096 73.504 6.067 72.151 L 1.965 69.417 C -0.062 68.065 -0.61 65.326 0.739 63.298 Z" fill="rgb(70, 70, 85)" height="72.89285657954811px" id="Ru83FJVt4" transform="translate(0 0.005)" width="53.73395842855223px"/><path d="M 0.744 25.998 L 16.791 1.963 C 18.146 -0.066 20.89 -0.611 22.917 0.746 L 26.983 3.469 C 29.006 4.823 29.55 7.559 28.2 9.585 L 12.172 33.625 C 10.819 35.654 8.077 36.202 6.049 34.848 L 1.963 32.12 C -0.064 30.766 -0.61 28.026 0.744 25.998 Z" fill="rgb(70, 70, 85)" height="35.59143200811687px" id="x3YbJM4yr" transform="translate(251.499 204.869)" width="28.94151305135091px"/><path d="M 0.739 26.123 L 16.812 1.969 C 18.164 -0.061 20.906 -0.611 22.935 0.742 L 27.031 3.472 C 29.06 4.825 29.608 7.568 28.254 9.596 L 12.147 33.712 C 10.796 35.735 8.065 36.283 6.038 34.939 L 1.976 32.247 C -0.059 30.898 -0.613 28.154 0.739 26.123 Z" fill="rgb(70, 70, 85)" height="35.674615562545625px" id="JWamSXmPn" transform="translate(276.253 167.696)" width="28.99757428163076px"/><path d="M 0.741 26.065 L 16.798 1.967 C 18.15 -0.062 20.891 -0.611 22.92 0.742 L 27.024 3.479 C 29.051 4.831 29.599 7.569 28.249 9.598 L 12.202 33.698 C 10.851 35.727 8.112 36.277 6.082 34.926 L 1.967 32.187 C -0.061 30.836 -0.611 28.094 0.741 26.065 Z" fill="rgb(70, 70, 85)" height="35.6663054618719px" id="wRX9_udCm" transform="translate(268.634 216.311)" width="28.98926678158773px"/><path d="M 0.745 26.004 L 16.811 1.962 C 18.165 -0.063 20.903 -0.609 22.93 0.742 L 27.032 3.476 C 29.061 4.829 29.609 7.572 28.253 9.6 L 12.188 33.642 C 10.835 35.667 8.096 36.213 6.07 34.862 L 1.967 32.128 C -0.064 30.777 -0.611 28.033 0.745 26.004 Z" fill="rgb(70, 70, 85)" height="35.6033871135171px" id="Lzz1KNGuY" transform="translate(293.408 179.137)" width="28.997456779853394px"/><path d="M 0.745 26.018 L 16.82 1.962 C 18.17 -0.057 20.897 -0.607 22.923 0.732 L 27.009 3.432 C 29.048 4.78 29.604 7.529 28.248 9.563 L 12.185 33.651 C 10.833 35.679 8.092 36.226 6.064 34.875 L 1.965 32.143 C -0.064 30.789 -0.611 28.046 0.745 26.018 Z" fill="rgb(70, 70, 85)" height="35.6159819374752px" id="A0idkIboh" transform="translate(285.776 227.741)" width="28.98956714730457px"/><path d="M 0.741 26.053 L 16.776 1.968 C 18.129 -0.063 20.874 -0.612 22.903 0.745 L 26.975 3.467 C 29 4.821 29.545 7.56 28.193 9.586 L 12.144 33.639 C 10.795 35.663 8.061 36.212 6.034 34.868 L 1.974 32.178 C -0.059 30.83 -0.612 28.085 0.741 26.053 Z" fill="rgb(70, 70, 85)" height="35.603519692695585px" id="rLYSPut_p" transform="translate(310.563 190.594)" width="28.93537083447484px"/></g></g></svg>)
快节奏团队大逃杀...带着枪的动物毛绒玩具!
SANDYFLOOR
了解一家韩国独立工作室是如何将其多人游戏发布到全球的。
Case Study

" width="512.0010000000001px"><path d="M 503.172 335.449 L 8.828 335.449 C 3.953 335.449 0 331.496 0 326.621 L 0 8.828 C 0 3.953 3.953 0 8.828 0 L 503.173 0 C 508.048 0 512.001 3.953 512.001 8.828 L 512.001 326.621 C 512 331.497 508.047 335.449 503.172 335.449 Z" fill="rgb(255, 75, 85)" height="335.44900000000007px" id="o4EFIIQWk" transform="translate(0 0)" width="512.0010000000001px"/><path d="M 110.786 2.968 L 134.395 73.758 L 209.016 74.336 C 213.188 74.368 214.918 79.693 211.562 82.172 L 151.533 126.501 L 174.042 197.648 C 175.301 201.626 170.771 204.918 167.376 202.492 L 106.667 159.099 L 45.957 202.492 C 42.563 204.918 38.033 201.627 39.291 197.649 L 61.8 126.502 L 1.771 82.173 C -1.586 79.695 0.145 74.369 4.317 74.337 L 78.938 73.758 L 102.547 2.969 C 103.868 -0.99 109.466 -0.99 110.786 2.968 Z" fill="rgb(255, 225, 90)" height="203.32040523295515px" id="P6STu5elW" transform="translate(149.333 64.725)" width="213.33273524655823px"/></g></svg>)
移动端赛马游戏凭借即时、高效能的服务器走向全球
Mirai Labs
看 Mirai Labs 如何通过即时服务器部署和细分 vCPU 来运行 Pegaxy Blaze 的全球多人竞速游戏,从而将单个玩家的成本保持在极低水平。
Case Study
服务器管理与分发
Matrioshka Games
阅读关于Matrioshka Games如何在资源有限的情况下发布早期访问的战斗 Royale。
Case Study
听我的信号,释放地狱!
TyGames
探索独立工作室TyGames如何让玩家沉浸在第三人称角斗士战斗的多人游戏中。
Case Study

瞬时全球编排
Soliton Interactive
探索Soliton Interactive如何做到了不可能……首次推出可多人玩的版本!
Case Study

" width="512.0010000000001px"><path d="M 503.172 335.449 L 8.828 335.449 C 3.953 335.449 0 331.496 0 326.621 L 0 8.828 C 0 3.953 3.953 0 8.828 0 L 503.173 0 C 508.048 0 512.001 3.953 512.001 8.828 L 512.001 326.621 C 512 331.497 508.047 335.449 503.172 335.449 Z" fill="rgb(200, 65, 75)" height="335.44900000000007px" id="MlxFuckso" transform="translate(0 0)" width="512.0010000000001px"/><path d="M 0 61.793 L 0 0 L 512 0 L 512 61.793 Z" fill="rgb(245, 245, 245)" height="61.793000000000006px" id="u3fp3xqWC" transform="translate(0 136.825)" width="512px"/></g></svg>)
竞技游戏具有服务器端物理引擎,确保理想的低于50毫秒的延迟
NS7
了解为什么仅有Edgegap能够使独立工作室通过服务器端物理和权限实现其AAA质量的免费游戏体育玩法愿景。
Case Study

" width="512.0010000000001px"><path d="M 503.172 335.449 L 8.828 335.449 C 3.953 335.449 0 331.496 0 326.621 L 0 8.828 C 0 3.953 3.953 0 8.828 0 L 503.173 0 C 508.048 0 512.001 3.953 512.001 8.828 L 512.001 326.621 C 512 331.497 508.047 335.449 503.172 335.449 Z" fill="rgb(115, 175, 0)" height="335.44900000000007px" id="XF0CA1kua" transform="translate(0 0)" width="512.0010000000001px"/><path d="M 190.294 1.287 L 4.238 114.538 C -1.413 117.977 -1.413 126.179 4.238 129.619 L 190.294 242.871 C 193.113 244.587 196.654 244.587 199.474 242.871 L 385.531 129.62 C 391.182 126.181 391.182 117.979 385.531 114.539 L 199.474 1.287 C 196.655 -0.429 193.113 -0.429 190.294 1.287 Z" fill="rgb(255, 225, 90)" height="244.15800000000002px" id="lacElszeU" transform="translate(61.116 45.646)" width="389.7694999999999px"/><path d="M 0 70.62 C 0 31.618 31.618 0 70.62 0 C 109.622 0 141.24 31.618 141.24 70.62 C 141.24 109.622 109.622 141.24 70.62 141.24 C 31.618 141.24 0 109.622 0 70.62 Z" fill="rgb(65, 71, 155)" height="141.24px" id="yn1LT8Oxg" transform="translate(185.38 97.105)" width="141.24px"/><g d="M 7.605 0.071 C 4.273 5.649 1.7 11.711 0 18.148 C 39.149 15.202 97.062 26.154 133.922 61.921 C 136.328 55.78 137.916 49.238 138.512 42.399 C 100.451 10.366 47.832 -1.025 7.605 0.071 Z M 71.129 60.297 L 73.009 65.935 L 78.952 65.981 C 79.721 65.987 80.04 66.969 79.422 67.426 L 74.641 70.957 L 76.434 76.623 C 76.666 77.357 75.83 77.964 75.205 77.516 L 70.37 74.06 L 65.535 77.516 C 64.909 77.964 64.074 77.357 64.306 76.623 L 66.099 70.957 L 61.318 67.426 C 60.699 66.969 61.018 65.987 61.787 65.981 L 67.73 65.935 L 69.61 60.297 C 69.853 59.567 70.885 59.567 71.129 60.297 Z M 94.228 74.882 L 95.037 77.308 L 97.595 77.328 C 97.926 77.33 98.064 77.753 97.797 77.95 L 95.739 79.469 L 96.51 81.908 C 96.61 82.224 96.251 82.485 95.981 82.292 L 93.9 80.805 L 91.819 82.292 C 91.55 82.485 91.19 82.224 91.29 81.908 L 92.061 79.469 L 90.003 77.95 C 89.737 77.754 89.874 77.331 90.205 77.328 L 92.763 77.308 L 93.572 74.882 C 93.678 74.567 94.123 74.567 94.228 74.882 Z M 61.142 49.587 L 61.951 52.013 L 64.509 52.033 C 64.84 52.035 64.978 52.458 64.711 52.655 L 62.653 54.174 L 63.424 56.613 C 63.524 56.929 63.165 57.19 62.895 56.997 L 60.814 55.51 L 58.733 56.997 C 58.464 57.19 58.104 56.929 58.204 56.613 L 58.975 54.174 L 56.917 52.655 C 56.651 52.459 56.788 52.036 57.119 52.033 L 59.677 52.013 L 60.486 49.587 C 60.592 49.273 61.037 49.273 61.142 49.587 Z M 16.334 46.645 L 17.143 49.071 L 19.701 49.091 C 20.032 49.093 20.17 49.516 19.903 49.713 L 17.845 51.232 L 18.616 53.671 C 18.716 53.987 18.357 54.248 18.087 54.055 L 16.006 52.568 L 13.925 54.055 C 13.656 54.248 13.296 53.987 13.396 53.671 L 14.167 51.232 L 12.109 49.713 C 11.843 49.517 11.98 49.094 12.311 49.091 L 14.869 49.071 L 15.678 46.645 C 15.785 46.331 16.229 46.331 16.334 46.645 Z M 53.818 74.044 L 54.627 76.47 L 57.185 76.49 C 57.516 76.492 57.654 76.915 57.387 77.112 L 55.329 78.631 L 56.1 81.07 C 56.2 81.386 55.841 81.647 55.571 81.454 L 53.49 79.967 L 51.409 81.454 C 51.14 81.647 50.78 81.386 50.88 81.07 L 51.651 78.631 L 49.593 77.112 C 49.327 76.916 49.464 76.493 49.795 76.49 L 52.353 76.47 L 53.162 74.044 C 53.269 73.731 53.714 73.731 53.818 74.044 Z M 33.194 44.952 L 33.856 46.936 L 35.948 46.953 C 36.218 46.955 36.331 47.301 36.114 47.462 L 34.431 48.704 L 35.062 50.698 C 35.144 50.956 34.85 51.17 34.629 51.012 L 32.927 49.796 L 31.225 51.012 C 31.004 51.17 30.711 50.956 30.792 50.698 L 31.423 48.704 L 29.74 47.462 C 29.523 47.301 29.634 46.955 29.906 46.953 L 31.998 46.936 L 32.66 44.952 C 32.745 44.695 33.108 44.695 33.194 44.952 Z M 96.023 3.991 L 96.851 6.473 L 99.467 6.493 C 99.806 6.495 99.946 6.928 99.673 7.129 L 97.569 8.683 L 98.358 11.178 C 98.461 11.501 98.092 11.768 97.817 11.571 L 95.688 10.049 L 93.559 11.571 C 93.283 11.769 92.916 11.5 93.018 11.178 L 93.807 8.683 L 91.703 7.129 C 91.43 6.928 91.571 6.496 91.909 6.493 L 94.525 6.473 L 95.353 3.991 C 95.461 3.669 95.916 3.669 96.023 3.991 Z M 19.216 32.814 L 19.878 34.798 L 21.97 34.815 C 22.24 34.817 22.353 35.163 22.136 35.324 L 20.453 36.566 L 21.084 38.56 C 21.166 38.818 20.872 39.032 20.651 38.874 L 18.949 37.658 L 17.247 38.874 C 17.026 39.032 16.733 38.818 16.814 38.56 L 17.445 36.566 L 15.762 35.324 C 15.545 35.163 15.656 34.818 15.928 34.815 L 18.02 34.798 L 18.682 32.814 C 18.767 32.557 19.13 32.557 19.216 32.814 Z M 29.316 60.778 L 30.318 63.784 L 33.486 63.808 C 33.896 63.811 34.066 64.334 33.736 64.578 L 31.187 66.46 L 32.143 69.48 C 32.267 69.871 31.822 70.195 31.488 69.956 L 28.91 68.114 L 26.332 69.956 C 25.999 70.194 25.553 69.871 25.677 69.48 L 26.633 66.46 L 24.084 64.578 C 23.754 64.334 23.924 63.811 24.334 63.808 L 27.502 63.784 L 28.504 60.778 C 28.637 60.39 29.187 60.39 29.316 60.778 Z M 107.107 75.512 L 107.737 77.403 L 109.73 77.418 C 109.988 77.42 110.095 77.749 109.888 77.902 L 108.285 79.086 L 108.886 80.986 C 108.964 81.232 108.684 81.435 108.473 81.285 L 106.852 80.126 L 105.23 81.285 C 105.02 81.435 104.74 81.232 104.817 80.986 L 105.418 79.086 L 103.815 77.902 C 103.608 77.749 103.715 77.42 103.973 77.418 L 105.966 77.403 L 106.596 75.512 C 106.679 75.267 107.026 75.267 107.107 75.512 Z M 114.081 61.082 L 114.89 63.508 L 117.448 63.528 C 117.779 63.53 117.917 63.953 117.65 64.15 L 115.592 65.669 L 116.363 68.108 C 116.463 68.424 116.104 68.685 115.834 68.492 L 113.753 67.005 L 111.672 68.492 C 111.403 68.685 111.043 68.424 111.143 68.108 L 111.914 65.669 L 109.856 64.15 C 109.59 63.954 109.727 63.531 110.058 63.528 L 112.616 63.508 L 113.425 61.082 C 113.531 60.767 113.976 60.767 114.081 61.082 Z" fill="transparent" height="82.35850740358373px" id="B22U7SVGG" transform="translate(187.796 131.527)" width="138.51199999999997px"><path d="M 7.605 0.071 C 4.273 5.649 1.7 11.711 0 18.148 C 39.149 15.202 97.062 26.154 133.922 61.921 C 136.328 55.78 137.916 49.238 138.512 42.399 C 100.451 10.366 47.832 -1.025 7.605 0.071 Z" fill="rgb(245, 245, 245)" height="61.921473126237345px" id="bTg9efNyw" width="138.51199999999997px"/><path d="M 10.138 0.548 L 12.018 6.185 L 17.961 6.231 C 18.73 6.237 19.049 7.219 18.431 7.676 L 13.65 11.207 L 15.443 16.873 C 15.675 17.607 14.839 18.214 14.214 17.766 L 9.379 14.31 L 4.544 17.766 C 3.918 18.214 3.083 17.607 3.315 16.873 L 5.108 11.207 L 0.327 7.676 C -0.292 7.219 0.027 6.237 0.796 6.231 L 6.739 6.185 L 8.619 0.548 C 8.862 -0.183 9.894 -0.183 10.138 0.548 Z" fill="rgb(245, 245, 245)" height="17.91960670288428px" id="O0CEZ6vpv" transform="translate(60.991 59.75)" width="18.7565376021994px"/><path d="M 4.365 0.236 L 5.174 2.662 L 7.732 2.682 C 8.063 2.684 8.201 3.107 7.934 3.304 L 5.876 4.823 L 6.647 7.262 C 6.747 7.578 6.388 7.839 6.118 7.646 L 4.037 6.159 L 1.956 7.646 C 1.687 7.839 1.327 7.578 1.427 7.262 L 2.198 4.823 L 0.14 3.304 C -0.126 3.108 0.011 2.685 0.342 2.682 L 2.9 2.662 L 3.709 0.236 C 3.815 -0.079 4.26 -0.079 4.365 0.236 Z" fill="rgb(245, 245, 245)" height="7.712282427997806px" id="lCSq4gWlc" transform="translate(89.863 74.646)" width="8.075170272227865px"/><path d="M 4.365 0.235 L 5.174 2.661 L 7.732 2.681 C 8.063 2.683 8.201 3.106 7.934 3.303 L 5.876 4.822 L 6.647 7.261 C 6.747 7.577 6.388 7.838 6.118 7.645 L 4.037 6.158 L 1.956 7.645 C 1.687 7.838 1.327 7.578 1.427 7.261 L 2.198 4.822 L 0.14 3.303 C -0.126 3.107 0.011 2.684 0.342 2.681 L 2.9 2.661 L 3.709 0.235 C 3.815 -0.078 4.26 -0.078 4.365 0.235 Z" fill="rgb(245, 245, 245)" height="7.711532427997767px" id="IsSCgSKbh" transform="translate(56.777 49.352)" width="8.075170272227844px"/><path d="M 4.365 0.235 L 5.174 2.661 L 7.732 2.681 C 8.063 2.683 8.201 3.106 7.934 3.303 L 5.876 4.822 L 6.647 7.261 C 6.747 7.577 6.388 7.838 6.118 7.645 L 4.037 6.158 L 1.956 7.645 C 1.687 7.838 1.327 7.578 1.427 7.261 L 2.198 4.822 L 0.14 3.303 C -0.126 3.107 0.011 2.684 0.342 2.681 L 2.9 2.661 L 3.709 0.235 C 3.816 -0.078 4.26 -0.078 4.365 0.235 Z" fill="rgb(245, 245, 245)" height="7.711532427997767px" id="TW2NtG63f" transform="translate(11.969 46.41)" width="8.075170272227838px"/><path d="M 4.365 0.235 L 5.174 2.661 L 7.732 2.681 C 8.063 2.683 8.201 3.106 7.934 3.303 L 5.876 4.822 L 6.647 7.261 C 6.747 7.577 6.388 7.838 6.118 7.645 L 4.037 6.158 L 1.956 7.645 C 1.687 7.838 1.327 7.577 1.427 7.261 L 2.198 4.822 L 0.14 3.303 C -0.126 3.107 0.011 2.684 0.342 2.681 L 2.9 2.661 L 3.709 0.235 C 3.816 -0.078 4.261 -0.078 4.365 0.235 Z" fill="rgb(245, 245, 245)" height="7.710782427997771px" id="s_erDFpu_" transform="translate(49.453 73.81)" width="8.075170272227844px"/><path d="M 3.569 0.193 L 4.231 2.177 L 6.323 2.194 C 6.593 2.196 6.706 2.542 6.489 2.703 L 4.806 3.945 L 5.437 5.939 C 5.519 6.197 5.225 6.411 5.004 6.253 L 3.302 5.037 L 1.6 6.253 C 1.379 6.411 1.086 6.197 1.167 5.939 L 1.798 3.945 L 0.115 2.703 C -0.102 2.542 0.009 2.196 0.281 2.194 L 2.373 2.177 L 3.035 0.193 C 3.12 -0.064 3.483 -0.064 3.569 0.193 Z" fill="rgb(245, 245, 245)" height="6.306769772597434px" id="dusRwlxlw" transform="translate(29.625 44.76)" width="6.6027792152261px"/><path d="M 4.464 0.242 L 5.292 2.724 L 7.908 2.744 C 8.247 2.746 8.387 3.179 8.114 3.38 L 6.01 4.934 L 6.799 7.429 C 6.902 7.752 6.533 8.019 6.258 7.822 L 4.129 6.3 L 2 7.822 C 1.724 8.02 1.357 7.751 1.459 7.429 L 2.248 4.934 L 0.144 3.38 C -0.129 3.179 0.012 2.746 0.35 2.744 L 2.966 2.724 L 3.794 0.242 C 3.902 -0.081 4.357 -0.081 4.464 0.242 Z" fill="rgb(245, 245, 245)" height="7.889096442946011px" id="FpqSfzWHc" transform="translate(91.559 3.75)" width="8.25829728228689px"/><path d="M 3.569 0.193 L 4.231 2.177 L 6.323 2.194 C 6.593 2.196 6.706 2.542 6.489 2.703 L 4.806 3.945 L 5.437 5.939 C 5.519 6.197 5.225 6.411 5.004 6.253 L 3.302 5.037 L 1.6 6.253 C 1.379 6.411 1.086 6.197 1.167 5.939 L 1.798 3.945 L 0.115 2.703 C -0.102 2.542 0.009 2.197 0.281 2.194 L 2.373 2.177 L 3.035 0.193 C 3.12 -0.064 3.483 -0.064 3.569 0.193 Z" fill="rgb(245, 245, 245)" height="6.3067697725973915px" id="qIdFBWWdp" transform="translate(15.647 32.622)" width="6.602779215226105px"/><path d="M 5.406 0.291 L 6.408 3.297 L 9.576 3.321 C 9.986 3.324 10.156 3.847 9.826 4.091 L 7.277 5.973 L 8.233 8.993 C 8.357 9.384 7.912 9.708 7.578 9.469 L 5 7.627 L 2.422 9.469 C 2.089 9.707 1.643 9.384 1.767 8.993 L 2.723 5.973 L 0.174 4.091 C -0.156 3.847 0.014 3.324 0.424 3.321 L 3.592 3.297 L 4.594 0.291 C 4.727 -0.097 5.277 -0.097 5.406 0.291 Z" fill="rgb(245, 245, 245)" height="9.550662337295933px" id="e7G6cbAKf" transform="translate(23.91 60.487)" width="10.000311588842724px"/><path d="M 3.401 0.184 L 4.031 2.075 L 6.024 2.09 C 6.282 2.092 6.389 2.421 6.182 2.574 L 4.579 3.758 L 5.18 5.658 C 5.258 5.904 4.978 6.107 4.767 5.957 L 3.146 4.798 L 1.524 5.957 C 1.314 6.107 1.034 5.904 1.111 5.658 L 1.712 3.758 L 0.109 2.574 C -0.098 2.421 0.009 2.092 0.267 2.09 L 2.26 2.075 L 2.89 0.184 C 2.973 -0.061 3.32 -0.061 3.401 0.184 Z" fill="rgb(245, 245, 245)" height="6.00804378735296px" id="wSeVAZjIw" transform="translate(103.706 75.329)" width="6.291188041482457px"/><path d="M 4.365 0.236 L 5.174 2.662 L 7.732 2.682 C 8.063 2.684 8.201 3.107 7.934 3.304 L 5.876 4.823 L 6.647 7.262 C 6.747 7.578 6.388 7.839 6.118 7.646 L 4.037 6.159 L 1.956 7.646 C 1.687 7.839 1.327 7.578 1.427 7.262 L 2.198 4.823 L 0.14 3.304 C -0.126 3.108 0.011 2.685 0.342 2.682 L 2.9 2.662 L 3.709 0.236 C 3.815 -0.079 4.26 -0.079 4.365 0.236 Z" fill="rgb(245, 245, 245)" height="7.712282427997778px" id="geZET5ldv" transform="translate(109.716 60.846)" width="8.075170272227865px"/></g></g></svg>)
iGaming的区域部署
X1 Contra 1
X1 Contra 1 通过经济高效的托管和区域部署,为其巴西玩家提供实时 PvP 休闲游戏,确保数据和法律合规。
Case Study

" width="512.0010000000001px"><path d="M 503.172 335.449 L 8.828 335.449 C 3.953 335.449 0 331.496 0 326.621 L 0 8.828 C 0 3.953 3.953 0 8.828 0 L 503.173 0 C 508.048 0 512.001 3.953 512.001 8.828 L 512.001 326.621 C 512 331.497 508.047 335.449 503.172 335.449 Z" fill="rgb(65, 71, 155)" height="335.44900000000007px" id="oRUr3tSM2" transform="translate(0 0)" width="512.0010000000001px"/><path d="M 247.172 0 L 231.838 0 L 150.068 53.574 L 150.068 0 L 105.93 0 L 105.93 53.574 L 24.16 0 L 8.828 0 C 3.953 0 0 3.952 0 8.827 L 0 15.829 L 70.155 61.792 L 0 61.792 L 0 105.93 L 70.155 105.93 L 0 151.894 L 0 158.896 C 0 163.771 3.953 167.724 8.828 167.724 L 24.162 167.724 L 105.932 114.15 L 105.932 167.724 L 150.07 167.724 L 150.07 114.15 L 231.839 167.724 L 247.173 167.724 C 252.048 167.724 256.001 163.771 256.001 158.896 L 256.001 151.894 L 185.846 105.931 L 256 105.931 L 256 61.793 L 185.845 61.793 L 256 15.83 L 256 8.828 C 256 3.952 252.047 0 247.172 0 Z" fill="rgb(245, 245, 245)" height="167.72399999999996px" id="JN7k2Rbkt" transform="translate(0 0.001)" width="256.0010000000001px"/><g d="M 256 70.621 L 141.241 70.621 L 141.241 0 L 114.759 0 L 114.759 70.621 L 0 70.621 L 0 97.103 L 114.759 97.103 L 114.759 167.724 L 141.241 167.724 L 141.241 97.103 L 256 97.103 Z M 97.103 61.793 L 4.207 1.492 C 1.735 3.056 0 5.685 0 8.827 L 0 9.285 L 80.889 61.793 Z M 166.283 61.793 L 254.657 4.427 C 253.121 1.828 250.411 0 247.172 0 L 245.263 0 L 150.069 61.793 Z M 89.474 105.931 L 1.269 163.187 C 2.79 165.849 5.542 167.724 8.828 167.724 L 10.493 167.724 L 105.689 105.931 Z M 255.86 159.589 L 173.194 105.931 L 156.98 105.931 L 250.854 166.866 C 253.666 165.561 255.595 162.826 255.86 159.589 Z M 395.474 279.837 C 395.116 279.837 394.755 279.724 394.448 279.509 L 384 272.043 L 373.551 279.509 C 373.245 279.724 372.883 279.837 372.525 279.837 C 372.159 279.837 371.797 279.724 371.487 279.5 C 370.875 279.052 370.612 278.259 370.84 277.535 L 374.715 265.293 L 364.388 257.673 C 363.776 257.216 363.522 256.432 363.755 255.708 C 363.992 254.984 364.66 254.492 365.423 254.484 L 378.264 254.38 L 382.325 242.199 C 382.567 241.484 383.243 240.992 384.002 240.992 C 384.761 240.992 385.438 241.483 385.679 242.199 L 389.74 254.38 L 402.581 254.484 C 403.344 254.493 404.012 254.984 404.249 255.708 C 404.482 256.432 404.227 257.216 403.616 257.673 L 393.289 265.293 L 397.164 277.535 C 397.392 278.259 397.13 279.052 396.517 279.5 C 396.203 279.724 395.837 279.837 395.474 279.837 Z" fill="transparent" height="279.83700439453116px" id="iohiX_nhu" transform="translate(0 0.001)" width="404.3343130299322px"><path d="M 256 70.621 L 141.241 70.621 L 141.241 0 L 114.759 0 L 114.759 70.621 L 0 70.621 L 0 97.103 L 114.759 97.103 L 114.759 167.724 L 141.241 167.724 L 141.241 97.103 L 256 97.103 Z" fill="rgb(255, 75, 85)" height="167.724px" id="u_QvVDyhk" width="256px"/><path d="M 97.103 60.301 L 4.207 0 C 1.735 1.564 0 4.193 0 7.335 L 0 7.793 L 80.889 60.301 Z" fill="rgb(255, 75, 85)" height="60.30099999999999px" id="VrtjWyLYe" transform="translate(0 1.492)" width="97.103px"/><path d="M 16.214 61.793 L 104.588 4.427 C 103.052 1.828 100.342 0 97.103 0 L 95.194 0 L 0 61.793 Z" fill="rgb(255, 75, 85)" height="61.793000000000006px" id="AcASLTAjz" transform="translate(150.069 0)" width="104.58800000000002px"/><path d="M 88.205 0 L 0 57.256 C 1.521 59.918 4.273 61.793 7.559 61.793 L 9.224 61.793 L 104.42 0 Z" fill="rgb(255, 75, 85)" height="61.793000000000006px" id="u8eftdJGu" transform="translate(1.269 105.931)" width="104.41999999999999px"/><path d="M 98.88 53.658 L 16.214 0 L 0 0 L 93.874 60.935 C 96.686 59.63 98.615 56.895 98.88 53.658 Z" fill="rgb(255, 75, 85)" height="60.935px" id="j2ee5cEF6" transform="translate(156.98 105.931)" width="98.88000000000002px"/><path d="M 31.804 38.845 C 31.446 38.845 31.085 38.732 30.778 38.517 L 20.33 31.051 L 9.881 38.517 C 9.575 38.732 9.213 38.845 8.855 38.845 C 8.489 38.845 8.127 38.732 7.817 38.508 C 7.205 38.06 6.942 37.267 7.17 36.543 L 11.045 24.301 L 0.718 16.681 C 0.106 16.224 -0.148 15.44 0.085 14.716 C 0.322 13.992 0.99 13.5 1.753 13.492 L 14.594 13.388 L 18.655 1.207 C 18.897 0.492 19.573 0 20.332 0 C 21.091 0 21.768 0.491 22.009 1.207 L 26.07 13.388 L 38.911 13.492 C 39.674 13.501 40.342 13.992 40.579 14.716 C 40.812 15.44 40.557 16.224 39.946 16.681 L 29.619 24.301 L 33.494 36.543 C 33.722 37.267 33.46 38.06 32.847 38.508 C 32.533 38.732 32.167 38.845 31.804 38.845 Z" fill="rgb(255, 75, 85)" height="38.844999999999914px" id="RKPrtsJ7l" transform="translate(363.67 240.992)" width="40.66478788344784px"/></g><path d="M 22.095 3.531 L 26.556 16.909 L 40.658 17.018 L 29.313 25.395 L 33.567 38.84 L 22.095 30.641 L 10.622 38.842 L 14.876 25.397 L 3.531 17.02 L 17.633 16.911 L 22.095 3.531 M 22.095 0 C 20.576 0 19.226 0.972 18.745 2.414 L 15.082 13.398 L 3.504 13.488 C 1.985 13.499 0.643 14.482 0.173 15.928 C -0.297 17.374 0.212 18.957 1.433 19.86 L 10.747 26.738 L 7.255 37.777 C 6.797 39.226 7.317 40.806 8.546 41.699 C 9.165 42.148 9.893 42.373 10.622 42.373 C 11.341 42.373 12.061 42.153 12.676 41.714 L 22.096 34.981 L 31.516 41.714 C 32.131 42.152 32.85 42.373 33.569 42.373 C 34.297 42.373 35.026 42.148 35.645 41.699 C 36.874 40.805 37.394 39.226 36.936 37.777 L 33.444 26.738 L 42.758 19.86 C 43.981 18.957 44.488 17.374 44.018 15.928 C 43.548 14.483 42.207 13.499 40.687 13.488 L 29.109 13.398 L 25.446 2.414 C 24.964 0.973 23.614 0 22.095 0 Z" fill="rgb(245, 245, 245)" height="42.372999999999934px" id="ByJ397rbf" transform="translate(361.905 239.228)" width="44.191510438092266px"/><path d="M 31.804 38.844 C 31.442 38.844 31.085 38.731 30.778 38.516 L 20.33 31.043 L 9.881 38.517 C 9.575 38.732 9.213 38.845 8.855 38.845 C 8.493 38.845 8.127 38.732 7.817 38.508 C 7.205 38.06 6.942 37.267 7.17 36.543 L 11.045 24.301 L 0.718 16.672 C 0.106 16.215 -0.148 15.422 0.085 14.707 C 0.322 13.983 0.994 13.491 1.753 13.483 L 14.594 13.388 L 18.655 1.207 C 18.897 0.492 19.573 0 20.332 0 C 21.091 0 21.768 0.491 22.009 1.207 L 26.07 13.388 L 38.911 13.483 C 39.67 13.492 40.342 13.983 40.579 14.707 C 40.812 15.422 40.557 16.215 39.946 16.672 L 29.619 24.301 L 33.494 36.543 C 33.722 37.267 33.46 38.06 32.847 38.508 C 32.533 38.732 32.167 38.844 31.804 38.844 Z" fill="rgb(255, 75, 85)" height="38.84499999999997px" id="aNUwPW0UJ" transform="translate(363.67 98.674)" width="40.66478788344784px"/><path d="M 22.095 3.531 L 26.556 16.909 L 40.658 17.018 L 29.313 25.395 L 33.567 38.841 L 22.095 30.64 L 10.622 38.841 L 14.876 25.395 L 3.531 17.018 L 17.633 16.909 L 22.095 3.531 M 22.095 0 C 20.576 0 19.226 0.972 18.745 2.414 L 15.082 13.398 L 3.504 13.488 C 1.985 13.499 0.643 14.482 0.173 15.928 C -0.297 17.374 0.212 18.957 1.433 19.86 L 10.747 26.738 L 7.255 37.777 C 6.797 39.226 7.317 40.806 8.546 41.699 C 9.165 42.148 9.893 42.373 10.622 42.373 C 11.341 42.373 12.061 42.153 12.676 41.714 L 22.096 34.981 L 31.516 41.714 C 32.131 42.152 32.85 42.373 33.569 42.373 C 34.297 42.373 35.026 42.148 35.645 41.699 C 36.874 40.805 37.394 39.226 36.936 37.777 L 33.444 26.738 L 42.758 19.86 C 43.981 18.957 44.488 17.374 44.018 15.928 C 43.548 14.482 42.207 13.499 40.687 13.488 L 29.109 13.398 L 25.446 2.414 C 24.964 0.972 23.614 0 22.095 0 Z" fill="rgb(245, 245, 245)" height="42.37299999999999px" id="a6u1Vdmyv" transform="translate(361.905 96.907)" width="44.191510438092266px"/><path d="M 31.803 38.845 C 31.441 38.845 31.084 38.732 30.777 38.517 L 20.33 31.043 L 9.881 38.517 C 9.575 38.732 9.213 38.845 8.855 38.845 C 8.493 38.845 8.127 38.732 7.817 38.508 C 7.205 38.06 6.942 37.267 7.17 36.543 L 11.045 24.301 L 0.718 16.672 C 0.106 16.215 -0.148 15.422 0.085 14.707 C 0.322 13.983 0.994 13.491 1.753 13.483 L 14.594 13.388 L 18.655 1.207 C 18.897 0.492 19.573 0 20.332 0 C 21.091 0 21.768 0.491 22.009 1.207 L 26.07 13.388 L 38.911 13.483 C 39.67 13.492 40.342 13.983 40.579 14.707 C 40.812 15.422 40.557 16.215 39.946 16.672 L 29.619 24.301 L 33.494 36.543 C 33.722 37.267 33.46 38.06 32.847 38.508 C 32.532 38.732 32.166 38.845 31.803 38.845 Z" fill="rgb(255, 75, 85)" height="38.84499999999997px" id="FlA4ZQrf5" transform="translate(425.464 142.811)" width="40.66478788344784px"/><path d="M 22.095 3.531 L 26.556 16.909 L 40.658 17.018 L 29.313 25.395 L 33.567 38.841 L 22.094 30.64 L 10.621 38.841 L 14.875 25.396 L 3.53 17.019 L 17.632 16.91 L 22.095 3.531 M 22.095 0 C 20.576 0 19.226 0.972 18.745 2.414 L 15.082 13.398 L 3.504 13.488 C 1.985 13.499 0.643 14.482 0.173 15.928 C -0.297 17.374 0.212 18.957 1.433 19.86 L 10.747 26.738 L 7.255 37.777 C 6.797 39.226 7.317 40.806 8.546 41.699 C 9.165 42.148 9.893 42.373 10.622 42.373 C 11.341 42.373 12.061 42.153 12.675 41.714 L 22.095 34.981 L 31.515 41.714 C 32.13 42.152 32.849 42.373 33.569 42.373 C 34.297 42.373 35.026 42.148 35.645 41.699 C 36.874 40.805 37.394 39.226 36.936 37.777 L 33.444 26.738 L 42.758 19.86 C 43.981 18.957 44.488 17.374 44.018 15.928 C 43.548 14.482 42.207 13.499 40.687 13.488 L 29.109 13.398 L 25.446 2.414 C 24.964 0.972 23.615 0 22.095 0 Z" fill="rgb(245, 245, 245)" height="42.37299999999996px" id="W5itgutsT" transform="translate(423.698 141.045)" width="44.19151043809232px"/><path d="M 31.803 38.845 C 31.441 38.845 31.084 38.732 30.777 38.517 L 20.33 31.043 L 9.881 38.517 C 9.575 38.732 9.213 38.845 8.855 38.845 C 8.493 38.845 8.127 38.732 7.817 38.508 C 7.205 38.06 6.942 37.267 7.17 36.543 L 11.045 24.301 L 0.718 16.672 C 0.106 16.215 -0.148 15.422 0.085 14.707 C 0.322 13.983 0.994 13.491 1.753 13.483 L 14.594 13.388 L 18.655 1.207 C 18.897 0.492 19.573 0 20.332 0 C 21.091 0 21.768 0.491 22.009 1.207 L 26.07 13.388 L 38.911 13.483 C 39.67 13.492 40.342 13.983 40.579 14.707 C 40.812 15.422 40.557 16.215 39.946 16.672 L 29.619 24.301 L 33.494 36.543 C 33.722 37.267 33.46 38.06 32.847 38.508 C 32.532 38.733 32.166 38.845 31.803 38.845 Z" fill="rgb(255, 75, 85)" height="38.84500000000003px" id="ZR0QmOJss" transform="translate(301.878 160.466)" width="40.6647878834479px"/><path d="M 22.095 3.531 L 26.556 16.909 L 40.658 17.018 L 29.313 25.395 L 33.567 38.841 L 22.094 30.64 L 10.621 38.841 L 14.875 25.395 L 3.53 17.018 L 17.632 16.909 L 22.095 3.531 M 22.095 0 C 20.576 0 19.226 0.972 18.745 2.414 L 15.082 13.398 L 3.504 13.488 C 1.985 13.499 0.643 14.482 0.173 15.928 C -0.297 17.374 0.212 18.957 1.433 19.86 L 10.747 26.738 L 7.255 37.777 C 6.797 39.226 7.317 40.806 8.546 41.699 C 9.165 42.148 9.893 42.373 10.622 42.373 C 11.341 42.373 12.061 42.153 12.675 41.714 L 22.095 34.981 L 31.515 41.714 C 32.13 42.152 32.849 42.373 33.568 42.373 C 34.296 42.373 35.025 42.148 35.644 41.699 C 36.873 40.805 37.393 39.226 36.935 37.777 L 33.443 26.738 L 42.757 19.86 C 43.98 18.957 44.487 17.374 44.017 15.928 C 43.547 14.482 42.206 13.499 40.686 13.488 L 29.108 13.398 L 25.445 2.414 C 24.964 0.972 23.614 0 22.095 0 Z" fill="rgb(245, 245, 245)" height="42.372999999999934px" id="vDCsZAdom" transform="translate(300.112 158.7)" width="44.19051043809229px"/></g></svg>)
仅在玩家游玩时付费:经济实惠的多人游戏基础设施
Meltdown Interactive
Edgegap 如何帮助独立开发商 Meltdown Interactive Media 在无需复杂方案的情况下,以高性价比解决扩缩容和匹配问题,从而让他们能够专注于游戏开发。
Case Study

同一个 Edgegap 平台,三种截然不同的网络配置
Warped Games
了解 Warped Games 如何在同一个 Edgegap 部署 API 和同一个容器管线上运行社交中心、实时合作以及回合制合作。
Case Study
" width="512.001px"><path d="M 512 111.817 L 0 111.817 L 0 8.828 C 0 3.953 3.953 0 8.828 0 L 503.173 0 C 508.048 0 512.001 3.953 512.001 8.828 L 512 111.817 Z" fill="rgb(255, 75, 85)" height="111.81700000000001px" id="vQYTMiGey" transform="translate(0 0)" width="512.001px"/><path d="M 503.172 111.816 L 8.828 111.816 C 3.953 111.816 0 107.863 0 102.988 L 0 0 L 512 0 L 512 102.988 C 512 107.864 508.047 111.816 503.172 111.816 Z" fill="rgb(70, 70, 85)" height="111.81600000000003px" id="DALciVNY9" transform="translate(0 223.633)" width="512px"/><path d="M 0 111.81 L 0 0 L 512 0 L 512 111.81 Z" fill="rgb(245, 245, 245)" height="111.80999999999997px" id="MWcFh48hf" transform="translate(0 111.815)" width="512px"/><path d="M 56.373 26.707 C 56.373 22.33 52.084 19.238 47.932 20.623 L 40.128 23.224 L 38.233 11.78 C 37.1 4.954 31.25 0 24.327 0 L 17.028 0 L 9.394 9.396 L 19.503 9.396 L 16.674 23.368 L 8.441 20.624 C 4.288 19.239 0 22.331 0 26.708 L 0 74.183 L 11.363 62.82 L 6.009 78.881 L 0.001 78.881 L 0.001 88.277 L 56.374 88.277 L 56.374 78.881 L 50.366 78.881 L 45.012 62.82 L 56.375 74.183 L 56.375 26.707 Z M 23.49 78.879 L 15.916 78.879 L 21.124 64.97 L 23.49 67.991 L 23.49 78.879 Z M 32.884 78.879 L 32.884 67.991 L 35.25 64.97 L 40.458 78.879 Z M 28.187 61.85 C 28.187 61.85 13.653 52.014 14.241 33.664 C 14.241 33.664 23.197 32.196 28.187 24.268 C 33.178 32.195 42.134 33.664 42.134 33.664 C 42.721 52.015 28.187 61.85 28.187 61.85 Z" fill="rgb(240, 199, 39)" height="88.27700000000002px" id="TGF8Mq4HK" transform="translate(227.813 123.588)" width="56.375px"/></g></svg>)
台球大师巡回赛Max
RETA Games
Case Study

韩国的Web3 POP提取射击游戏走向全球,即刻启程
NDUS Entertainment
XOCIETY 如何轻松地添加 Edgegap 编排并集成自定义 matchmaking,与 Edgegap Ping Beacons 一起优化延迟。
Case Study

Multiplayer in Every Dimension
Arcadia.tv
Discover how Arcadia.tv uses Edgegap's edge network to deliver an innovative, team and location-based athletic VR sport.
Case Study

F2P 移动格斗游戏利用即时(Just-In-Time)服务器降低基础设施成本
Game Changers Worldwide
Game Changer Worldwide 如何在全球移动端托管 Rumble Rush 的实时 3v3 PvP 游戏。
Case Study
他们选择 Edgegap 的关键原因
了解 Edgegap 自动化游戏服务器编排如何带来无缝的多人游戏体验。